.png)
This lets Mavvrik group and filter your costs by whatever labels you're already using — team, environment, project, and so on.
-
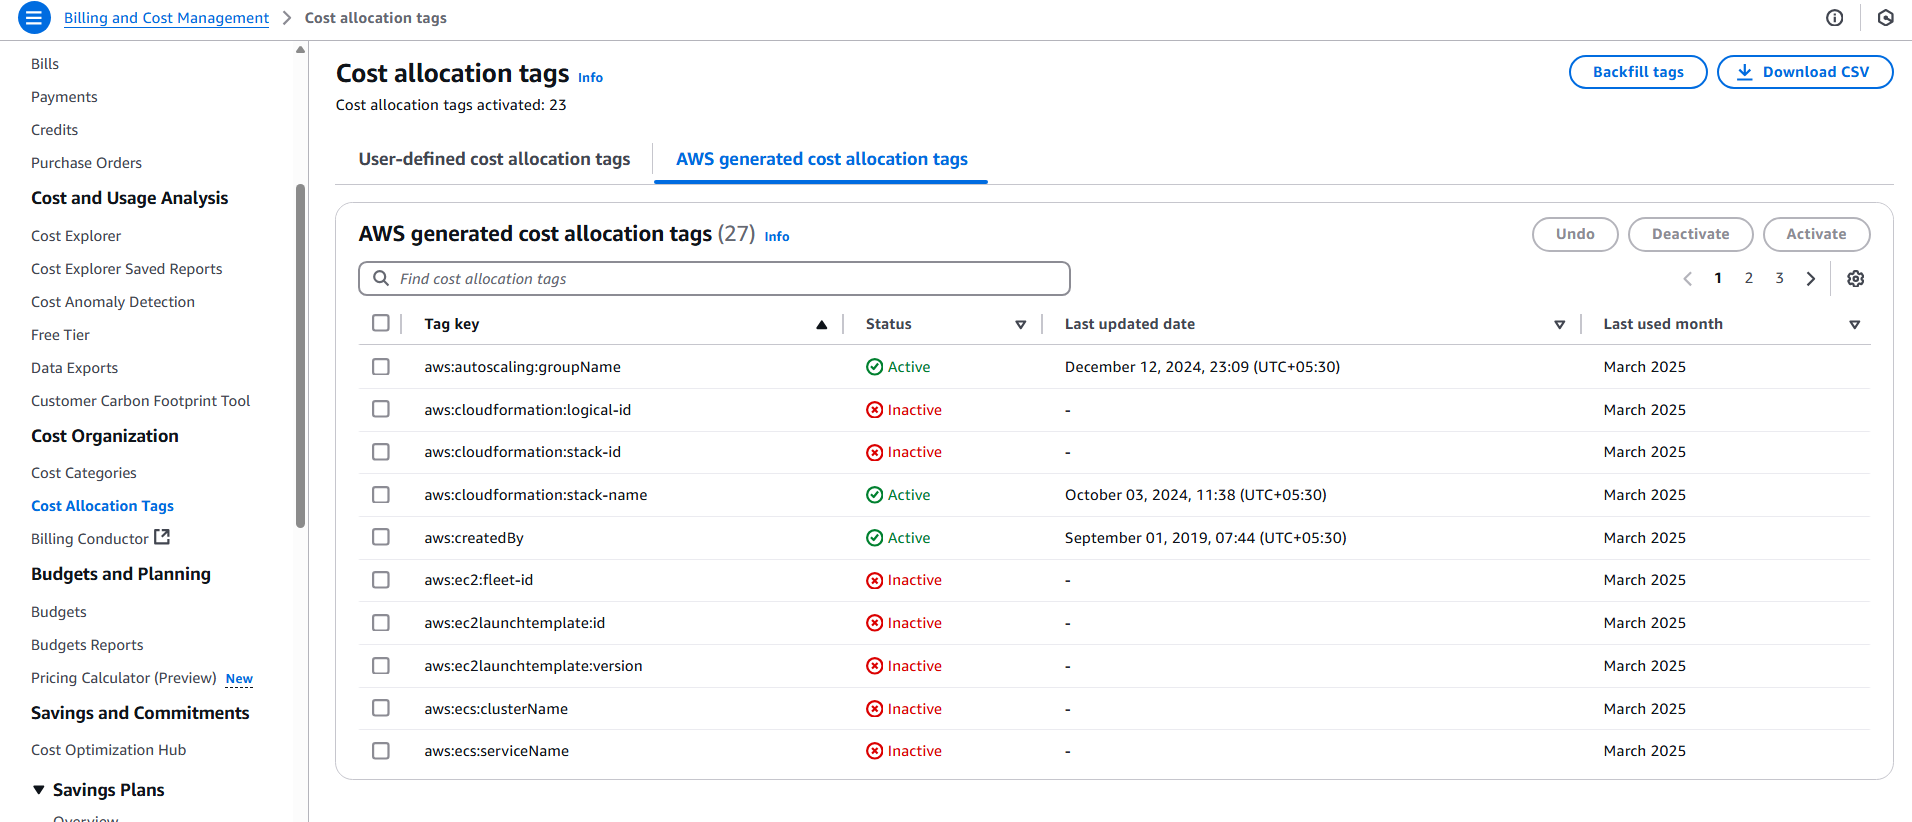
Navigate to Billing and Cost Management under your profile.
-
Click on Cost Allocation Tags.
-
Click on AWS-generated cost allocation tags.
-
Select the tags you want to use as dimensions for grouping and filtering cost data, and click Activate to activate them.
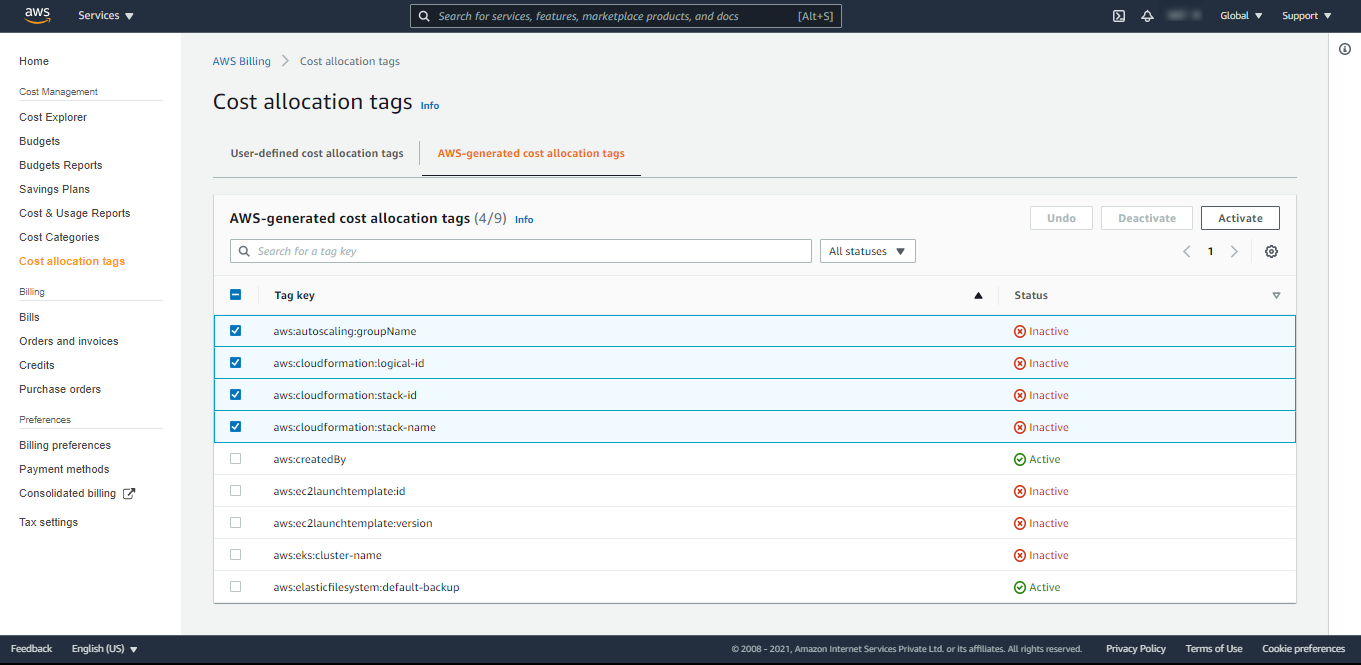
Not seeing your tags in cost data?
AWS doesn't include every tag in billing by default — only tags marked Active under cost allocation settings get reported. If nothing is showing up, this is almost always why.
To fix it, enable the tags you need using AWS's guides:
Once enabled, tags typically start appearing in AWS's reports within 24 hours, and will then show up on the Mavvrik dashboard.
This doesn't apply retroactively. For historical data, you'll need to request a backfill using AWS's cost allocation tag backfill process — this can also take up to 24 hours.
← Step 1: Enable CUR & Cost Explorer | Step 3: Create Role / IAM User →