.png)
Virtual Tags are custom tags created within the platform to help you organize, filter, and report on cloud resources—even if those resources don't have native tags applied. They provide flexibility in how you assign metadata to resources, helping improve visibility, cost attribution, and governance.
Why this matters: real-world tagging is rarely clean — some resources were never tagged in the first place, and the ones that were often use inconsistent keys and values (`Env`, `ENV`, `Environment`) depending on who created them. Fixing that at the source across every cloud account is a much bigger project than most teams can take on. Virtual Tags let you standardize or backfill tagging inside Mavvrik itself, so cost allocation and reporting work correctly without needing a company-wide tagging cleanup first.
This shows up differently depending on your role:
-
FinOps managers use Rule-Based tags to retroactively standardize years of inconsistent tagging across the whole environment, without waiting on engineering to re-tag every resource at the source.
-
Engineering leads use Standard tags to backfill attribution on resources they can't or don't want to modify directly — third-party-managed resources, or ones where changing real tags risks breaking automation that depends on them.
You can create two types of Virtual Tags:
-
Standard – Manually assign a specific tag key and value to a defined set of resources.
-
Rule-Based – Automatically generate or standardize tags based on defined logic, conditions, or patterns.
Virtual Tags do not modify the actual resource tags in your cloud provider. Instead, they live within the platform and are applied virtually to support better analytics and reporting..
Steps to create a Virtual Tags
-
Login to Mavvrik
-
Click on Menu
-
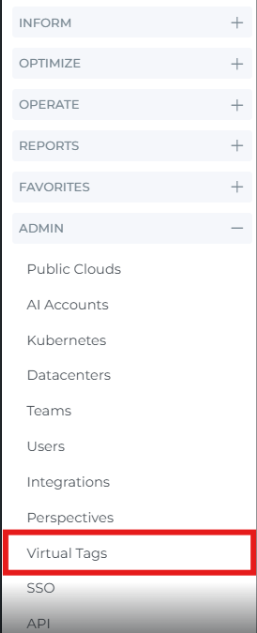
Navigate to the Admin section on the sidebar and select "Virtual Tags."
The Virtual Tags list
This is the page you land on. At the top, a standard / rule-based toggle switches which set of Virtual Tags is listed below — Standard and Rule-Based tags are shown in two separate lists, not one combined table.
The list table's columns are:
-
Name: for Standard tags, this is shown as
key:value(e.g.cloud:june); for Rule-Based tags, it's the tag's own Name (e.g.Test Rule 3). -
Description
-
Source: the Data Source the tag applies to — e.g. Cloud, AI Assist, Gen AI, Datadog, MongoDB, Databricks, or a customer-configured custom provider integration.
-
Scope: a summary of the tag's filter conditions (e.g.
Provider IN "aws, azure"). -
Start / End: the tag's active-period months, if set.
-
Created (Standard list) or Rule Type (Rule-Based list, shown instead of Created).
-
Action: Clone, Edit, and Delete icons for each tag.
Tip: clicking a tag's Name in the list takes you directly to the page that tag applies to (Cost, AI Cost, AI Assist, SaaS Cost, etc.) with that Virtual Tag already applied as a filter — a quick way to jump straight to what a tag is filtering without setting up the filter yourself.
Alongside the "+ Virtual Tag" button, the page header also has Info, Reload, and Help icons.
Creating a Standard Virtual Tag
Standard Virtual Tags allow you to manually assign a specific tag key and value to selected resources for a defined time period. Follow the steps below to create one:
1. Navigate to Create Virtual Tag
Open the Virtual Tag creation panel. You'll see two tabs at the top: Setup and Scope.
2. Select Tag Type
In the Setup tab:
-
From the Type dropdown, select Standard.
-
Enter the desired Key and Value for your tag.
-
Example: Key =
Environment, Value =QA
-
-
Optionally, add a Description to explain the purpose of the tag.
-
Define the Start Month and End Month to set the active period for this tag.
Click Next to proceed.
3. Define Tag Scope
In the Scope tab:
-
Choose the Data Source (e.g., Cloud, AI, K8s, VMware, SaaS).
-
Select filter options such as:
-
Provider (e.g., AWS, Azure, GCP)
-
Billing Account
-
Usage Account
-
Resource Group
-
Category
-
Location
-
Service Category
-
Service
-
SKU
-
Cost Type
-
Billing Entity
-
Instance Type
-
Cluster
-
Host
-
Namespace
-
Tag (Key/Value)
-
-
You can use Basic or Advanced filters based on your tagging needs.
-
Optional: Enable Dynamic Filter for more flexible targeting.
4. Create the Tag
Once all fields are filled out:
-
Click Create to save your Virtual Tag
-
The tag will be applied to all matching resources within the selected scope and date range.
-
New Virtual Tag is created and displayed as shown below.
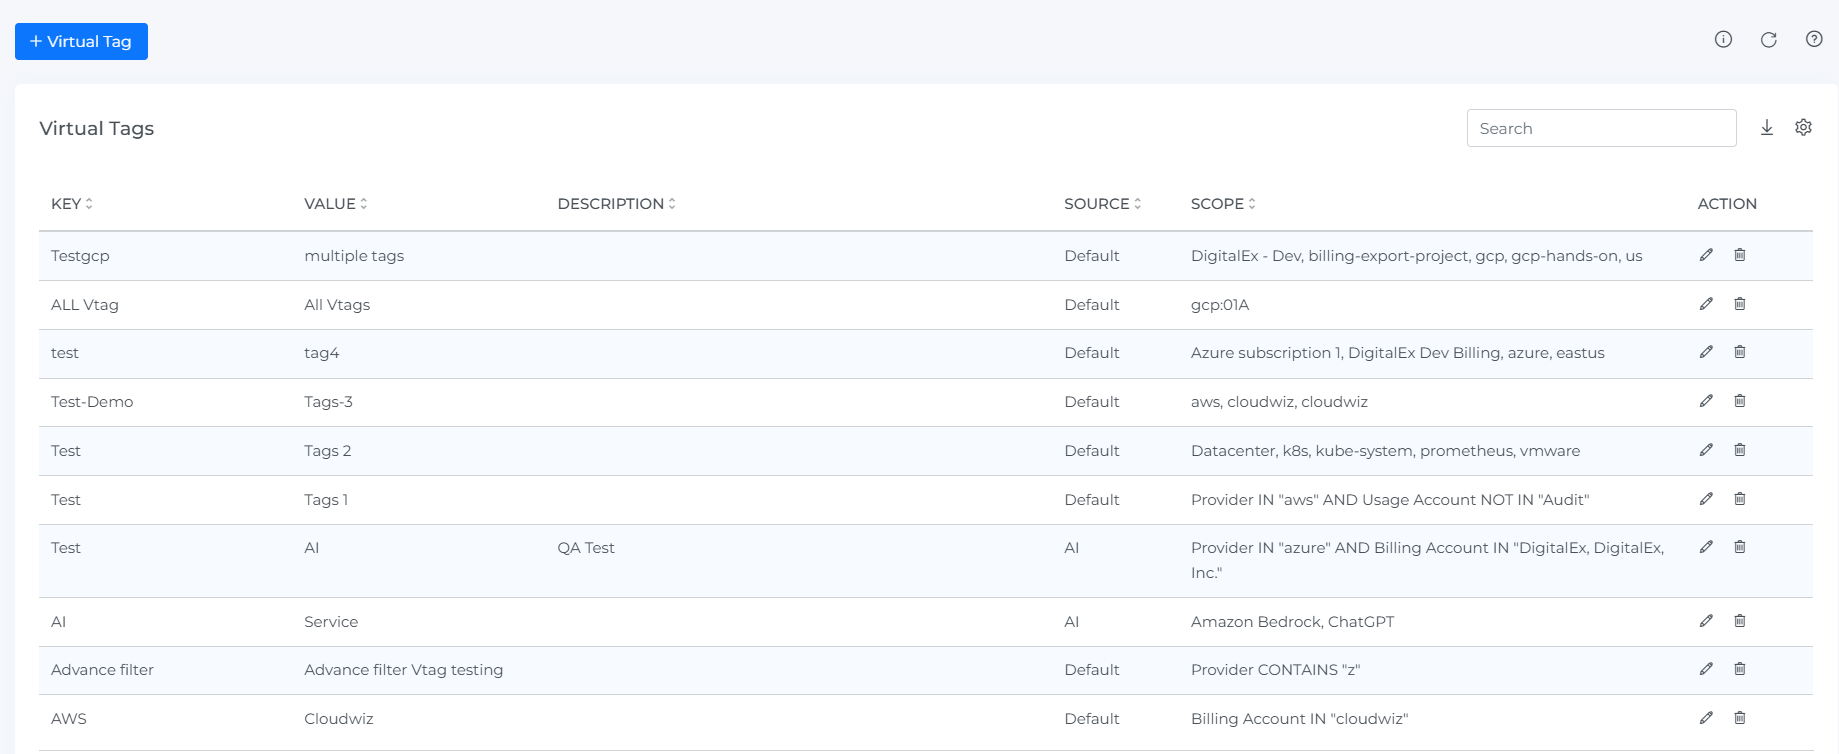
After creating the Virtual Tags, click on "Run Ingestion" and wait for the process to complete. Once done, perform a hard refresh on the page.

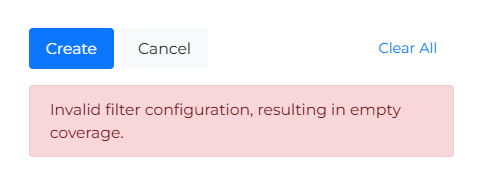
If you configure invalid tag parameters using basic and advanced filters error message is displayed.
Creating a Rule-Based Virtual Tag
Rule-Based Virtual Tags allow you to automatically generate, clean up, or standardize tags using smart logic such as tag key/value mappings or RegEx patterns. This reduces manual effort and improves tag consistency across your cloud environment.
You can use Rule-Based Virtual Tags to:
-
Standardize inconsistent tag keys and/or values
-
Create dynamic tags based on resource attributes using RegEx
-
Apply complex tagging logic that adapts to your environment
1. Navigate to Create Virtual Tag
Open the Virtual Tag creation panel. Selecting Type = Rule Based (see next step) adds a third tab, so you'll see: Setup, Scope, and Rule.
2. Select Tag Type
In the Setup tab:
-
From the Type dropdown, choose Rule Based — this is what makes the Rule tab appear alongside Setup and Scope.
-
Enter a Name for the rule — this is required, and it's what identifies the tag in the Virtual Tags list (e.g. "Test Rule 3").
-
Enter an optional Description for your tag
-
Set the Start Month and End Month to define the active period of the rule
-
Click Next to proceed
3. Define Tag Scope
In the Scope tab:
-
Choose the Data Source relevant to your tag (e.g., Cloud, AI Assist, Gen AI, Datadog, MongoDB, Databricks, K8s, VMware, or a customer-configured custom provider integration)
-
Use Basic or Advanced filters to define the resources this rule applies to
-
Filter options include:
• Provider
• Billing Account
• Usage Account
• Resource Group
• Category
• Location
• Service Category
• Service
• SKU
• Cost Type
• Billing Entity
• Instance Type
• Cluster
• Host
• Namespace
• Tag (Key/Value) -
(Optional) Enable Dynamic Filter for attribute-based matching
-
Click Next to continue
4. Choose a Rule Type
In the Rule tab, select the logic that fits your tagging needs.
Standardize Tag Keys Only
-
Use when you have inconsistent tag keys like
Env,ENV, orEnvironment, and you just want them unified under one key.
Fields:
-
Tag Keys ( to be standardized ) — the list of existing tag keys to match (e.g.
Env,ENV,Environment) -
Tag Key ( after being standardized ) — the single key they all get renamed to (e.g.
ENVIRONMENT)
Only resources that already carry a real tag with one of the listed keys are affected. The tag's key is renamed; its value is left completely unchanged.
Example: all of Env, ENV, Environment are renamed to ENVIRONMENT, while their values (e.g. prod, dev) stay exactly as they were.
Standardize Tag Values Only
-
Use when tag keys are already consistent but the values under that key vary.
Fields:
-
Tag Keys — which existing tag key(s) this rule applies to (e.g.
Environment) -
Click + Tag Value to add one or more mapping rows, each with its own Tag Values ( to be standardized ) (a list, e.g.
prod-root,prod-tenant) → Tag Value ( after being standardized ) (one value, e.g.prod)
You can define several separate value mappings in a single rule this way. Only tags whose key is in the list above and whose value matches one of your mapping rows get changed — any value that isn't covered by a mapping rule is left exactly as it was, not blanked out.
Example: values like prod-root, prod-tenant are standardized to prod, while the original key (Environment) stays the same.
Standardize Tag Keys & Values
-
Use when both tag keys and values are inconsistent and need fixing together.
Fields: combines both of the above — Tag Keys → Tag Key ( after ) renames the key, plus one or more + Tag Value mapping rows standardize the value at the same time.
Example: env or Env → Environment, and qa-root, qa-tenant → QA, all in one rule.
Dynamic Virtual Tags
-
Use when you want to extract a tag value from a resource's raw attributes using RegEx, rather than matching an existing real tag at all.
Fields:
-
Tag Value Source — the raw resource attribute to read from (Provider, Billing Account, Usage Account, Resource Group, Category, Location, Service Category, Service, SKU, Cost Type, Billing Entity, Instance Type, Cluster, Host, Namespace)
-
Tag Value Regex — a regex applied to that attribute's raw value; the tag's value is whatever this regex extracts
-
Tag Key is a fixed name you type once, unless you check Regex next to it — checking it swaps the field for its own Tag Key Source + Tag Key Regex pair, so the key itself is derived dynamically too, exactly like the value.
Example: from usage_type:BoxUsage:t4g.medium, extract t4g.medium as the tag value for the fixed key instance_type.
How the regex extraction actually works:
-
Your pattern may contain at most one capturing group
( ... ). If it has one, only the text matched by that group becomes the tag's value (or key); if it has none, the entire matched substring is used instead. -
If the pattern doesn't match a given resource's attribute value at all, no tag is created for that resource — it isn't left blank or defaulted to anything.
-
Your regex is validated the moment you click Create — an invalid pattern is rejected immediately rather than failing silently later during ingestion.
Worked example: with Tag Value Source = Resource Group and Tag Value Regex = ^rg-(dev|qa|prod)-.*, a resource group named rg-dev-app1 produces the tag value dev — only the parenthesized part is kept, not the whole matched string.
List of fields customers can use in dynamic virtual tags:
-
Provider
-
Billing Account
-
Usage Account
-
Resource Group
-
Category
-
Location
-
Service Category
-
Service
-
SKU
-
Cost Type
-
Billing Entity
-
Instance Type
-
Cluster
-
Host
-
Namespace
5. Finalize and Create
Once your rule is fully configured:
-
Click Create to save and apply the rule
-
The system will evaluate all matching resources and apply the virtual tag based on the logic and scope you defined
Steps to Edit Virtual Tags
-
Click on Menu
-
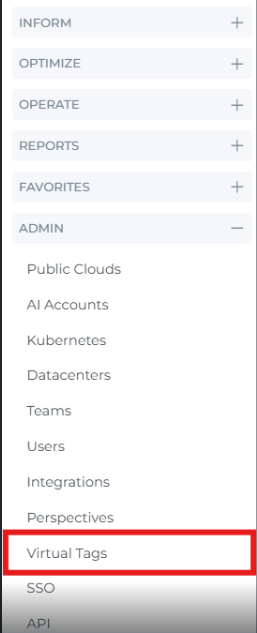
Navigate to the Admin section on the sidebar and select "Virtual Tags."
-
Click on Edit icon
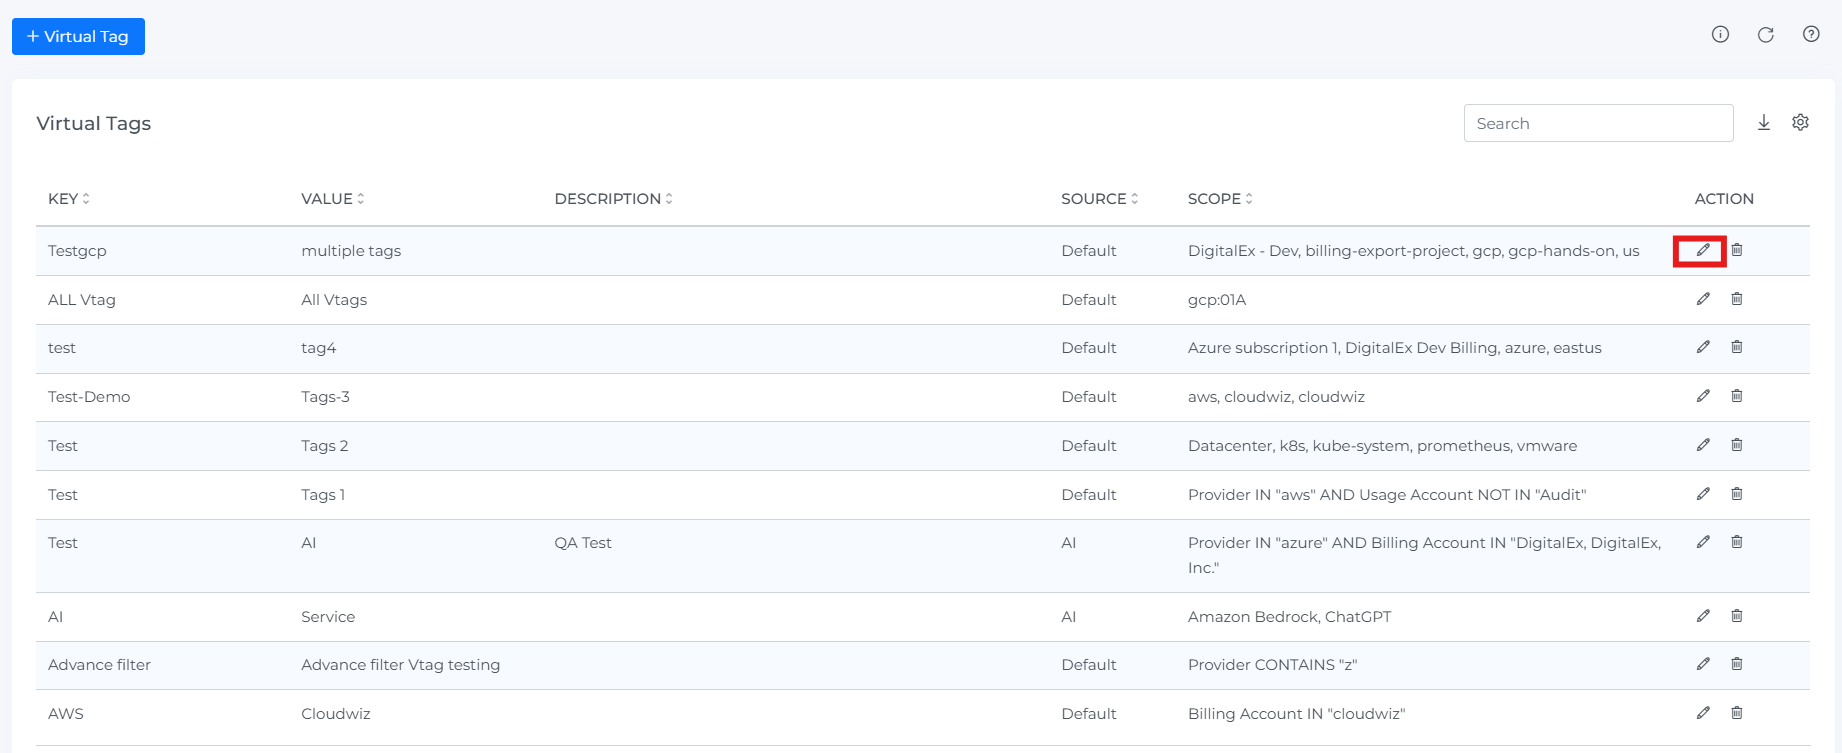
-
Make the changes as per requirement
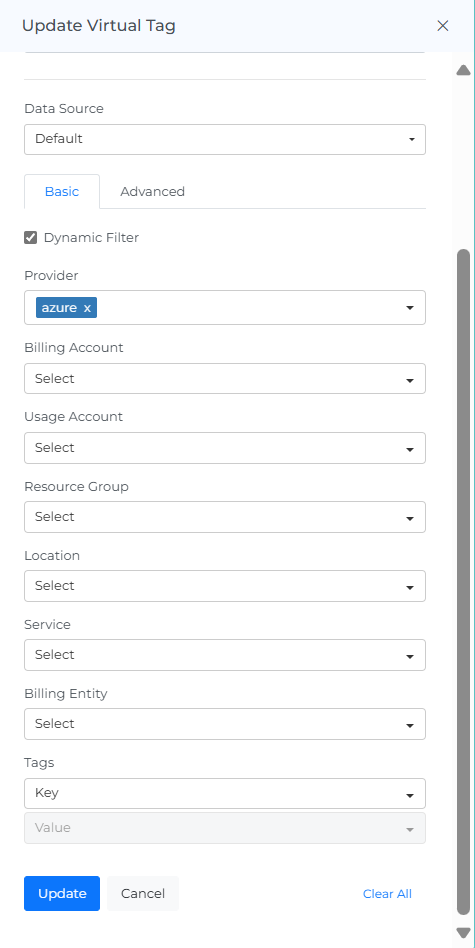
-
Click on Update button.
Steps to Delete Virtual Tags
-
Click on Menu
-
Navigate to the Admin section on the sidebar and select "Virtual Tags."
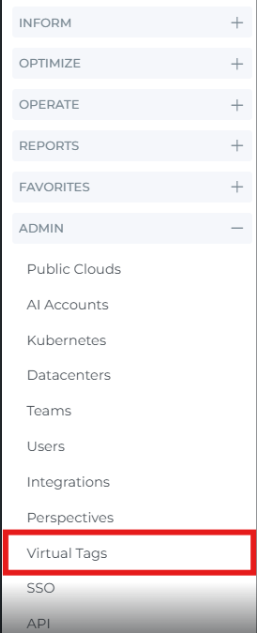
-
Click on Delete icon
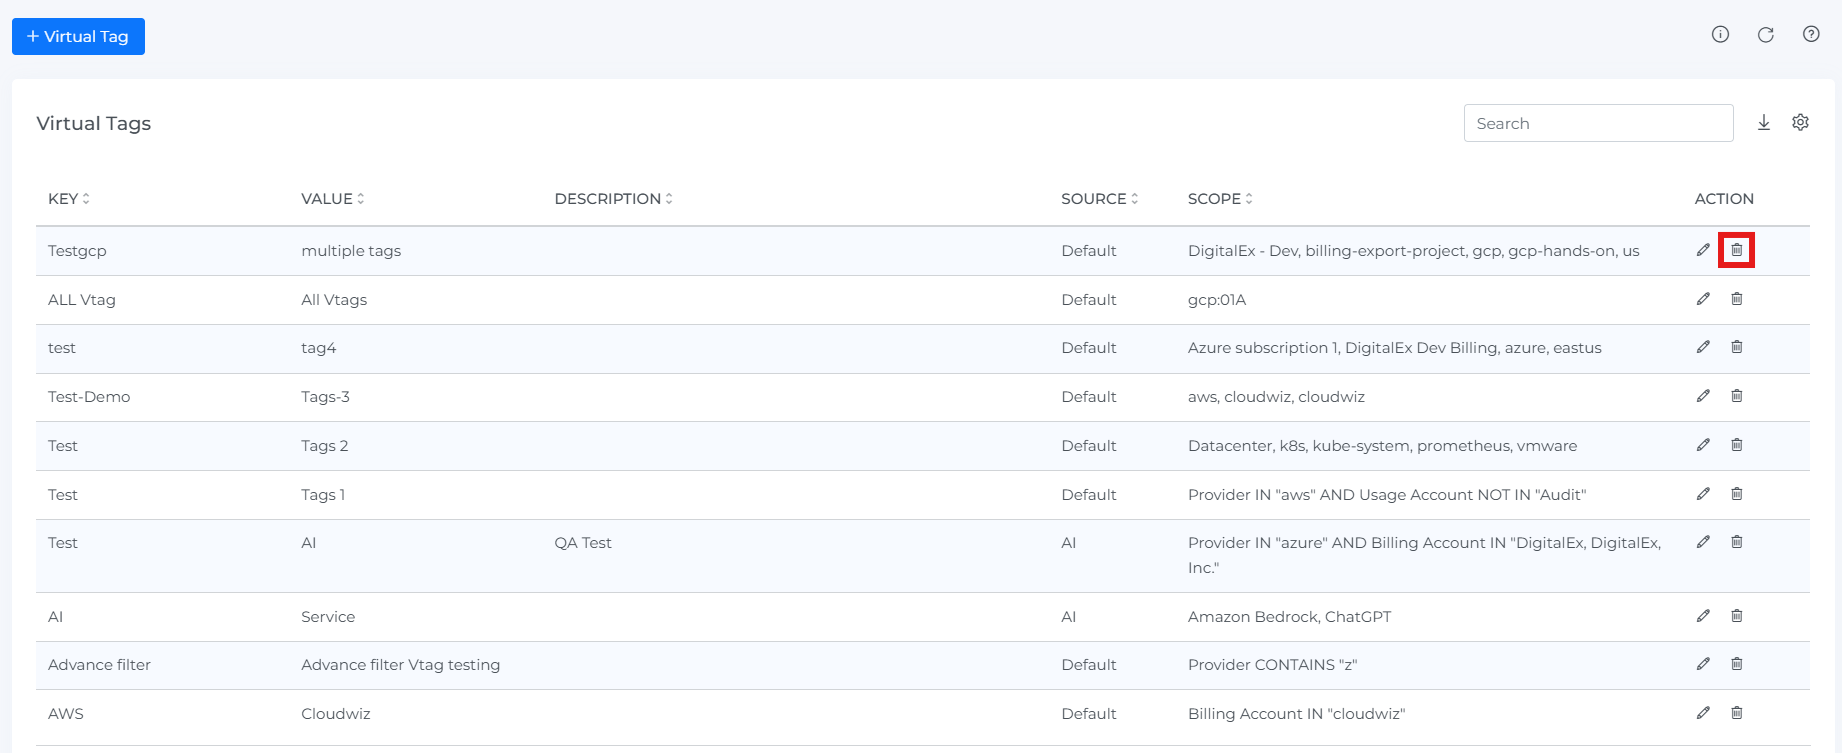
-
Click on Delete button
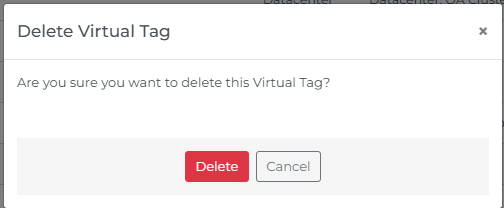
Steps to use Virtual Tags
-
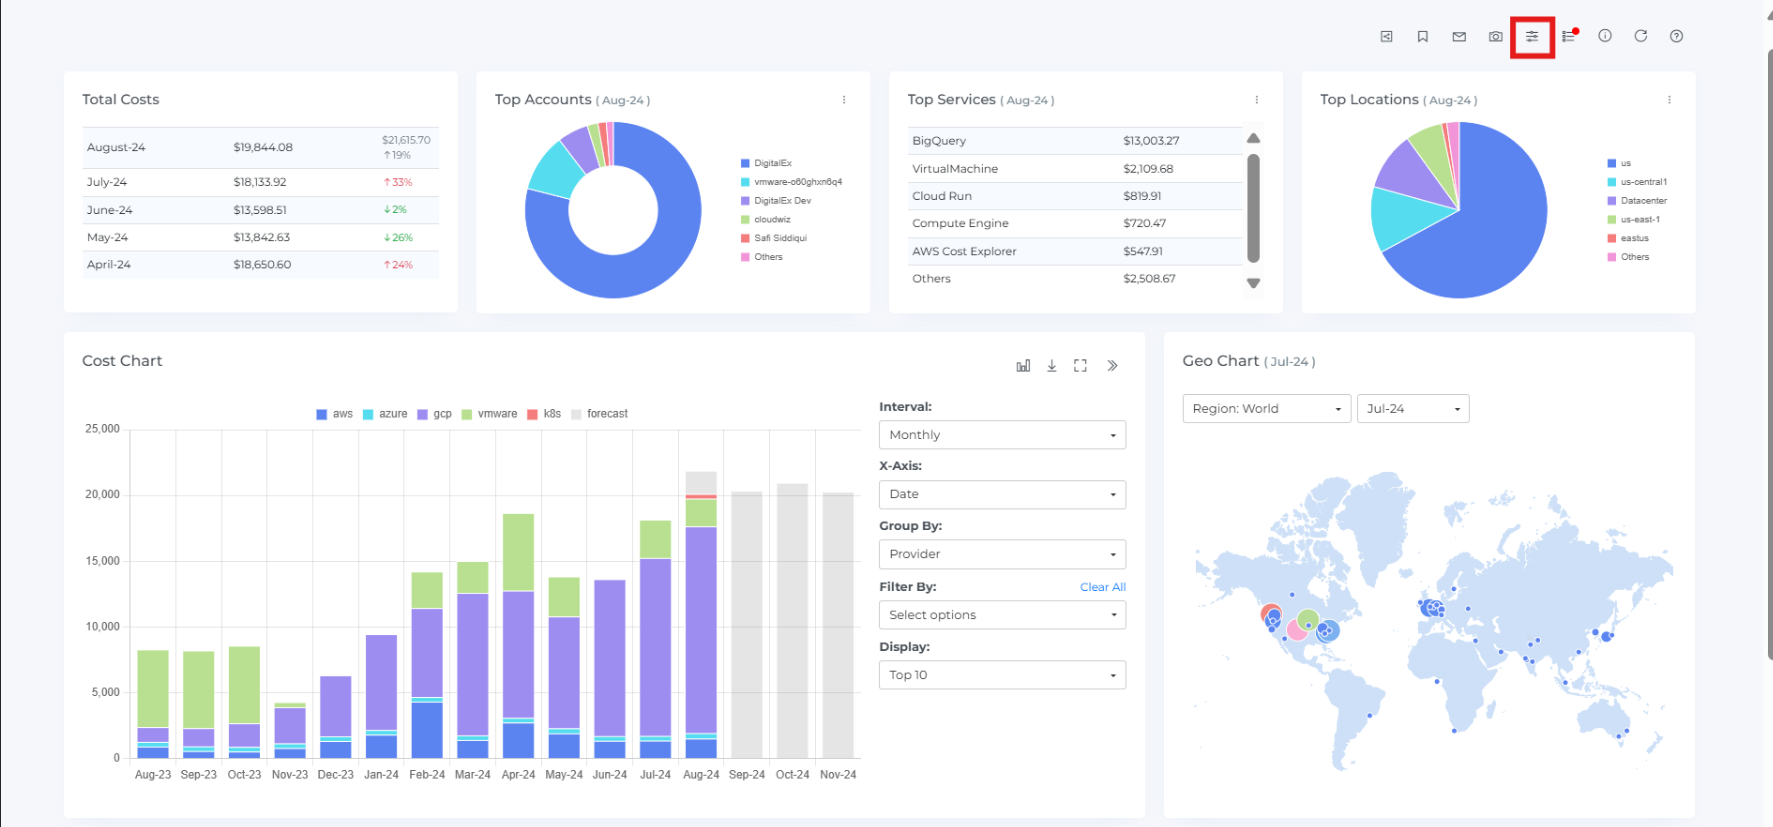
Click on Menu
-
Navigate to the Inform section on the sidebar and select "Cost"
-
Click on Filters
-
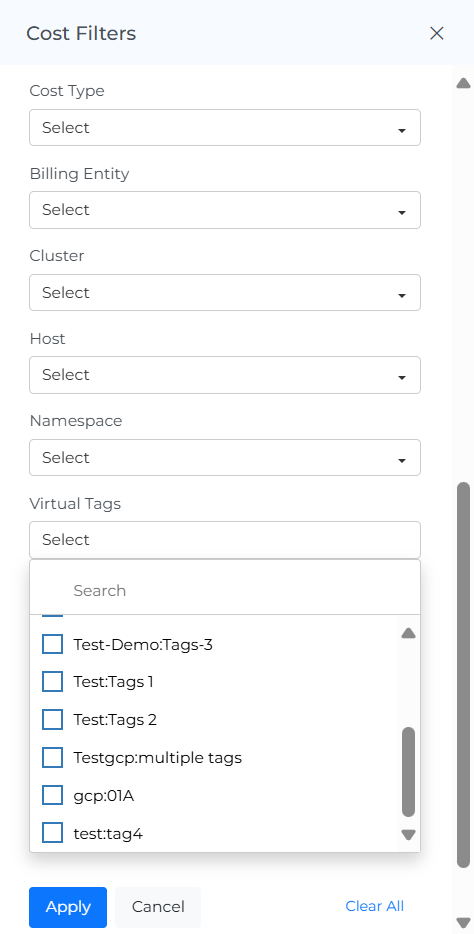
Scroll down to bottom of cost filters
-
Click on Virtual Tags option and select required Virtual Tags
-
Click on Apply.
Pages where Virtual Tags are available: Cost, AI Cost, Resources, Cost Variance, K8's Cost, Datacenter Cost, Coverage
Tip: you don't have to build this filter by hand every time — from the Virtual Tags list page, clicking a tag's Name jumps straight to the relevant page with that tag already applied as a filter.
Clone Virtual Tags
Clone an existing virtual tag to quickly create a new one with the same setup already in place.
This is useful when you need a similar view for another team, business unit, environment, or customer use case.
Instead of rebuilding filters and structure from scratch, you can start with a copied version and make only the needed changes.
The cloned virtual tag is independent, so updates to it do not affect the original.
-
Click on Menu
-
Navigate to the Admin section on the sidebar and select "Virtual Tags."
-
Click on Clone icon (You can see same filtered options selected)

-
Edit the required filters and create
-
Click Next -> Create
Troubleshooting
-
If a new or edited Virtual Tag isn't showing up on cost data, run Ingestion and then hard refresh the page — the tag doesn't apply retroactively until ingestion completes.
-
If you get an error when creating a tag, check the Basic/Advanced filter configuration in the Scope tab — an invalid filter combination will block creation with an error message rather than silently failing.
-
If a Virtual Tag doesn't appear as a filter option on a page, confirm that page is one of the ones Virtual Tags actually supports (Cost, AI Cost, Resources, Cost Variance, K8s Cost, Datacenter Cost, Coverage) — it won't appear anywhere else.
-
If a Dynamic Virtual Tag isn't producing a tag on a resource you expected, check whether your regex actually matches that resource's raw attribute value — a non-matching pattern silently skips the resource rather than erroring, so a Dynamic Virtual Tag can look "empty" without any error shown.
FAQs
Does creating a Virtual Tag change the actual tags on my cloud resources?
No. Virtual Tags never modify anything in your cloud provider — they exist entirely within Mavvrik and are applied virtually, purely to support cost allocation, filtering, and reporting inside the platform.
Which pages can I actually use Virtual Tags on?
Cost, AI Cost, Resources, Cost Variance, K8s Cost, Datacenter Cost, and Coverage. If you've created a tag but don't see it as a filter option somewhere else, that page likely isn't one of these.
Why do I only see two tabs (Setup, Scope) when creating a tag, but the docs mention a Rule tab?
The Rule tab only appears for Rule-Based tags. Set Type = Rule Based in the Setup tab first — Standard tags never show a Rule tab, since they don't need one.
I clicked a tag's Name in the Virtual Tags list and it took me to another page — is that expected?
Yes. Name is a direct link to the page that tag applies to, with the tag already applied as a filter — a shortcut so you don't have to rebuild the filter yourself on the Cost, AI Cost, or other supported page.
My Dynamic Virtual Tag regex has more than one capture group — why did it fail?
A Tag Value Regex or Tag Key Regex can contain at most one capturing group ( ... ). If you need to combine multiple pieces of a value, use non-capturing groups (?: ... ) for everything except the one piece you actually want extracted.
Can I standardize more than one set of values under the same tag key in one rule?
Yes — on Standardize Tag Values Only (and Standardize Tag Keys & Values), click "+ Tag Value" to add additional value-mapping rows. Each row maps its own list of source values to one standardized value; a value not covered by any row is left unchanged.