.png)
Definition:
-
Partner is a Mavvrik’s partner with capability to onboard and manage their own customers.
-
Customer is a customer created and managed by partner that will onboard the cloud accounts in Mavvrik.
Partner activation:
-
Check your inbox for account activation email sent from Mavvrik.
-
Follow the instructions provided in the email to activate account and setup initial password.
Partner Setup
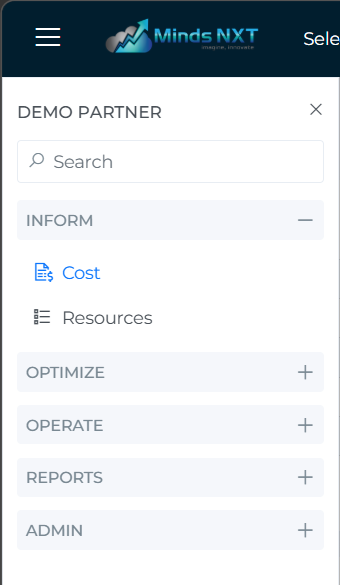
Click on Menu bar located at the top left corner of the page.
-
Inform: View insights such as Cost and Resources.
-
Optimize: Manage optimization features including Savings, Cost Anomalies, and Commitments (Coverage, Reserved Instances, and Savings Plans).
-
Operate: Monitor and manage operational areas like Alerts, Budgets, Backlogs, Compliance, and Security.
-
Reports: Access and generate various reports for analysis.
-
Admin: Configure administrative settings such as Users, Perspectives, SSO, and API.
Settings
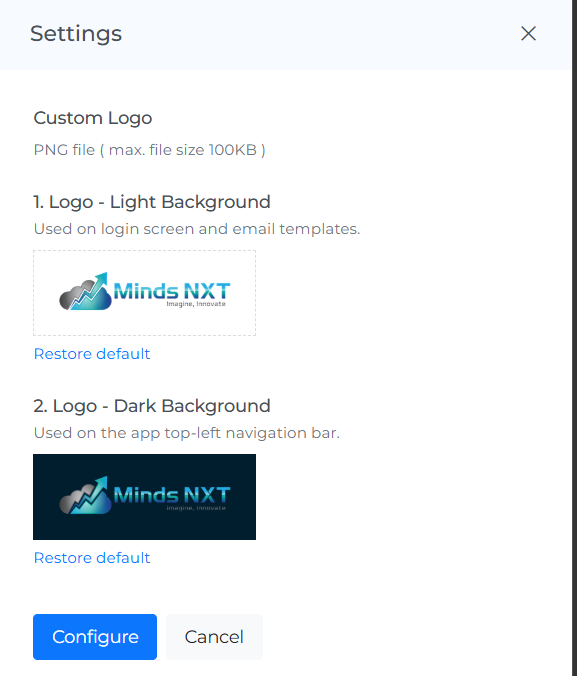
Follow the steps below to upload the logo and configure partner rate:
-
Click on the Settings icon
-
Click on Choose file and pick the logo you want to use.
-
Click on Configure button.
-
Click on Run Data Ingestion
Onboard a New Customer
Follow the steps below to onboard a new customer:
-
Login to Mavvrik.
-
Click on Menu bar
-
Click on Tenants option
-
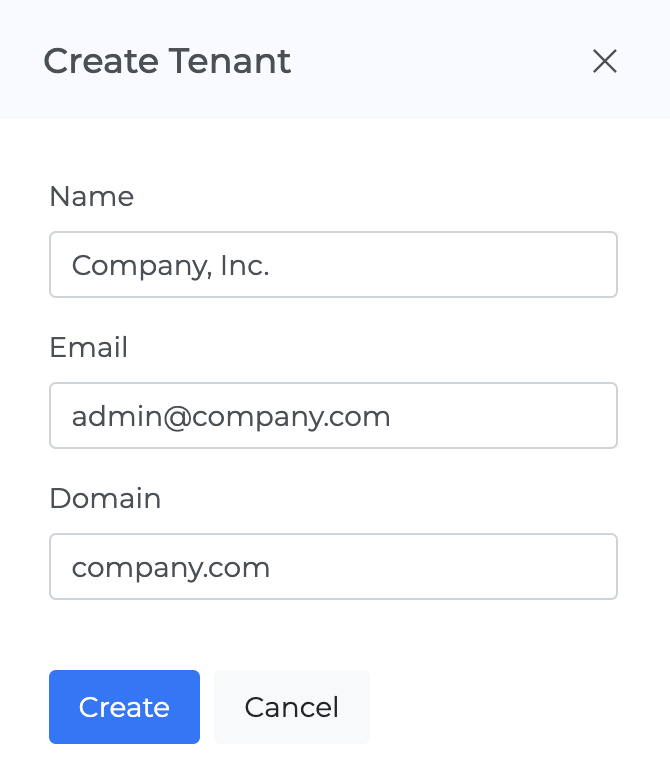
Click on + Tenant
-
Name - Customer’s company name (e.g. Company, Inc.).
-
Email - Customer’s email address (e.g. admin@company.com).
-
Domain - Customer’s domain name (e.g. company.com).
-
Click on Create button
-
Activation email will be sent to the customer at the email address provided in the step no. 2 above.
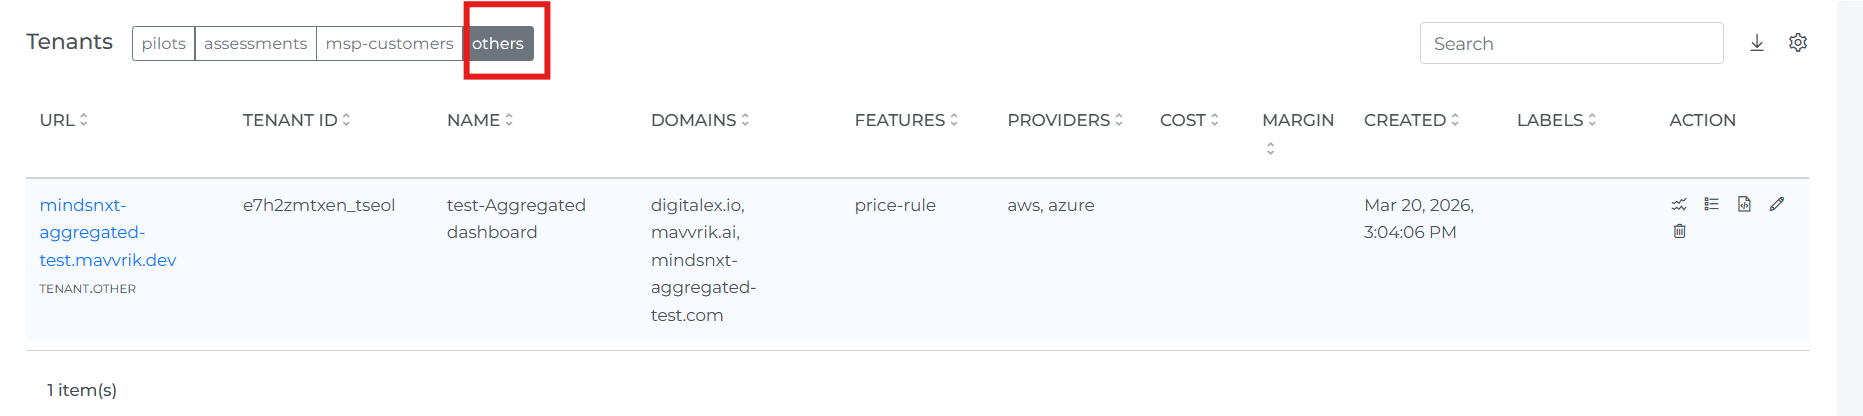
Labels and grouping of child tenants
Follow the steps below to group a tenant under a category label:
-
Log in to Mavvrik.
-
Click on the Menu bar.
-
Select the Tenants option.
-
Click the Edit button for the tenant you want to group.

-
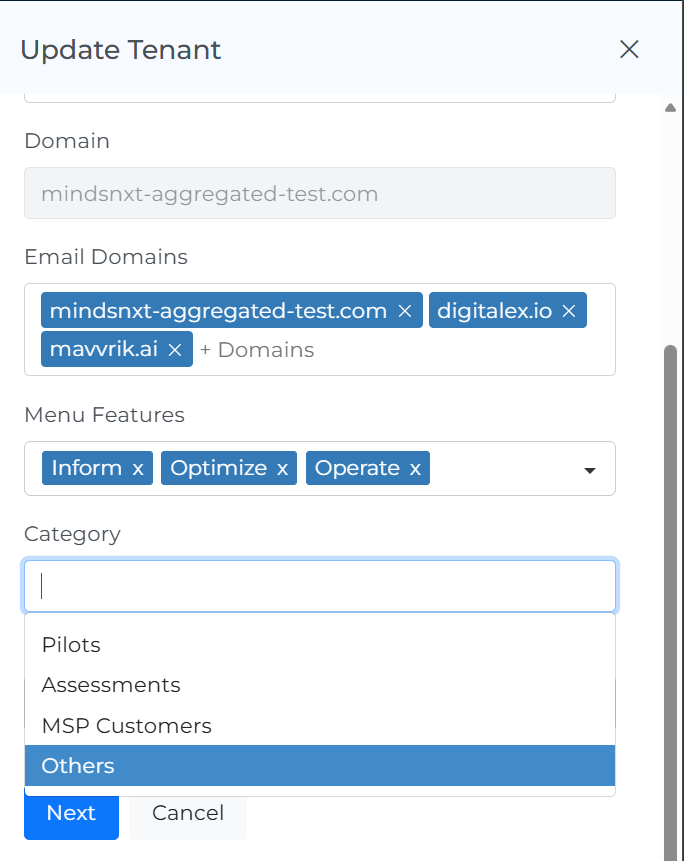
Navigate to the Category section and select the desired category.
-
Click Next → Next → Update to save the changes.
-
After updating, the selected tenant will be moved to the chosen category label (e.g., Others).
Child tenant white labeling
Steps for child White Labeling
-
Log in to Mavvrik.
-
Click on the Menu bar.
-
Select the Tenants option.
-
Locate the Child Tenant you want to configure.
-
Click the Edit button for that tenant
-
The Update Tenant window will open.

-
Click on the Logo tab.
-
Under Custom Logo, upload the required logos:
-
Logo – Light Background
-
Used on login screen and email templates
-
Click Choose file and upload PNG file (Max size: 100KB)
-
-
Logo – Dark Background
-
Used on the app top-left navigation bar
-
Click Choose file and upload PNG file (Max size: 100KB)
-
-
-
Click Update to save the changes.
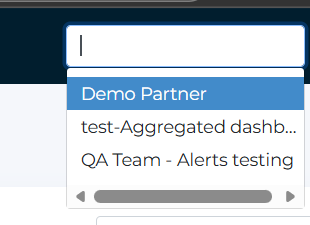
Tenant Switch
Follow the steps below to switch between Child and Partner tenants.
-
Log in to Mavvrik.
-
Click on the Menu bar.
-
Select the Tenants option.The Tenants page will open.
-
Click on the Tenant dropdown.
-
Select the required Child Tenant or Partner Tenant to switch
Manage a customer
Follow the steps below to manage a customer on their behalf:
-
Click the URL of the customer you want to manage.
-
Enter a partner user credentials.
-
Partner user will be logged into customer account in “admin” mode.
-
Partner user has full access to the child tenants
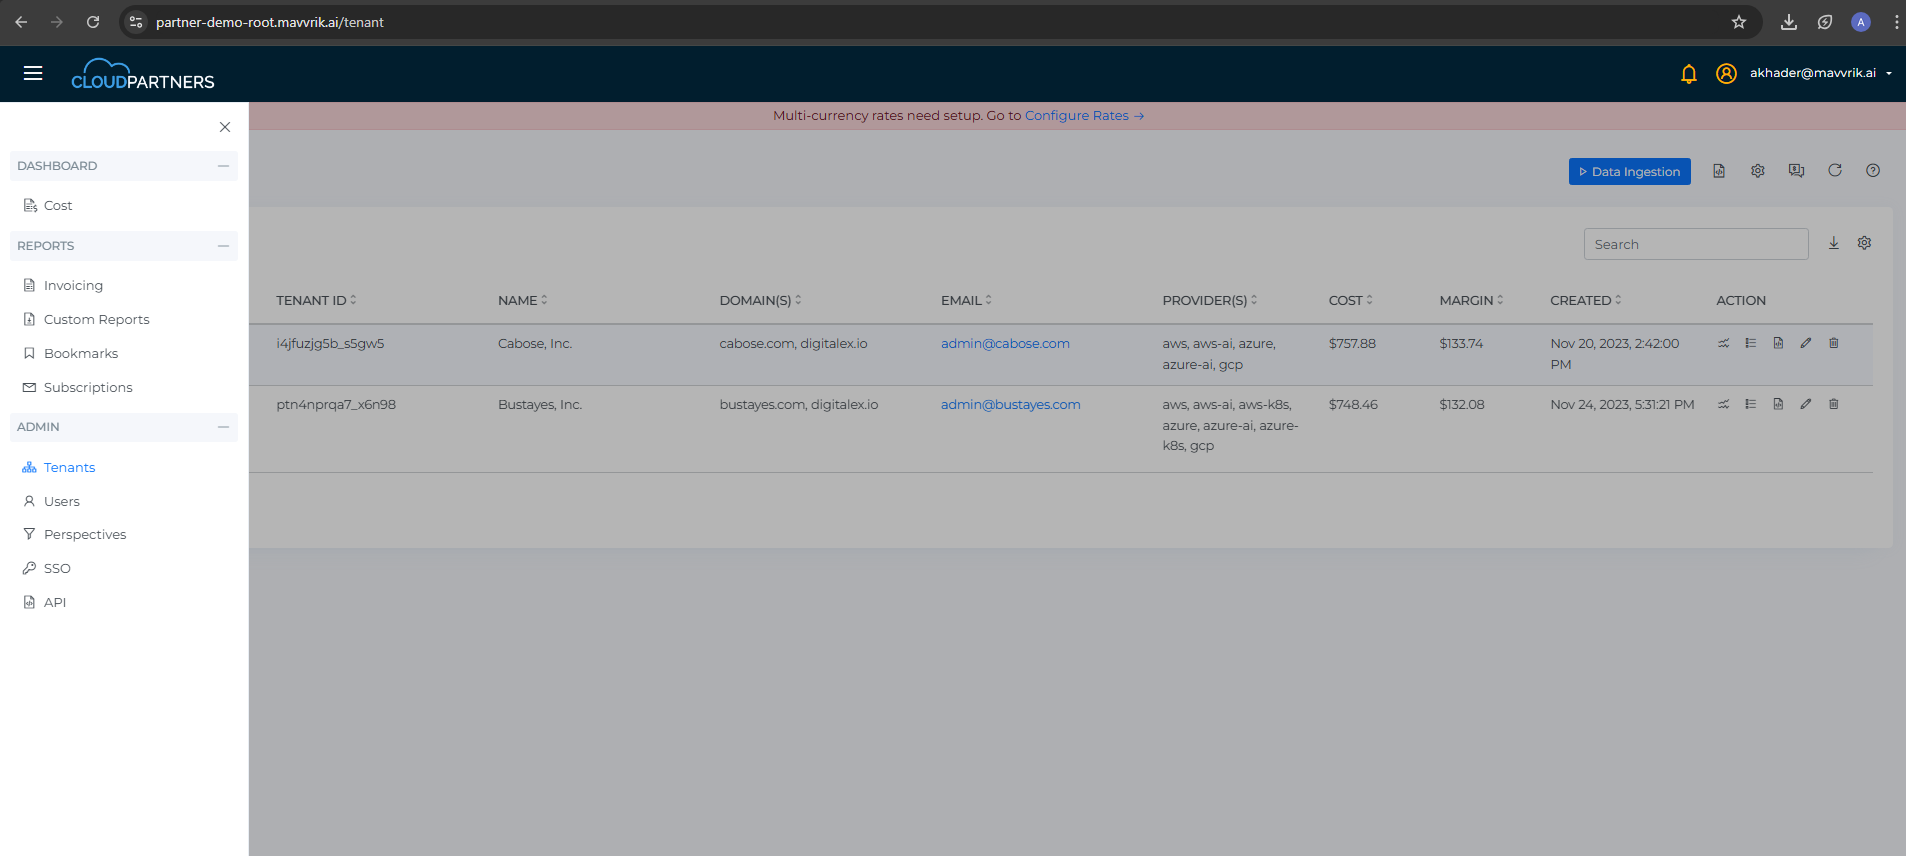
Configure Multicurrency
Multi-currency options will be visible only when child tenants use different billing currencies
Follow the steps below to configure and display your preferred currency in the Partner Dashboard:
-
Log in to your Partner Dashboard.
-
In the left-hand menu, navigate to Admin → Tenants.
-
Click the Currency icon located at the top of the Tenants page.
-
From the dropdown list, select the currency you want to display on the Partner Dashboard.
-
Enter the exchange rate
-
Click Save to apply the settings.
-
Click on Data Ingestion to refresh and update the currency changes across your partner data.
Partner Price Book (Tenants Dashboard) — Upload Price Rules
This guide shows MSP/Reseller partners how to upload a partner-level (global) Price Book from the Tenants dashboard so the same pricing rules apply across all customers/child tenants.
Who can do this
-
Partner admins (or roles with Partner Dashboard / Tenants access and Price Book permissions).
What you’ll need
-
A valid Price Book file in YAML.
Example (5% global discount):
kind: partner
book:
  - rule_group_id: ApplyDiscount
    rules:
      - rule_id: AddPercentDiscount
        line_item: {}
        rule_definition:
          adjustment: 5
          rule_type: percent_discount
-
kind: partner→ applies globally at the partner level -
line_item: {}→ no filters; affects all line items -
adjustment: 5+percent_discount→ flat 5% discount
Example (5% global discount) for child tenant/customer
kind: partner
book:
  - rule_group_id: ApplyDiscount
  - tenant_id: i4jfuzjg5b_s5gw5 <replace tenant_id with your child tenant id>
    rules:
      - rule_id: AddPercentDiscount
        line_item: {}
        rule_definition:
          adjustment: 5
          rule_type: percent_discount
Steps
-
Open Tenants dashboard
In the partner tenant, go to Tenants (the list of all your customer/child tenants).
-
Open Price Rule
Click the Price Rule button/icon at the partner/tenants level.This opens the global Price Book uploader for the partner.
-
Upload the YAML
-
Click Upload and choose your Price Book
.yaml. -
Confirm to Apply (global).
-
Save.
-
-
Verify the effect
-
Run the Data ingestion to reflect the price rule
-
Open any customer tenant’s cost view (e.g., Partner Aggregated Cost).
-
Confirm totals reflect the 5% discount.
-
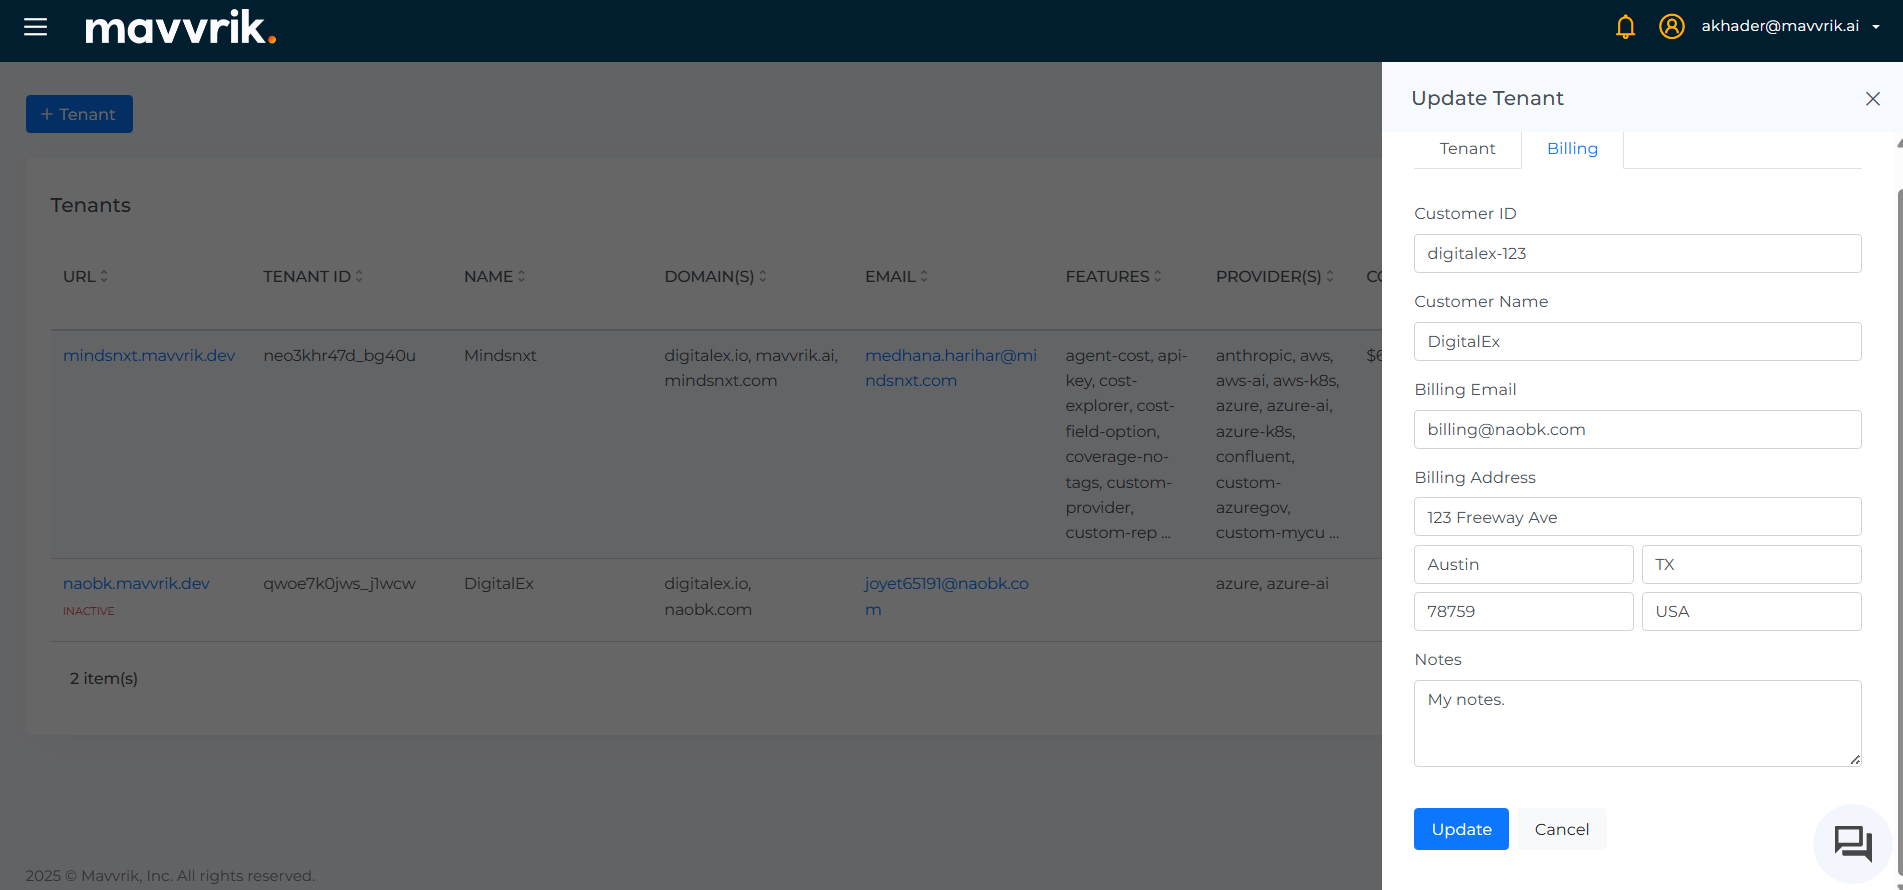
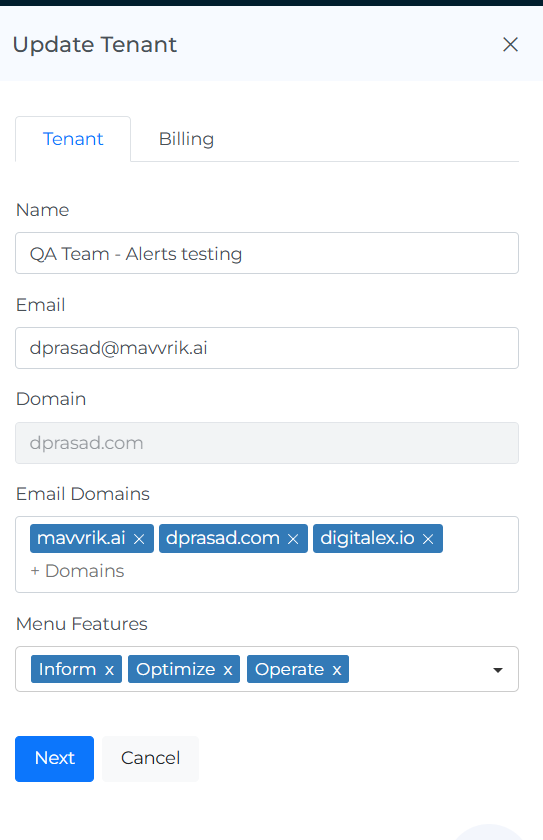
Update Tenant
Follow the steps to update the Billing
-
Log in to your Partner Dashboard.
-
In the left-hand menu, navigate to Admin → Tenants.
-
Click the Edit icon
-
Update the tenant details and Billing address
Follow the steps to update the Tenent
-
Log in to your Partner Dashboard.
-
In the left-hand menu, navigate to Admin → Tenants.
-
Click the Edit icon
-
Update the tenant details & Menu Features
If the partner enables specific menu features (Optimize or Operate), those features will be visible in the child tenant’s menu bar. If any feature is disabled, it will not appear in the child tenant’s menu.
Access to these menu options is fully controlled by the partner’s configuration
Sharing Dashboards Across Tenants
This feature enables Partners to create and share dashboards or across multiple child tenants. It helps standardize dashboards and ensures consistency across environments.
Key Capabilities
-
Share dashboards across multiple child tenants
-
Centralized creation and management by Partner tenant
-
Inheritance of dashboards to child tenants
-
Override support at Partner and Tenant levels
Inheritance Behavior
When shared with child tenants:
-
Dashboard becomes available in child tenants
-
It behaves as a Partner-owned inherited dashboard
Override Behavior
At Partner Level
-
Editing a System Dashboard (e.g., Overview Dashboard):
-
Converts it into a Partner-owned dashboard
-
-
If shared:
-
It overrides the same dashboard in child tenants
-
Restore Behavior (Delete Action)
Deleting a customized dashboard restores the original:
|
Scenario |
After Delete |
|---|---|
|
Partner modified System Dashboard |
Restores original System Dashboard |
|
Tenant modified System Dashboard |
Restores System / Partner Dashboard |
|
Tenant modified Partner Dashboard |
Restores Partner Dashboard |
Steps to Share a Dashboard (Users & Tenants)
-
Login to Mavvrik
-
Go to Menu → Dashboards
-
You will see the list of available dashboards
-
Identify the dashboard you want to share
-
Click on the Share icon under the Action column
-
Choose Sharing Type (Users / Tenants)
-
If you select Users field:
-
Search for users by email
-
Select one or multiple users from the list
-
OR select “All Users” checkbox
-
If you select Tenants field:
-
-
Search and select required tenants (e.g., child-1, child-2)
-
OR select “All Tenants” checkbox
-
Selected users/ tenants will appear in the selection box
-
Click on Update button to apply sharing
Partner Tenant supports Member, Administrator, and Owner roles. Roles can be updated as needed; however, only an Owner can assign the Owner role to another user, and only an Owner can delete the tenant.