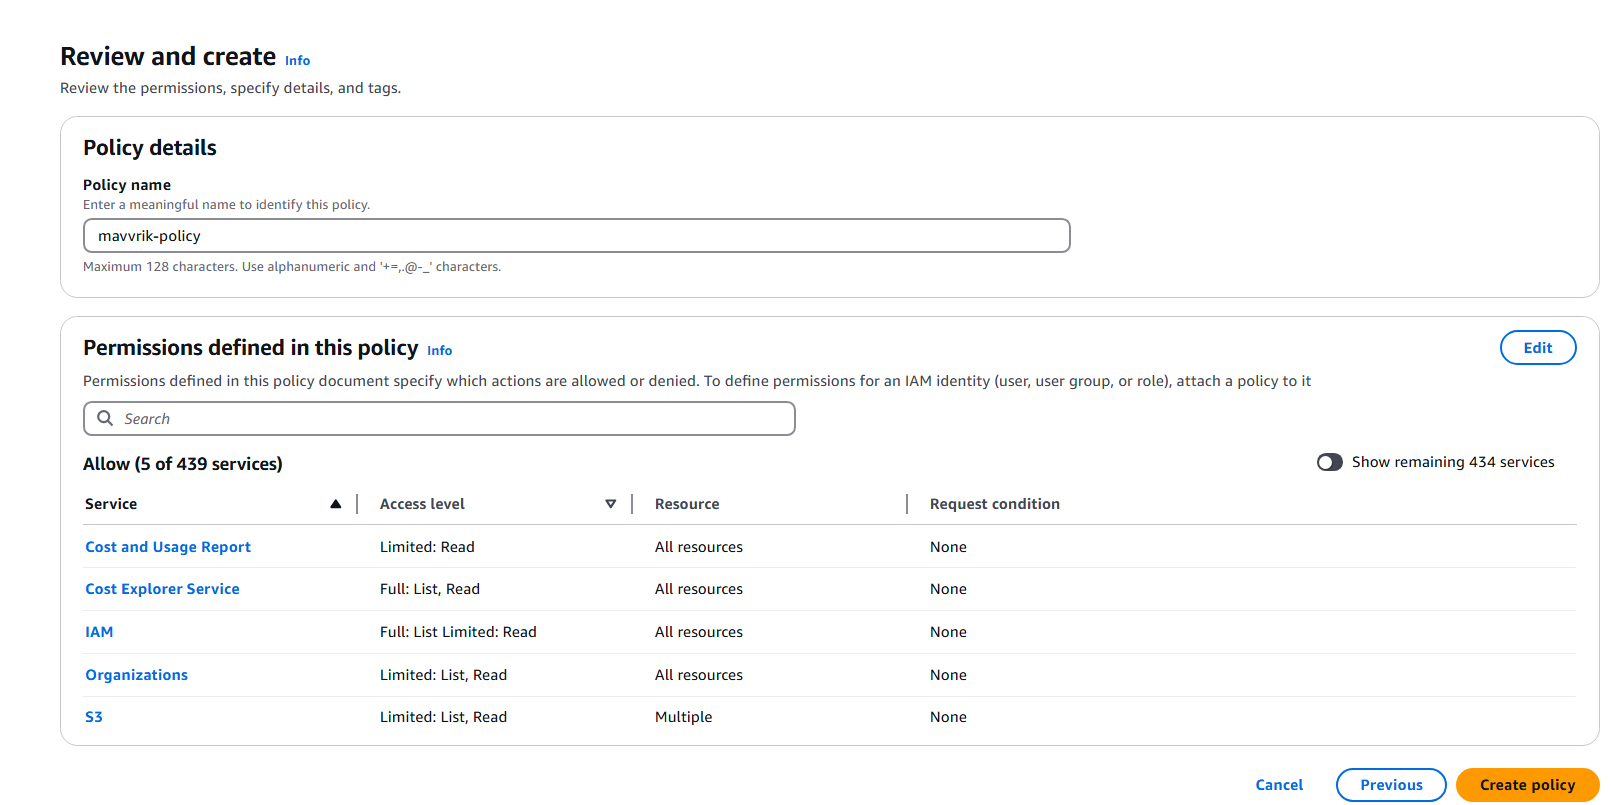
.png)
Mavvrik supports both types of AWS authentications,
Role-based access is generally considered to be more secure than user-based access, as it allows organizations to control access to resources and functions based on defined roles and responsibilities. We recommend using roles over individual users whenever possible
Roles
-
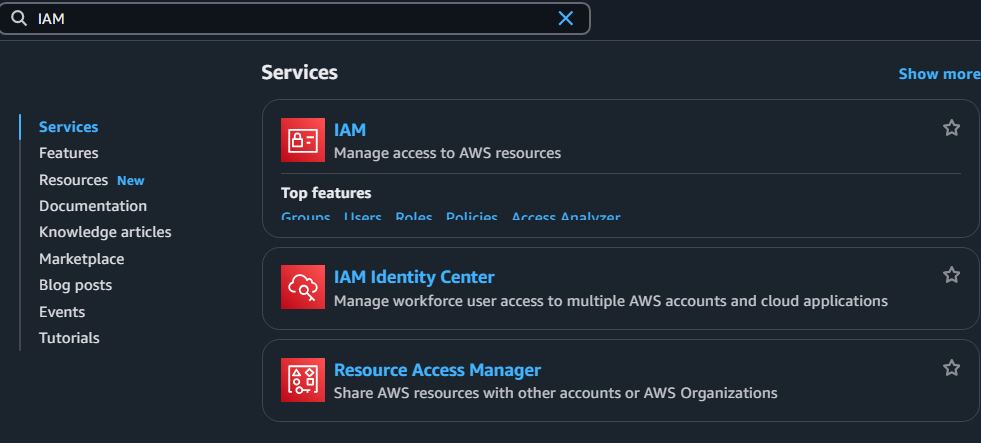
Search IAM and Navigate to IAM dashboard
-
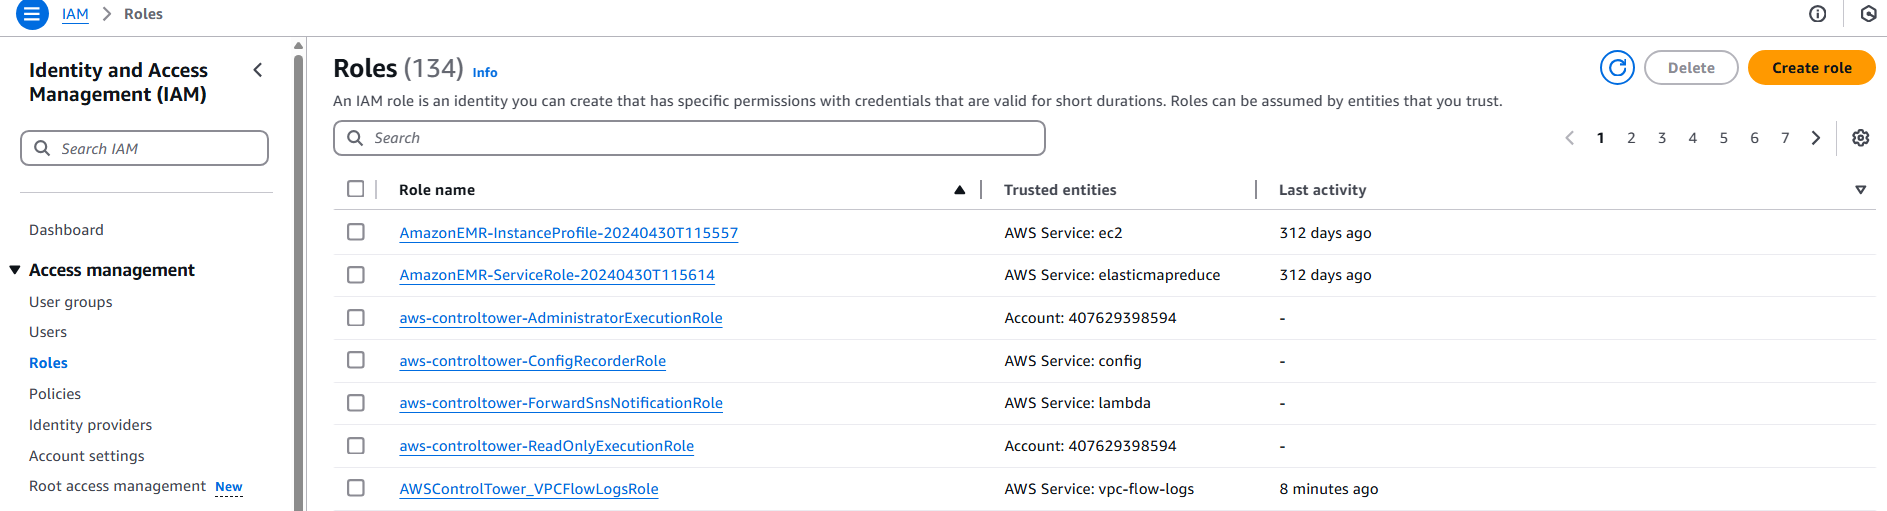
Click on Roles from the left menu options and Click on
Create Role
-
Select
Custom trust policy -
Copy the following trust policy JSON:
JSON{ "Version": "2012-10-17", "Statement": [ { "Effect": "Allow", "Action": ["sts:AssumeRole"], "Principal": { "AWS": [ "arn:aws:iam::911403356698:user/global-user-for-assume-role", "arn:aws:iam::911403356698:user/mavvrik-svc-user", "arn:aws:iam::911403356698:role/mavvrik-svc-role" ] }, "Condition": { "StringEquals": { "sts:ExternalId": "<TENANT-ID>" } } } ] } -
Paste the copied JSON in Custom trust policy editor
-
Remove <TENANT-ID>

-
Enter your tenant id as shown image. To get the tenant id to follow instructions,
-
-
Login to Mavvrik
-
From the side menu, select
APIunder theAdminsection -
Capture the Tenant ID8.
-
-
Click Next and don't select any permissions
Enter the role name with prefix 'Mavvrik-' e.g: Mavvrik-rolename
-
Enter the Role name and click Create role.
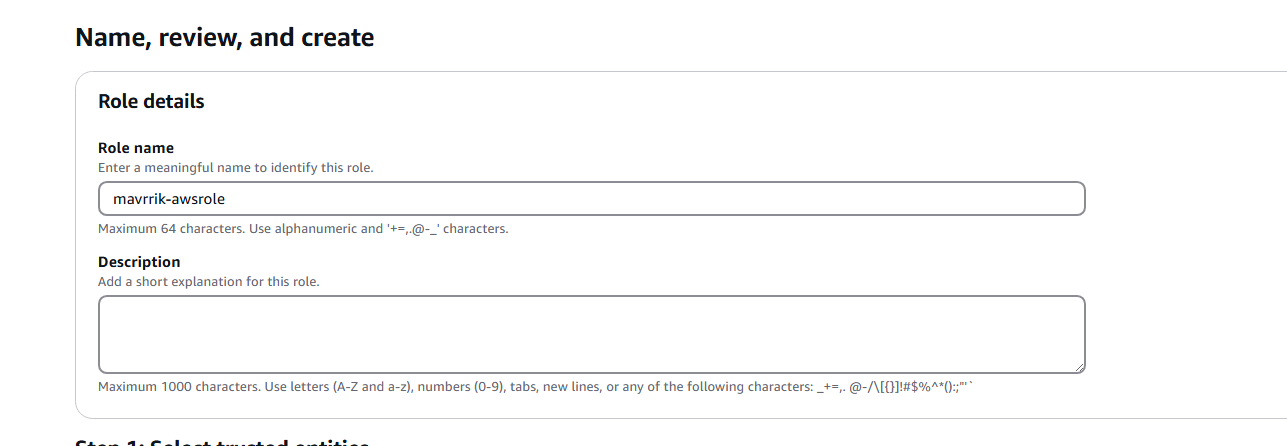
-
A new role should be created and displayed in the list.
-
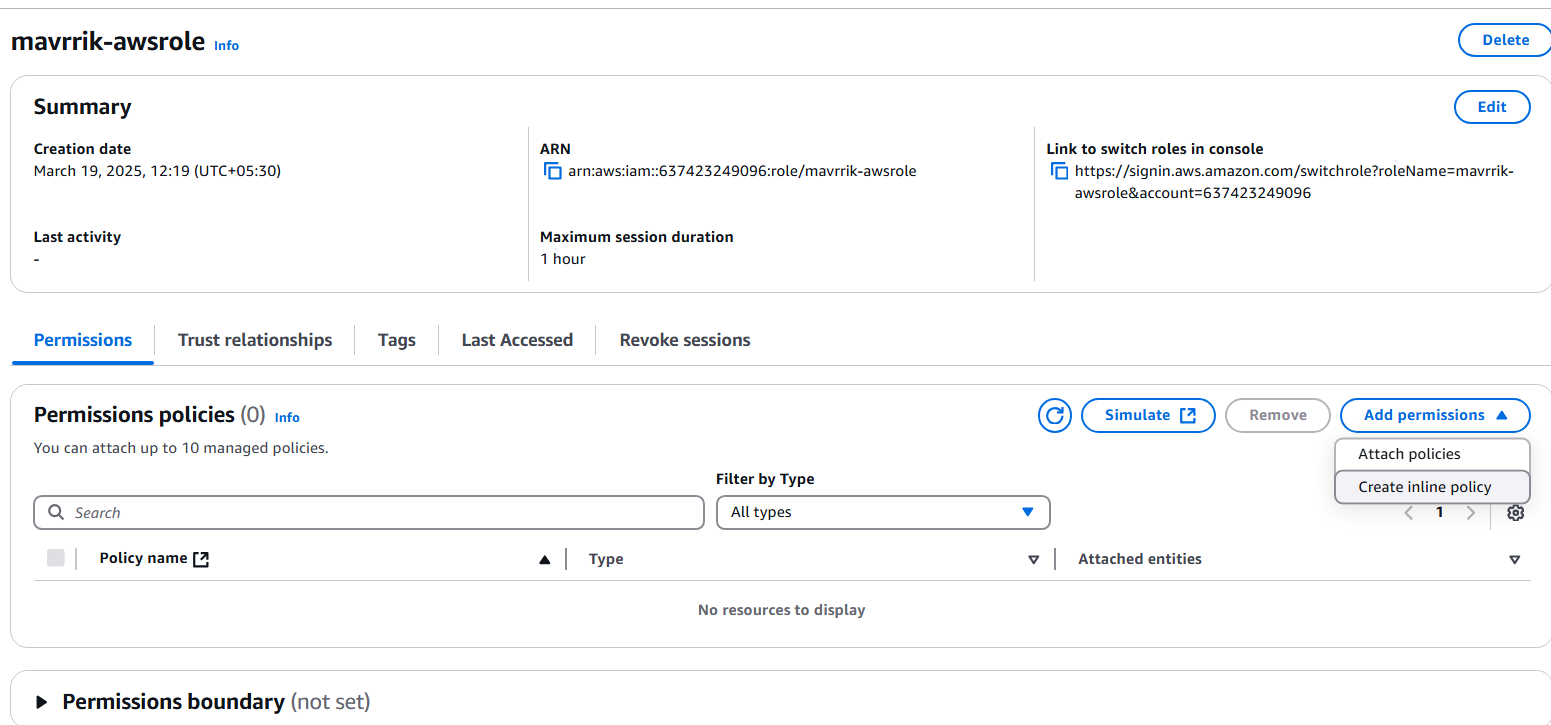
Click on the newly created Role which is navigated to the below page
-
Click on
Add Permissions -> Create Inline PolicyunderPermissionsTab -
Click on
JSONtab & replace existing JSON with the below JSON
Use any one of the policies mentioned. The first policy grants broader IAM permissions (Resource: *) and includes CUR actions (cur:Get*, cur:ValidateReportDestination, cur:Describe*). The second scopes the IAM permissions to a specific role ARN instead of a wildcard.
-
Option 1 — Broader IAM role permissions policy. Replace
<BUCKET_NAME>on lines 11 & 12 with the name of the bucket captured in Step 1: Enable CUR & Cost ExplorerJSON{ "Version": "2012-10-17", "Statement": [ { "Effect": "Allow", "Action": [ "s3:GetObject", "s3:ListBucket" ], "Resource": [ "arn:aws:s3:::<BUCKET_NAME>", "arn:aws:s3:::<BUCKET_NAME>/*" ] }, { "Effect": "Allow", "Action": [ "organizations:Describe*", "organizations:List*" ], "Resource": "*" }, { "Effect": "Allow", "Action": [ "ce:Get*", "ce:Desc*", "ce:List*" ], "Resource": "*" }, { "Effect": "Allow", "Action": [ "iam:Get*", "iam:List*", "iam:SimulateCustomPolicy", "iam:SimulatePrincipalPolicy" ], "Resource": "*" }, { "Effect": "Allow", "Action": [ "cur:Get*", "cur:ValidateReportDestination", "cur:Describe*" ], "Resource": "*" } ] }
Option 2 — Scoped IAM role permissions policy:
{
    "Version": "2012-10-17",
    "Statement": [
        {
            "Effect": "Allow",
            "Action": [
                "s3:GetObject",
                "s3:ListBucket"
            ],
            "Resource": [
                "arn:aws:s3:::<BUCKET_NAME>",
                "arn:aws:s3:::<BUCKET_NAME>/*"
            ]
        },
        {
            "Effect": "Allow",
            "Action": [
                "organizations:Describe*",
                "organizations:List*"
            ],
            "Resource": "*"
        },
        {
            "Effect": "Allow",
            "Action": [
                "ce:Get*",
                "ce:Desc*",
                "ce:List*"
            ],
            "Resource": "*"
        },
        {
            "Effect": "Allow",
            "Action": [
                "iam:Get*",
                "iam:List*",
                "iam:SimulateCustomPolicy",
                "iam:SimulatePrincipalPolicy"
            ],
            "Resource": "arn:aws:iam::<ACCOUNT_ID>:role/<ROLE_NAME>"
        },
        {
            "Effect": "Allow",
            "Action": [
                "cur:Get*",
                "cur:ValidateReportDestination",
                "cur:Describe*"
            ],
            "Resource": "*"
        }
    ]
}
-
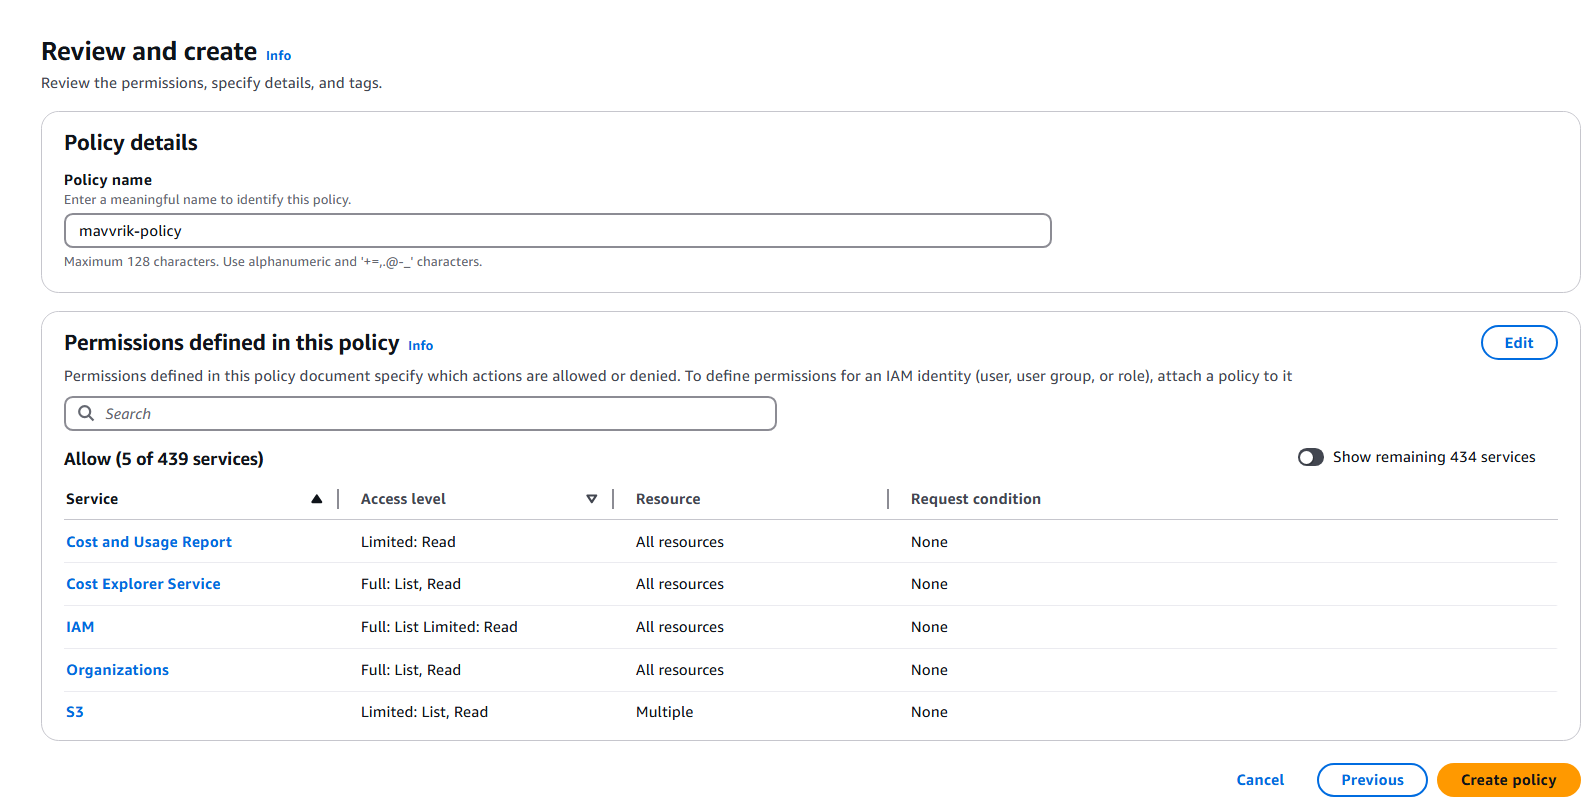
Click Next and Enter Policy, Name it & Click
Create policy
-
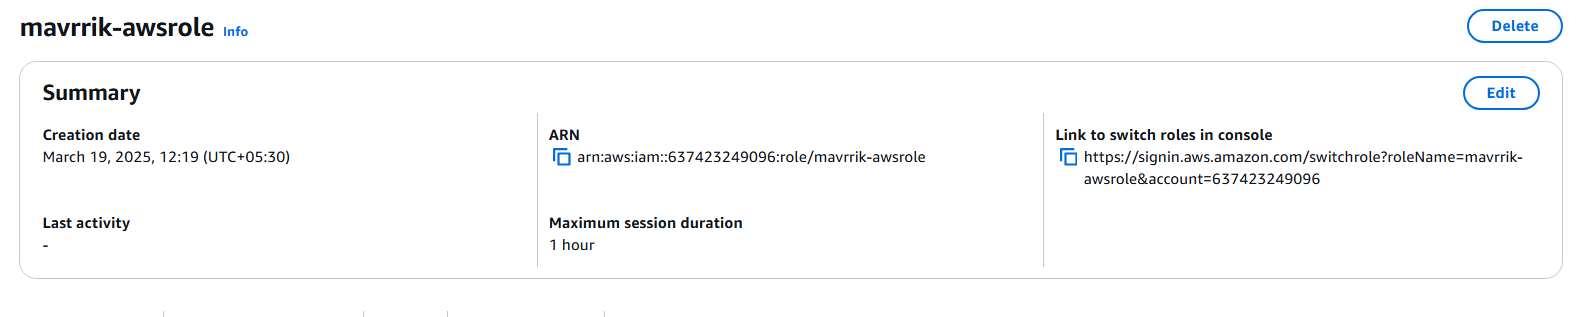
After creating policy below page is displayed. Capture
ARNof the role from the summary section for the next steps.
Users
This step is not required if you have created a Role.
-
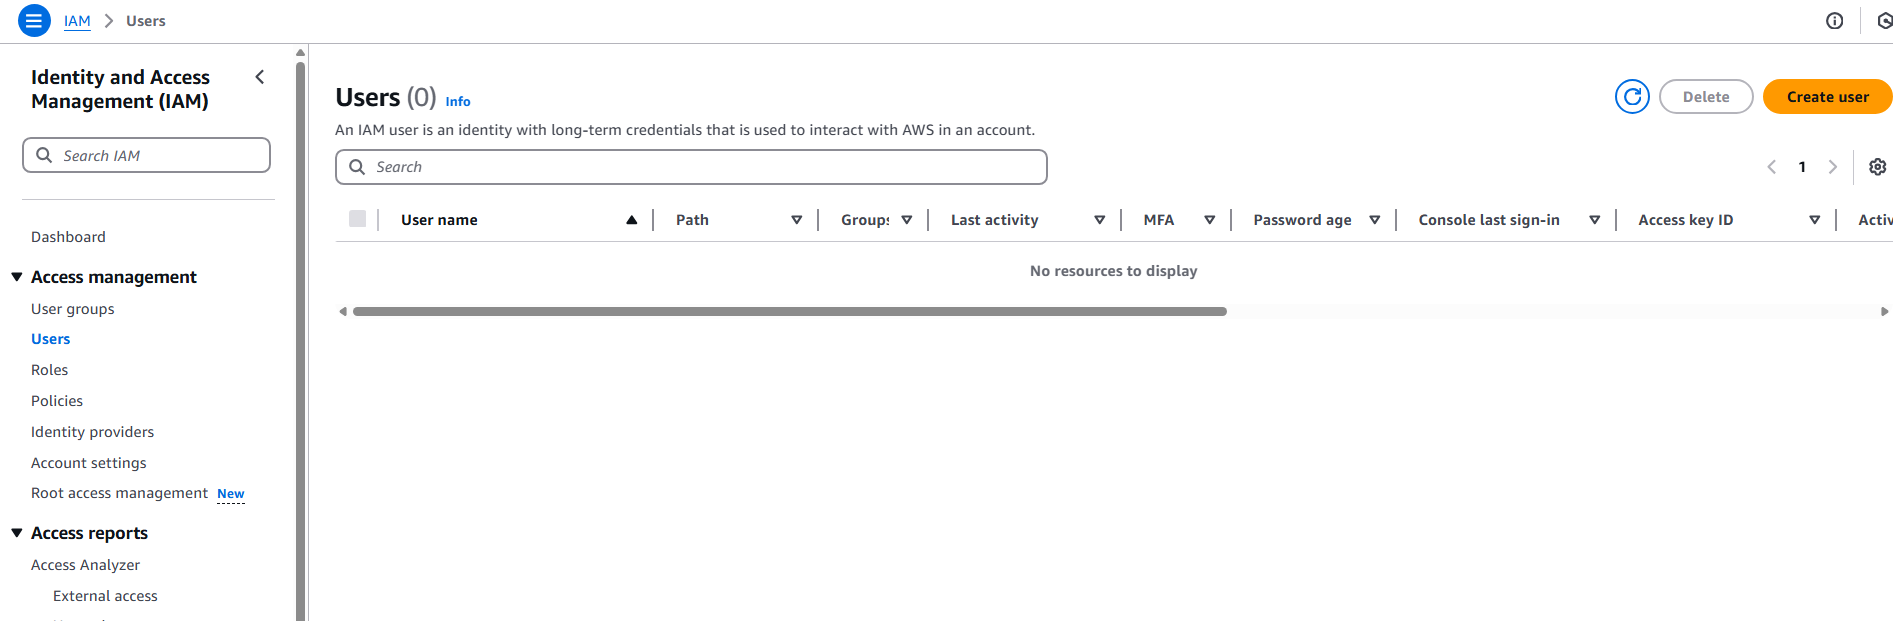
Search IAM, Navigate to IAM dashboard and Click Users
-
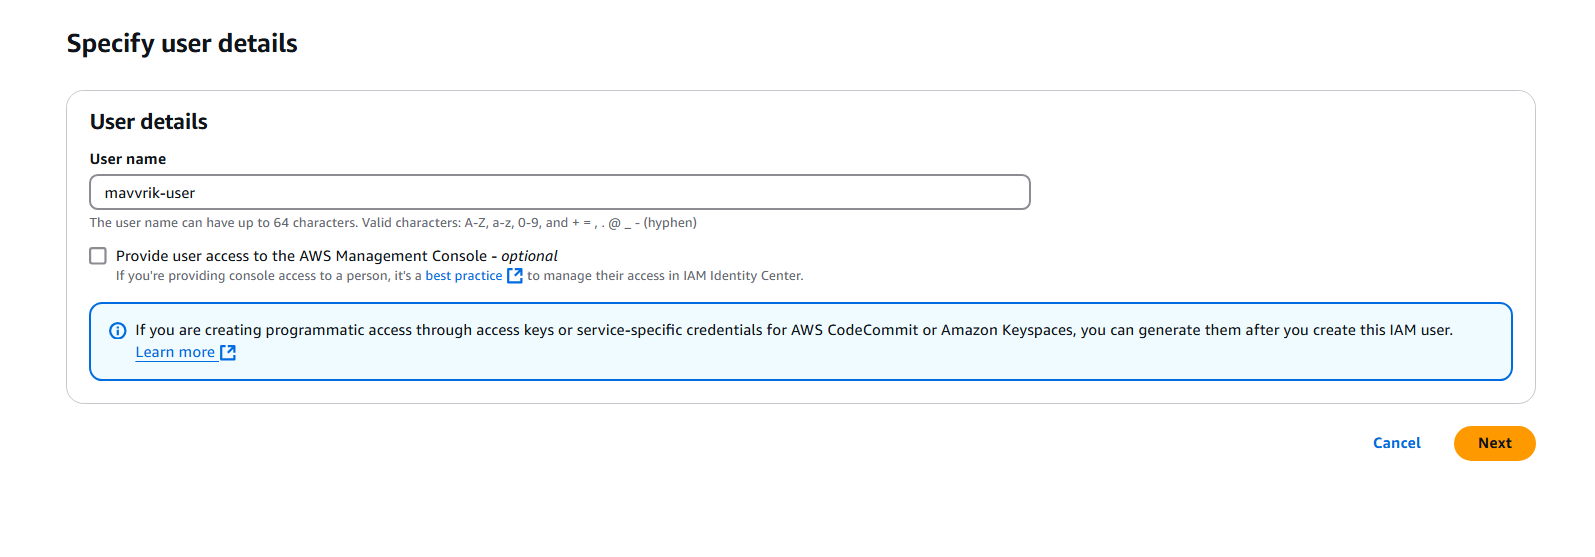
Click Add Users, Enter name of your choice
-
Skip permissions for now. Keep doing Next & finally Create User.
-
Click the User you have created & click on Security credentials.
-
Scroll down & click on Create access key
-
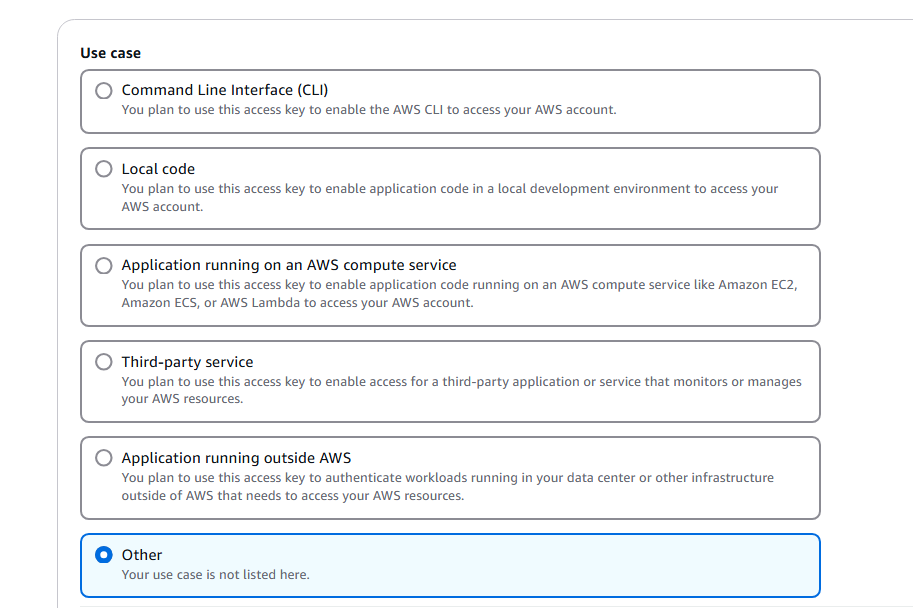
Select Others & click on next
-
Click on Create Access Key
-
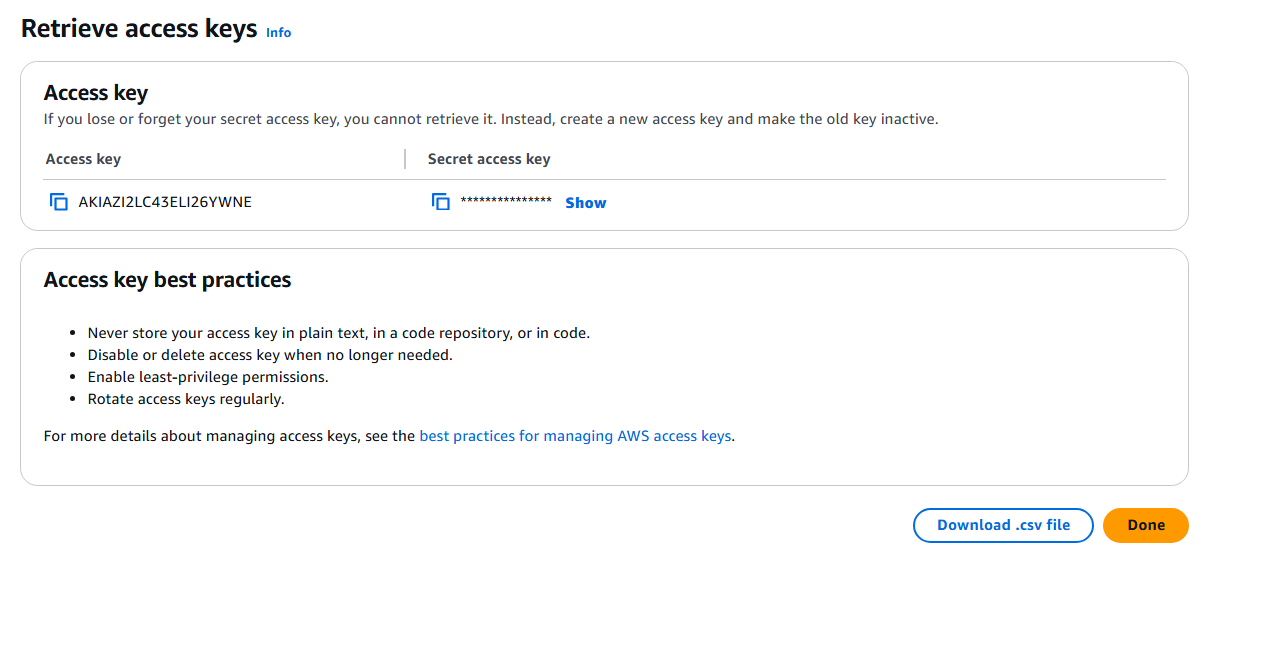
Capture Access key & Secret access key which is used in subsequent steps.
-
Click Done
-
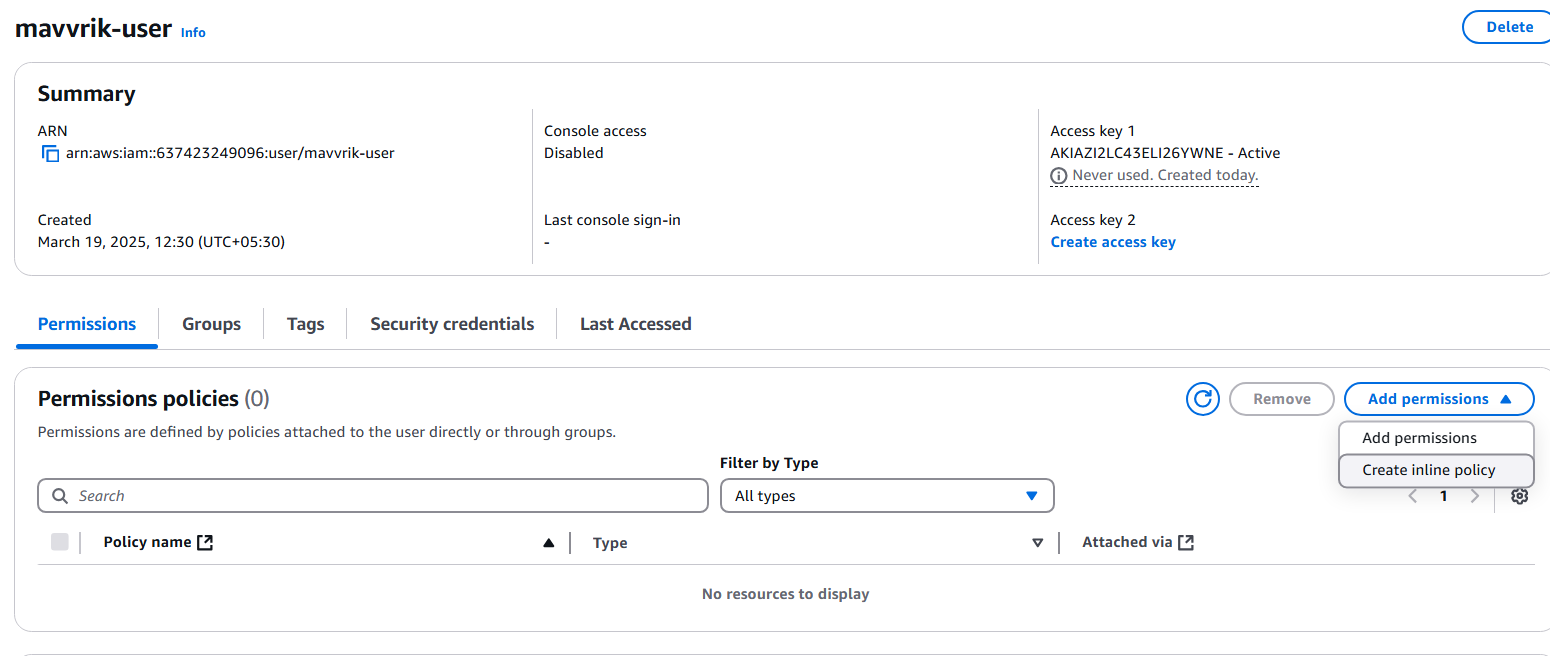
Navigate to the details of the user we just created
-
Click
Create Inline PolicyunderPermissionsTab & Click onJSONtab & replace existing JSON with the below JSON
Use any one of the policies mentioned. The first policy grants broader IAM permissions (Resource: *) and includes CUR actions (cur:Get*, cur:ValidateReportDestination, cur:Describe*). The second scopes the IAM permissions to a specific role ARN instead of a wildcard, and does not include the CUR actions.
-
Option 1 — Broader IAM user permissions policy. Replace
<BUCKET_NAME>on lines 11 & 12 with the name of the bucket captured in Step 1: Enable CUR & Cost ExplorerJSON{ "Version": "2012-10-17", "Statement": [ { "Effect": "Allow", "Action": [ "s3:GetObject", "s3:ListBucket" ], "Resource": [ "arn:aws:s3:::<BUCKET_NAME>", "arn:aws:s3:::<BUCKET_NAME>/*" ] }, { "Effect": "Allow", "Action": [ "organizations:ListAccounts", "organizations:DescribeAccount" ], "Resource": "*" }, { "Effect": "Allow", "Action": [ "ce:Get*", "ce:Desc*", "ce:List*" ], "Resource": "*" }, { "Effect": "Allow", "Action": [ "iam:Get*", "iam:List*", "iam:SimulateCustomPolicy", "iam:SimulatePrincipalPolicy" ], "Resource": "*" }, { "Effect": "Allow", "Action": [ "cur:Get*", "cur:ValidateReportDestination", "cur:Describe*" ], "Resource": "*" } ] }
Option 2 — Scoped IAM user permissions policy:
{
    "Version": "2012-10-17",
    "Statement": [
        {
            "Effect": "Allow",
            "Action": [
                "s3:GetObject",
                "s3:ListBucket"
            ],
            "Resource": [
                "arn:aws:s3:::<BUCKET_NAME>",
                "arn:aws:s3:::<BUCKET_NAME>/*"
            ]
        },
        {
            "Effect": "Allow",
            "Action": [
                "organizations:Describe*",
                "organizations:List*"
            ],
            "Resource": "*"
        },
        {
            "Effect": "Allow",
            "Action": [
                "ce:Get*",
                "ce:Desc*",
                "ce:List*"
            ],
            "Resource": "*"
        },
        {
            "Effect": "Allow",
            "Action": [
                "iam:Get*",
                "iam:List*",
                "iam:SimulateCustomPolicy",
                "iam:SimulatePrincipalPolicy"
            ],
            "Resource": "arn:aws:iam::<ACCOUNT_ID>:role/<ROLE_NAME>"
        },
        {
            "Effect": "Allow",
            "Action": [
                "cur:Get*",
                "cur:ValidateReportDestination",
                "cur:Describe*"
            ],
            "Resource": "*"
        }
    ]
}
-
Review the policy & click create