.png)
Why this matters: Snowflake usage is metered continuously (compute credits, storage, data transfer) and billed on its own schedule, separate from any cloud provider invoice. Without pulling that into Mavvrik, Snowflake spend either gets tracked manually in a spreadsheet or doesn't get tracked at all until the invoice arrives. Connecting it here means Snowflake shows up in Mavvrik's SaaS dashboards, with the same allocation and reporting tools available for your cloud spend.
This shows up differently depending on your role:
-
FinOps managers use this to catch Snowflake cost growth early; compute credits can scale quickly with query volume, and this is where that shows up before the invoice does.
-
Data platform teams do the actual onboarding: running the setup script and managing the read-only access Mavvrik uses.
-
Finance leaders use this for accurate chargeback when Snowflake usage is shared across multiple teams or projects.
Prerequisite : The user must have an Account Admin role
Configuration steps
Step 1: Log in to Snowflake console and capture the Account identifier
-
Log in to the Snowflake console as admin
-
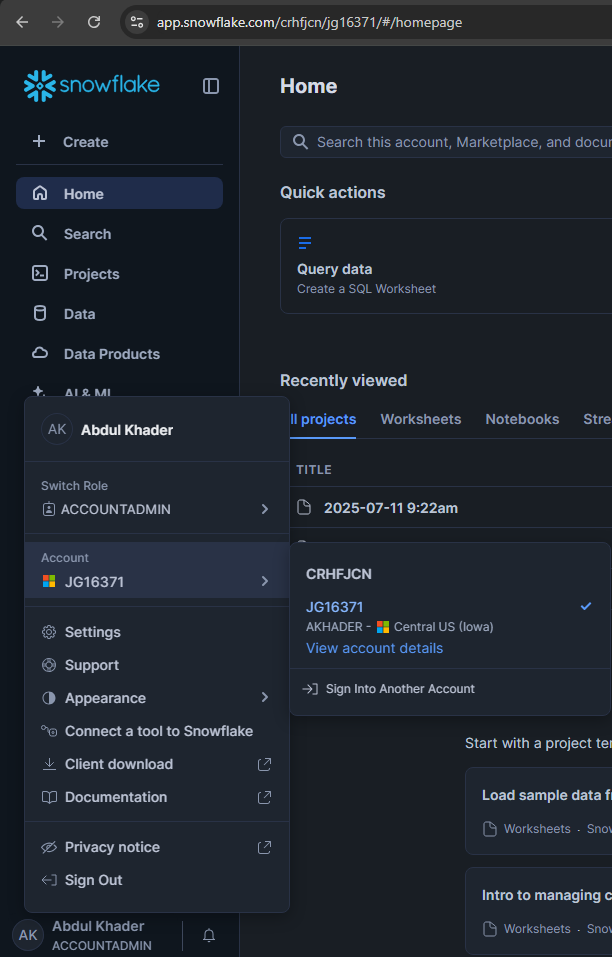
Click on the profile icon at the bottom of the page
-
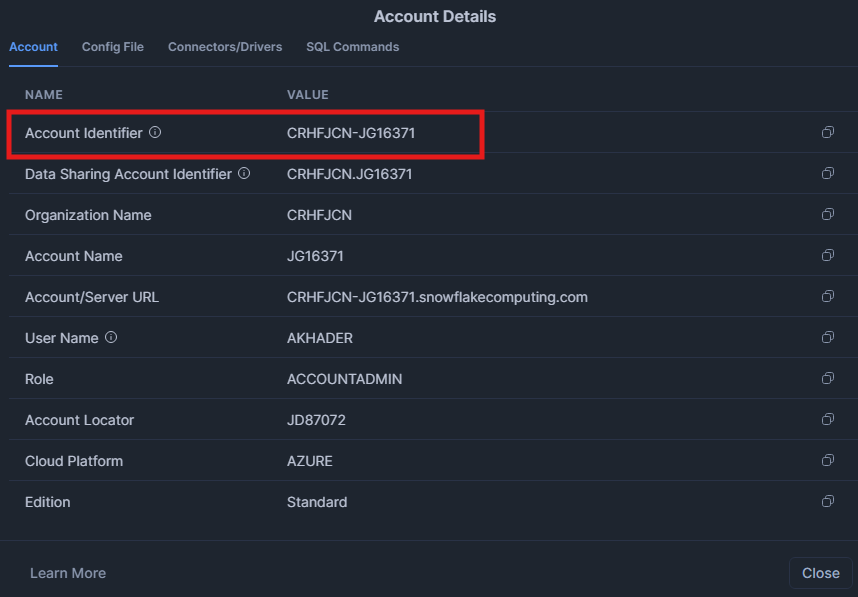
Click View account details.
-
Copy Account identifier
Step 2: Run the script
-
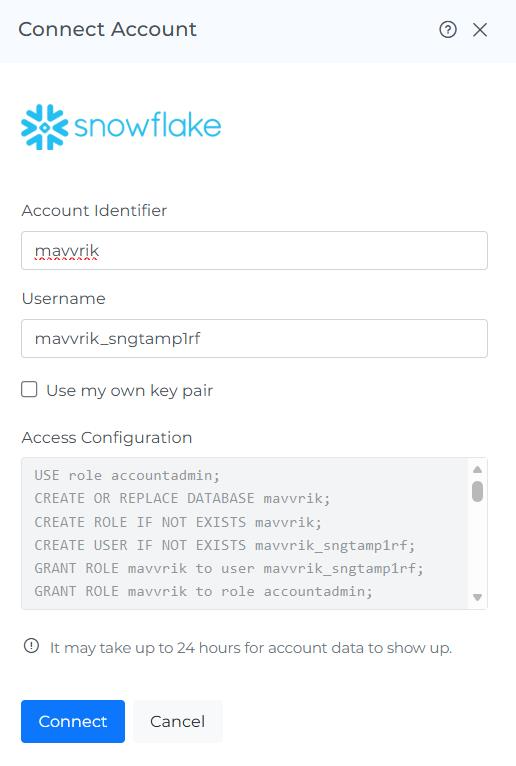
Go to Mavvrik portal and click on admin and then SaaS
-
Click on +account and then select Snowflake
-
If you leave the checkbox unchecked, the Public Key (PEM) and Private Key (unencrypted PKCS#8 PEM) fields will not be displayed.
-
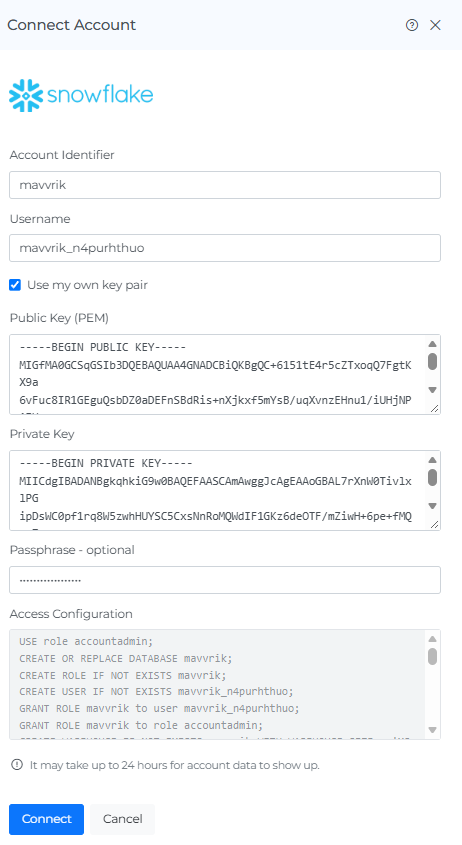
If you enable Use my own key pair, the Public Key (PEM) and Private Key (unencrypted PKCS#8 PEM) fields will appear. You must enter both keys to connect the account.
You can generate your own RSA key pair using an RSA key generator. Generate the key in PKCS#8 format with a 4096-bit key size.
Make sure the generated public and private keys are entered in the appropriate fields.
-
Enter the passphrase associated with your private key in the Passphrase field. This field is optional.
Use: Enter the passphrase when your private key is encrypted.
Do not use: Leave it blank when your private key does not require a passphrase.
-
Copy the Access Configuration
-
Again, navigate to Snowflake
-
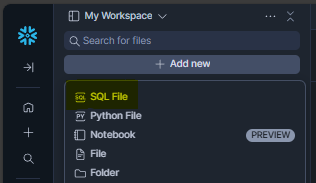
Click on Projects > Add new > SQL File > Enter
-
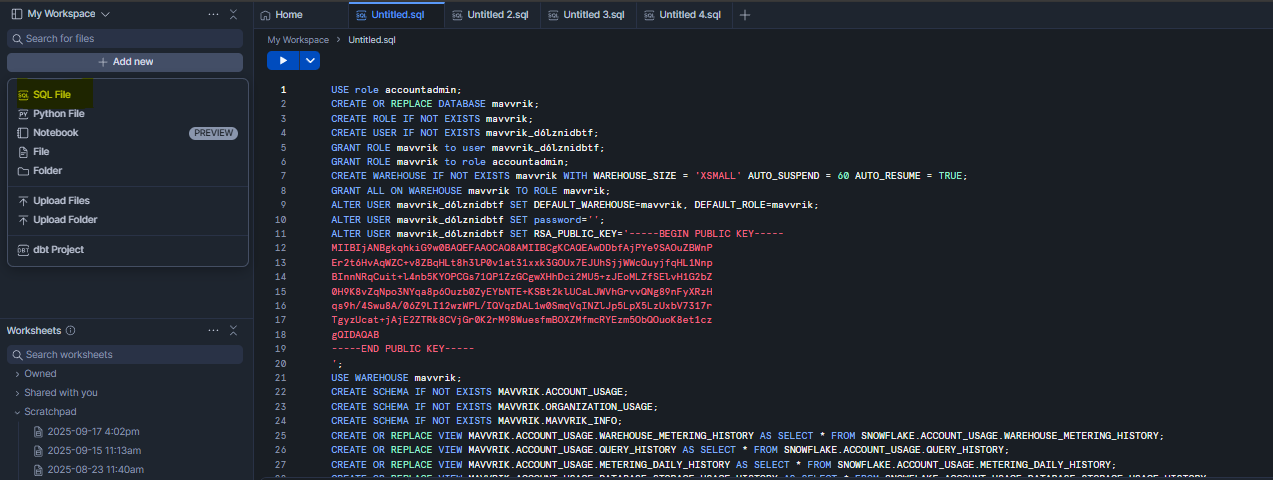
Paste the Access Configuration copied from the Mavvrik console, and click Run All
Note: Mavvrik platform requires read-only access to the following Snowflake schemas:
Step 3: Integrate into Mavvrik portal
-
Go to Mavvrik portal and click on admin and then SaaS
-
Click on +account and then select Snowflake
-
Enter the Account identifier
-
The Username field is pre-populated with a default username. You can change it to your preferred name, but entering a username is mandatory.
-
Click Connect
Troubleshooting
-
If the script fails, confirm that it was run with the required Snowflake administrative access.
-
If the account does not connect, verify the account identifier, username, and key details entered in Mavvrik.
FAQs
What access does Mavvrik get to my Snowflake account?
Read-only access to the ACCOUNT_USAGE and ORGANIZATION_USAGE schemas, nothing beyond usage and billing visibility.
Do I have to generate my own key pair?
No, Mavvrik can generate the key pair for you. Enabling "Use my own key pair" is optional, and if you do use it, it must be a PKCS#8-format RSA key with a 4096-bit key size.
Why do AI workloads increase Snowflake costs?
AI workloads increase Snowflake costs because they add Cortex AI usage, Cortex Search, embedding refreshes, serverless compute, storage, and serving costs on top of warehouse credits. A search or AI assistant workflow can create cost even when it does not look like a traditional SQL workload.