.png)
Why this matters: Confluent Cloud usage (Kafka cluster throughput, storage, connectors) is billed on its own schedule, separate from any cloud provider invoice. Without connecting it here, that spend either lives in a separate Confluent-only billing view nobody checks regularly, or shows up as a surprise on the invoice. Connecting it means Confluent costs show up in Mavvrik's SaaS dashboards, with the same allocation and reporting tools available for your cloud spend.
This shows up differently depending on your role:
-
FinOps managers use this to catch Confluent cost growth (cluster scaling, connector sprawl) before it's a large invoice surprise.
-
Data/platform teams do the actual onboarding — creating the API key, service account, and granting the BillingAdmin role.
-
Finance leaders use this for chargeback when clusters are shared across multiple teams.
Configuration steps
Step 1: Log in to Confluent console Generate an API Key and Service Account
-
Log in to the Confluent Cloud console.
-
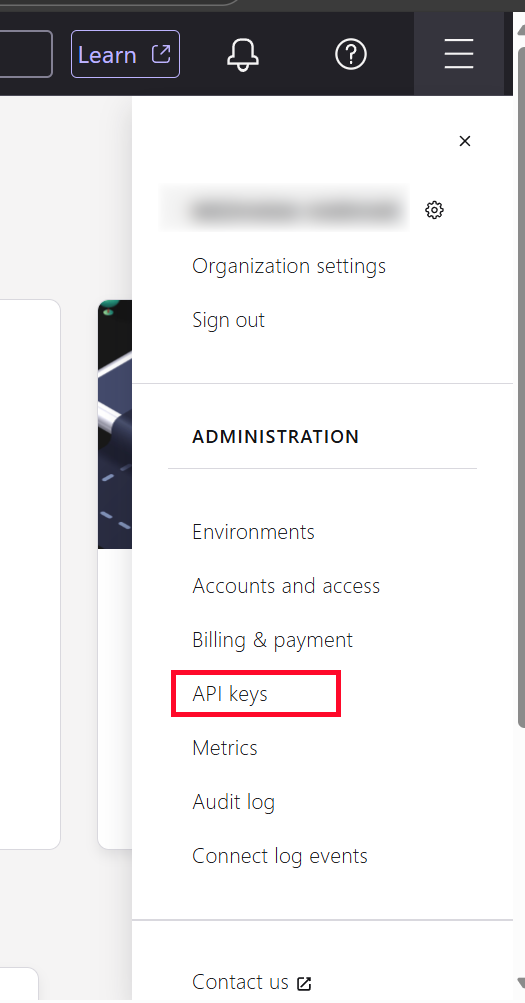
From the top right of the console, click the hamburger menu.
-
Under ADMINISTRATION, click API keys.
-
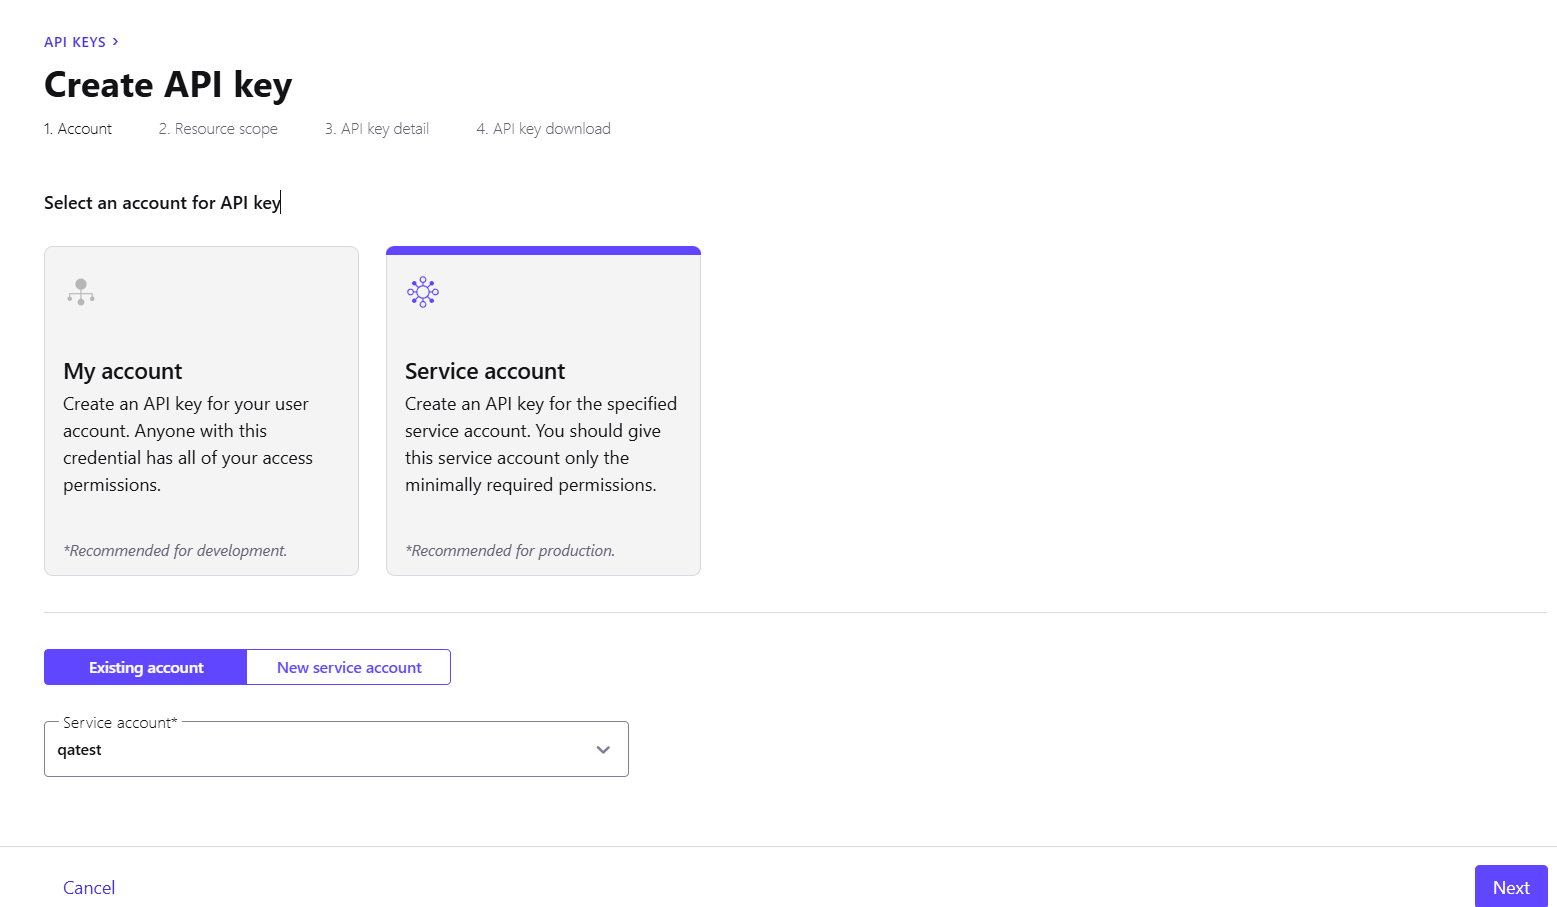
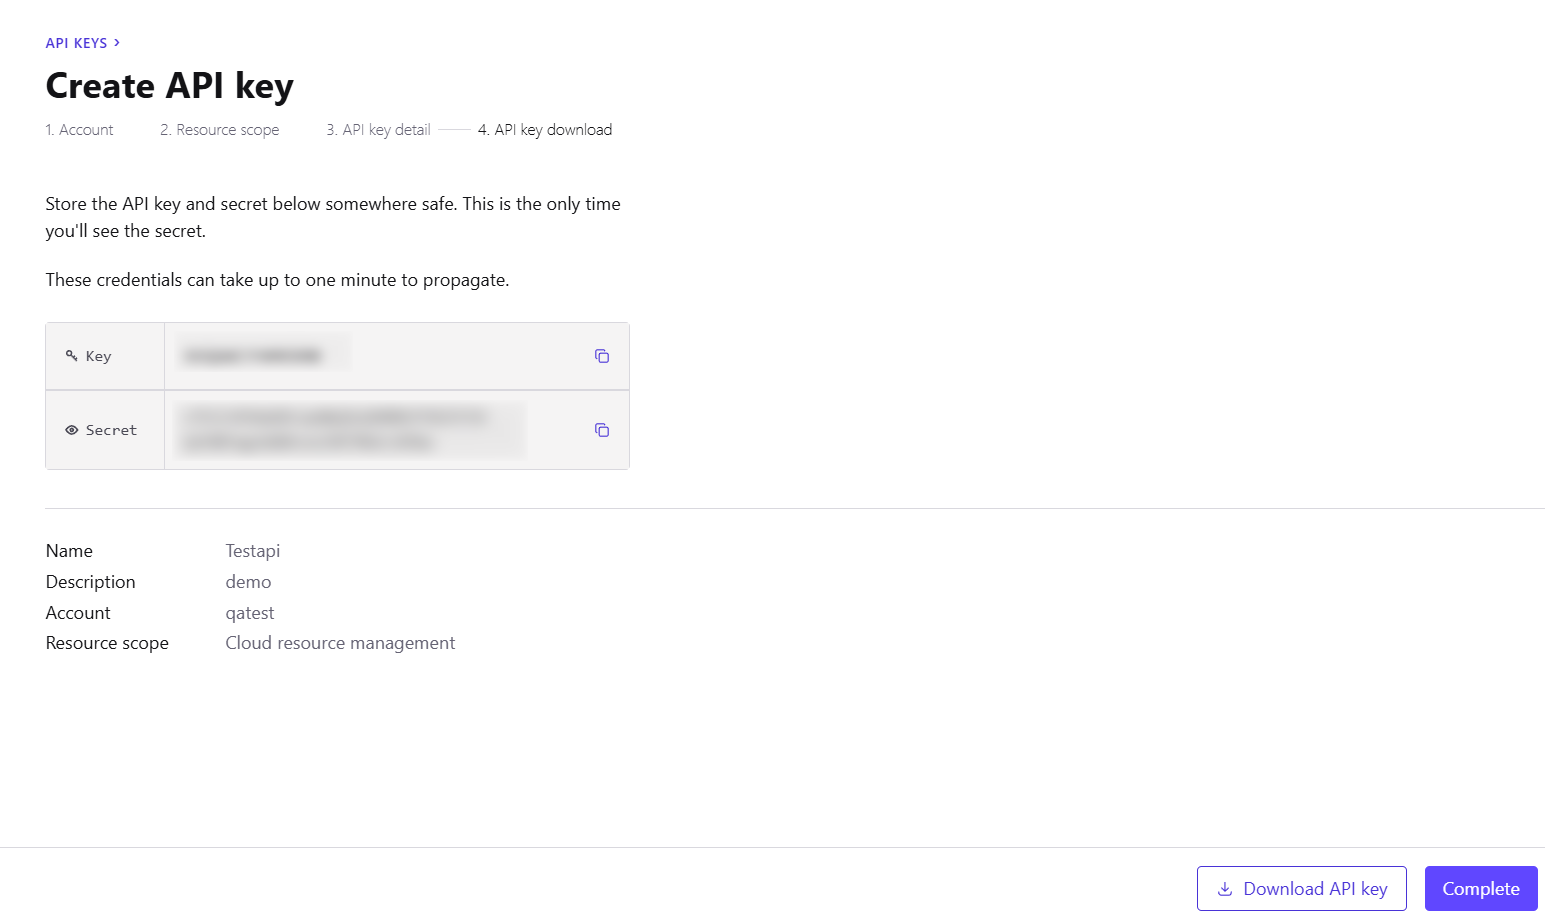
Click + Add API key

-
Select an existing service account or create a new one, then click Next
-
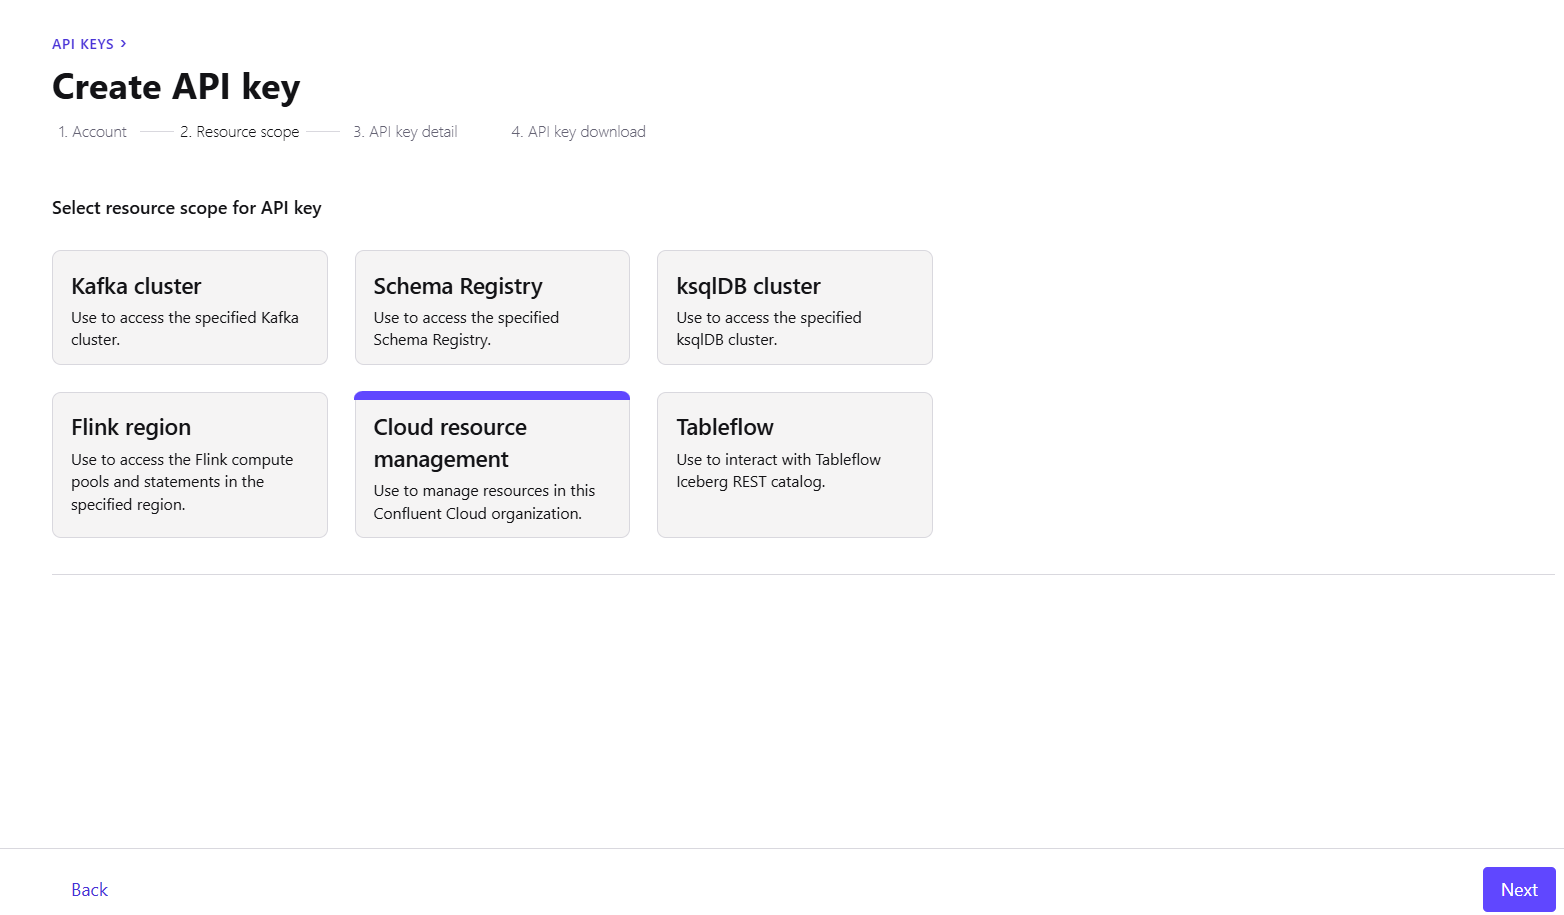
For Select resource scope for API key, select Cloud resource management. Click Next
-
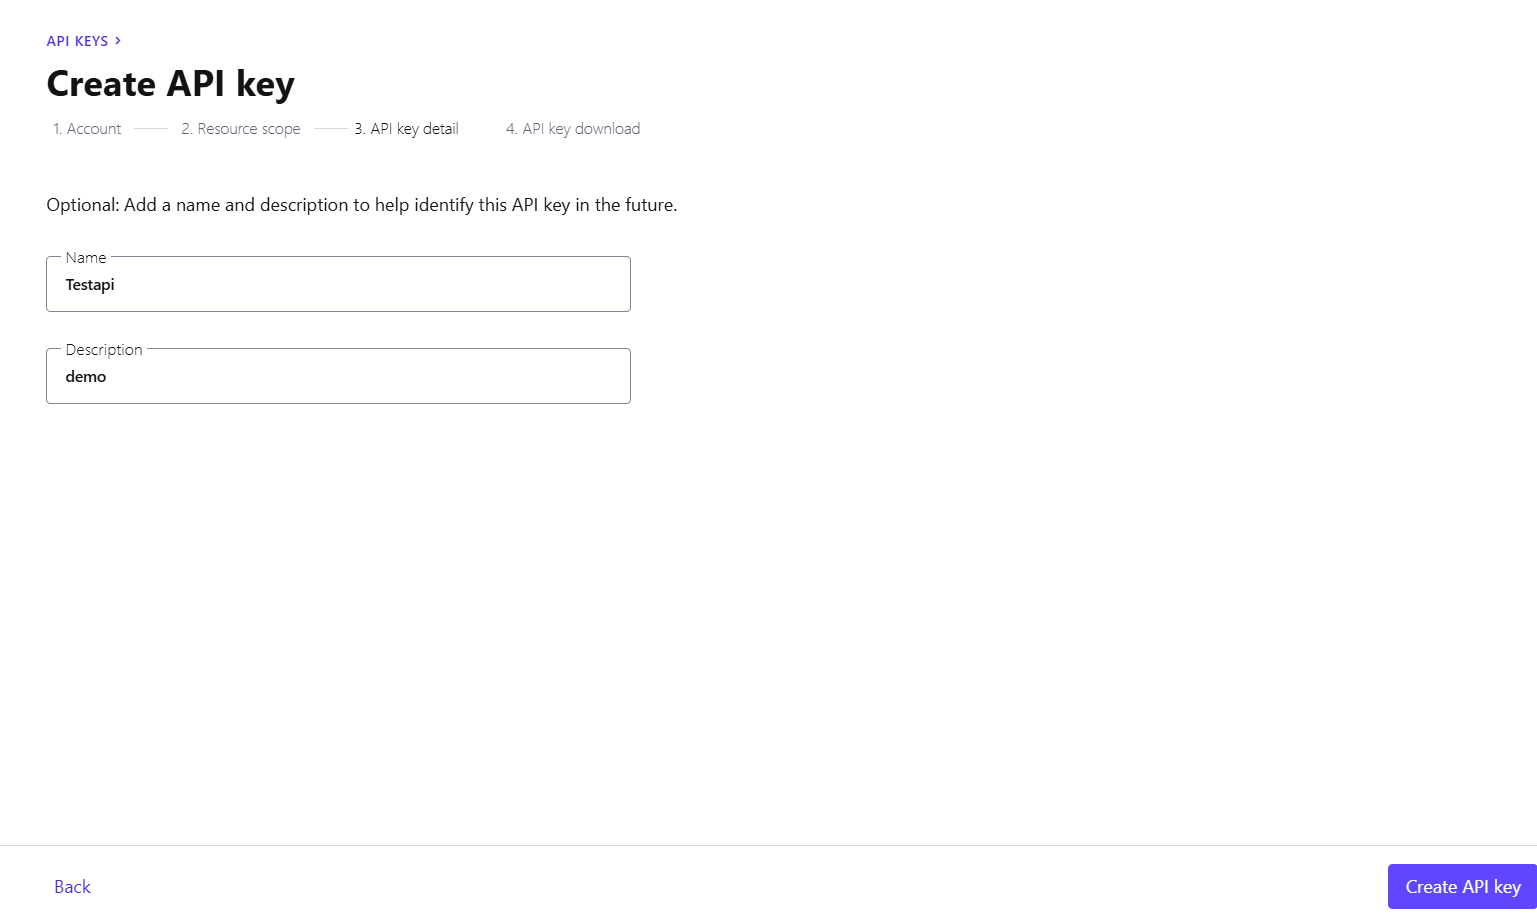
Add a name and description for the key, then click Create API key.
-
Copy the displayed key and the secret to add to Mavvrik. You can also download a copy of the API key from this screen. (Required in Step 4)
-
Click Complete
Step 2: Add the BillingAdmin Role to the Service Account
To access the Billing API, Mavvrik needs the BillingAdmin role attached to the service account (instructions provided below). The BillingAdmin role provides read/write access; however, Mavvrik will never perform write operations and will only read from the Billing API and Organizations API.
-
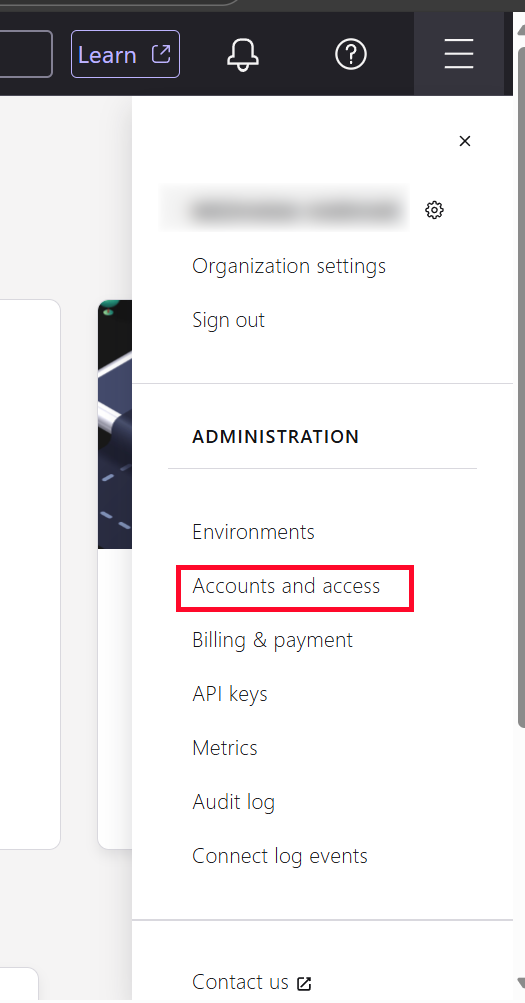
From the top hamburger menu of the Confluent Cloud console, select Accounts & access
-
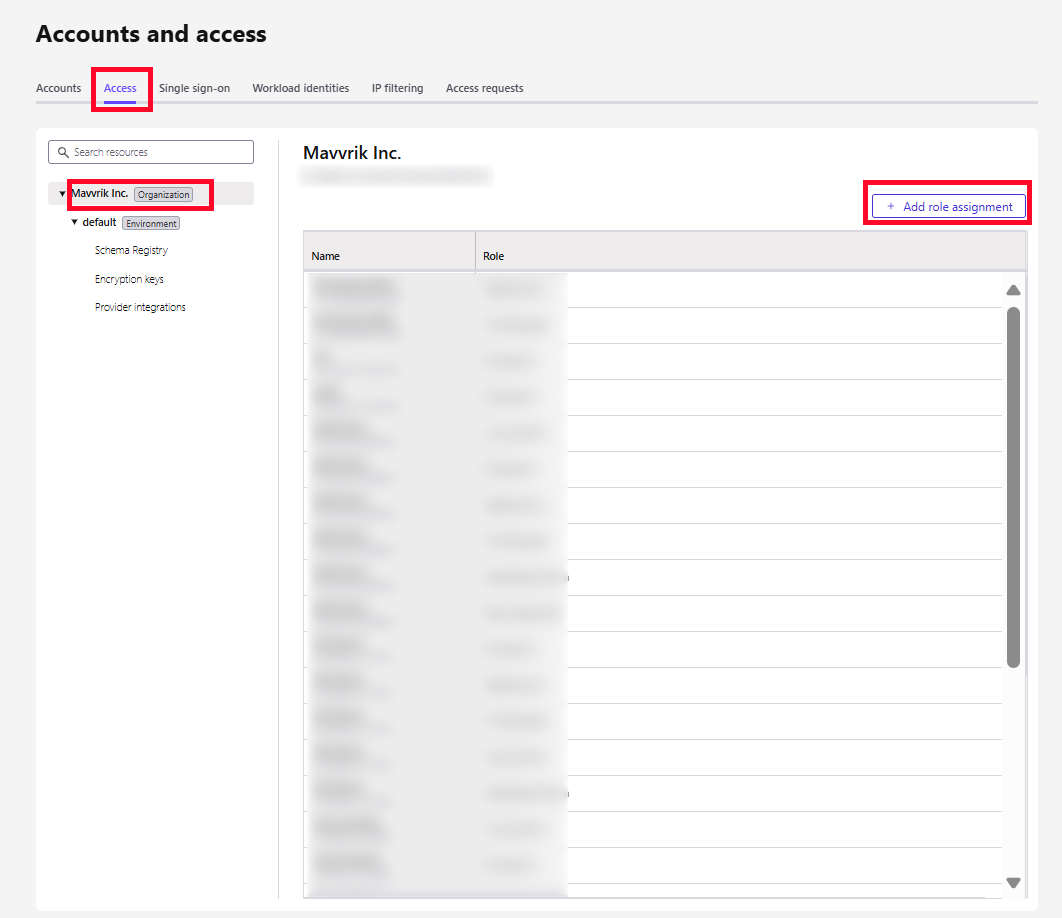
On the Accounts & access page, Go to Access tab
-
Click Organization, then click + Add role assignment
-
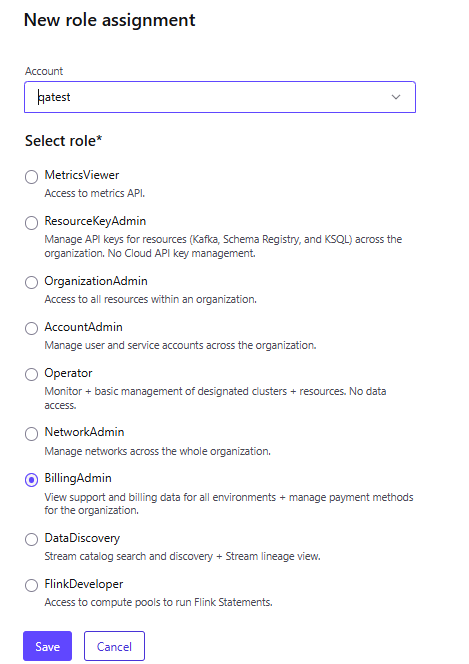
Select the Service Accounts associated with the integration API key.
-
Select the BillingAdmin role, then click Save
Step 3: Get the Organization ID
-
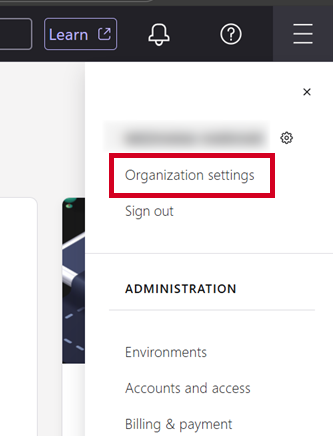
From the top right of the console, click the hamburger menu.
-
Go to Organization settings
-
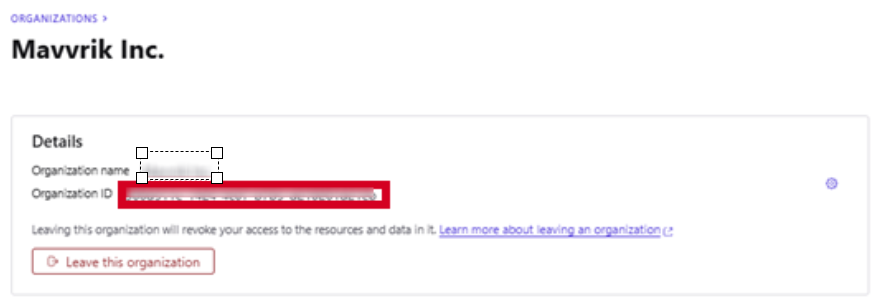
Copy the organization id
Step 4: Add the API Key to the Mavvrik Console
-
Go to Mavvrik portal and click on admin and then SaaS
-
Click on +Account and then select Confluent
-
Enter the Organization ID (Copied in Step 3 )
-
Enter the API Key ID & API Key Secret (Copied in Step 2)
-
Click Connect
Troubleshooting
-
If the account does not connect, verify the API key, secret, and organization ID entered in Mavvrik.
-
If a permission error appears, confirm that the service account has the BillingAdmin role described above.
FAQs
Does the BillingAdmin role give Mavvrik write access to my Confluent account?
The role itself supports read/write, but Mavvrik never performs write operations — it only reads from the Billing API and Organizations API.
Do I need to create a new service account for the API key?
No — you can select an existing service account or create a new one when generating the API key, whichever is easier for your setup.