.png)
Why this matters: Microsoft 365 Copilot is licensed and billed at the account level, but that total doesn't show which teams or workflows are actually driving it. Connecting your Azure billing account here brings that cost into Mavvrik's AI Assist dashboard, the same way other AI assist is tracked.
This shows up differently depending on your role:
-
FinOps managers use this to catch Copilot cost growth early, before it shows up as a surprise on the Azure invoice.
-
Engineering/IT admins are the ones who create the Entra app and assign permissions in Steps 1–3.
-
Finance leaders use this for chargeback when Copilot licenses are shared across multiple teams or departments.
The steps below will guide you through the process of Microsoft 365 Copilot onboarding from the Azure portal. Please log in to the Azure portal and follow these steps.
Prerequisites: Step 1 requires the Microsoft Entra ID Application Administrator role (noted below). You'll also need access to Cost Management + Billing with permission to assign the Billing Account Reader role, for Step 2.
Step- 1: Create Microsoft Entra ID app
To manage a Microsoft Entra ID app and create a client secret, the Microsoft Entra ID Application Administrator role is required
Steps to Create an application
-
Login to your Azure environment where billing account exists
-
Click on Menu
-
Search for App Registration
-
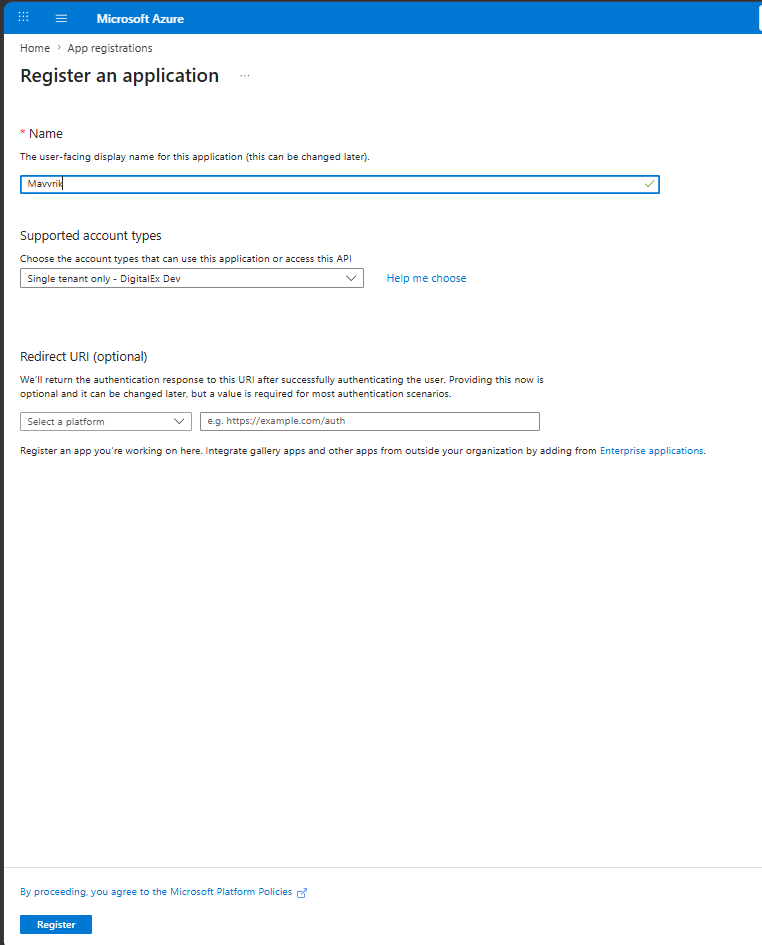
Enter app name and keep the other options as default and click Register
-
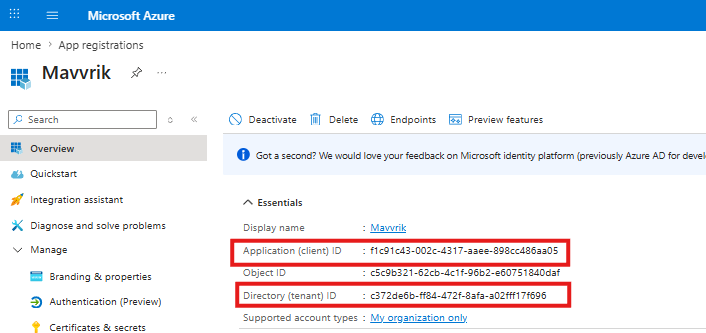
After app is created, you would land on app Overview page, capture following details from this page, Directory (tenant) ID and Application (client) ID
-
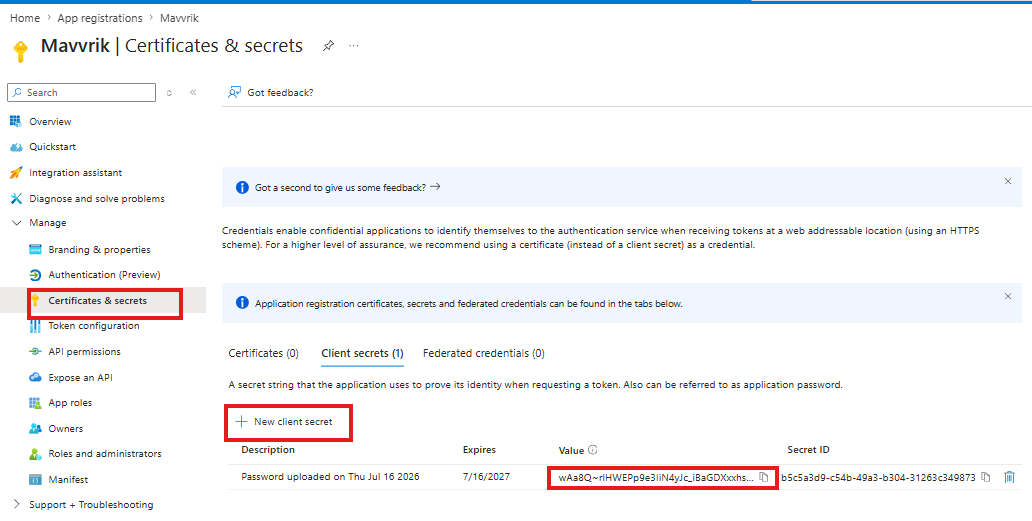
Navigate to Certificates & secrets > New client secret and create a secret. After creation is successful, capture data under Value field
-
By end of this step, you would have captured following information.
-
Directory (tenant) ID
-
Application (client) ID
-
Secret Value
-
Ownership note: the client secret is tied to this Entra app, not to any one person's individual login — but whoever created it is typically the one notified before it expires. Make sure that notification doesn't go to an inbox nobody checks, and document who's responsible for rotating it before expiry.
Step- 2: Assign permissions to the app
In this step, we will assign the Billing Account Reader permission to the app created in Step 1. This role grants read access to account information and cost reports. It's important to note that the Billing Account Reader role DOES NOT provide any WRITE permissions to Mavvrik platform.
Why this matters: Mavvrik only ever needs read access to generate cost data and recommendations — it never writes to your Azure account. Granting a read-only role like Billing Account Reader (rather than something broader) keeps the integration's blast radius limited if credentials were ever compromised.
Procedure in this step is also documented by Azure here : assign-roles-azure-service-principals.
-
If you choose to onboard the billing scope you must add the Billing Account Reader role
Steps to Assign Billing Account Reader
-
Click on Menu
-
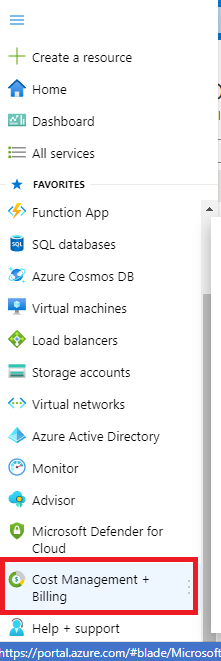
Go to Cost Management + Billing
-
Click on Access Control (IAM)
-
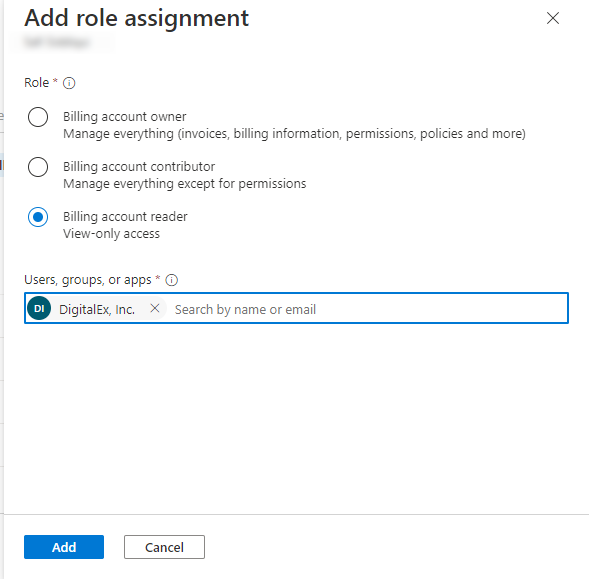
Click on Add (Add role assignment page will get opened)
-
Select the Billing account reader (Select based on your scope mentioned in the above note)
-
Search the App created in Step 1
-
Click on Add Button
Steps to Assign License Assignment & User permission
-
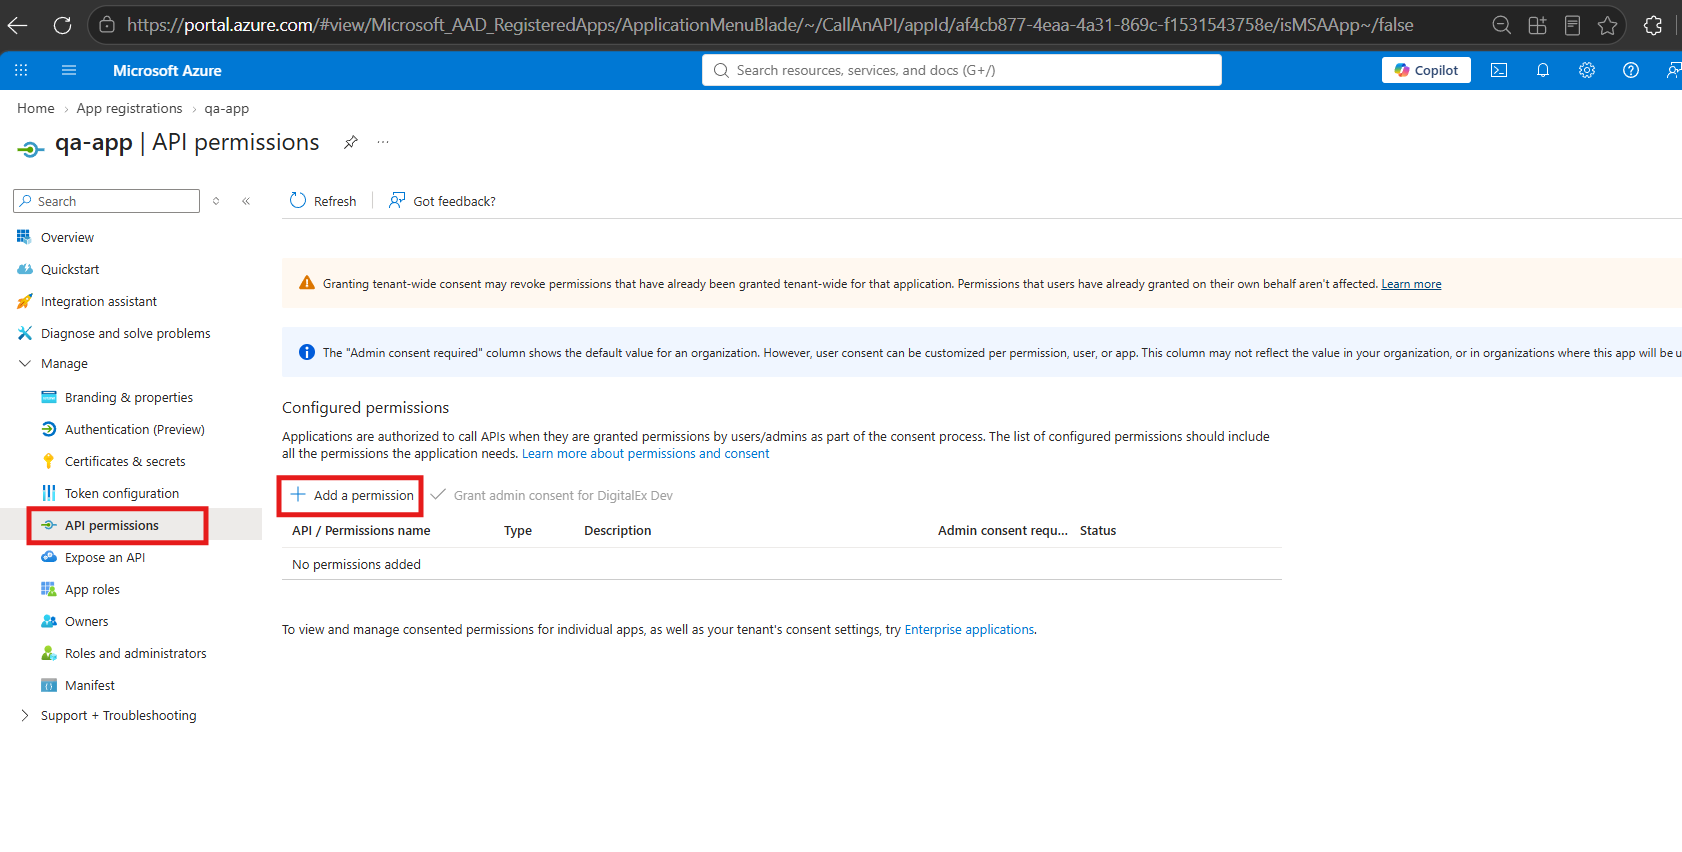
Go to the created application in step 1
-
Click on API permissions -> Add a permission
-
Search listed permissions & Add
-
LicenseAssignment.Read.All
-
User.Read.All
-
-
Click on Add Permissions
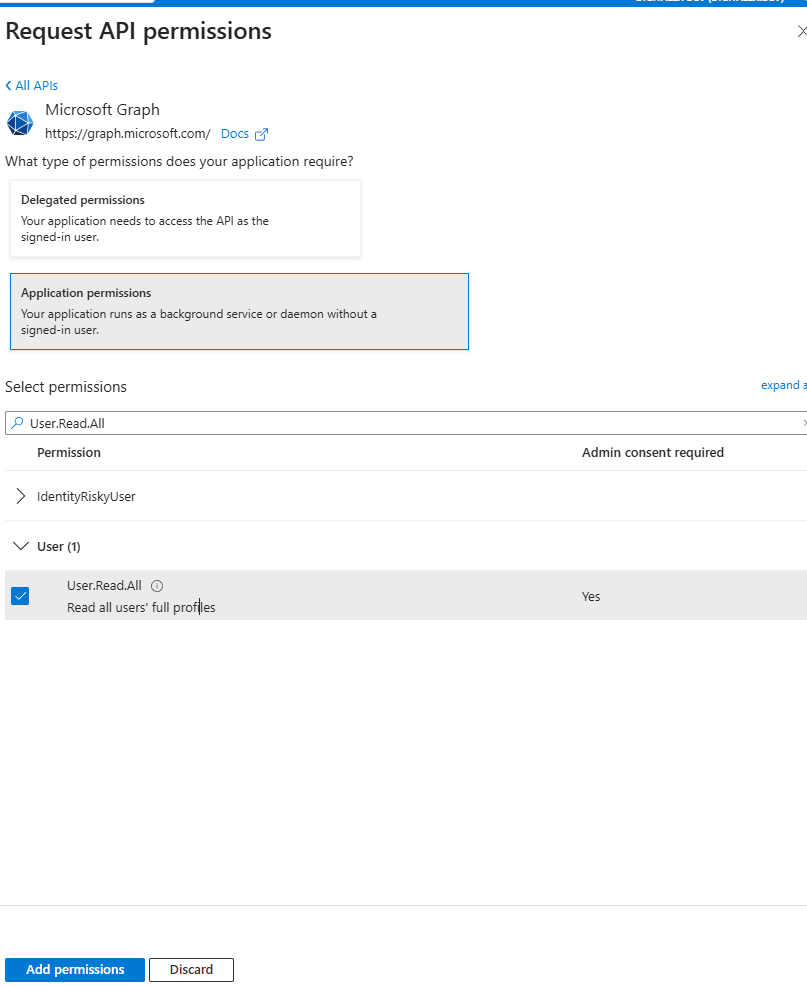
What this actually does: LicenseAssignment.Read.All and User.Read.All let Mavvrik read which users hold a Copilot license and their basic account details — this is what powers per-user cost attribution in the GenAI dashboard. Neither permission grants any write access.
Step- 3: Retrieve Account ID
Steps to Retrieve Account ID:
-
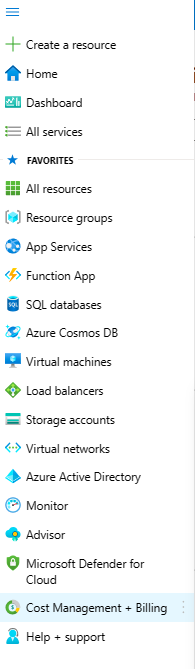
Click on Menu
-
Click on Cost Management + Billing.
-
Click on Properties
-
Copy the Account ID
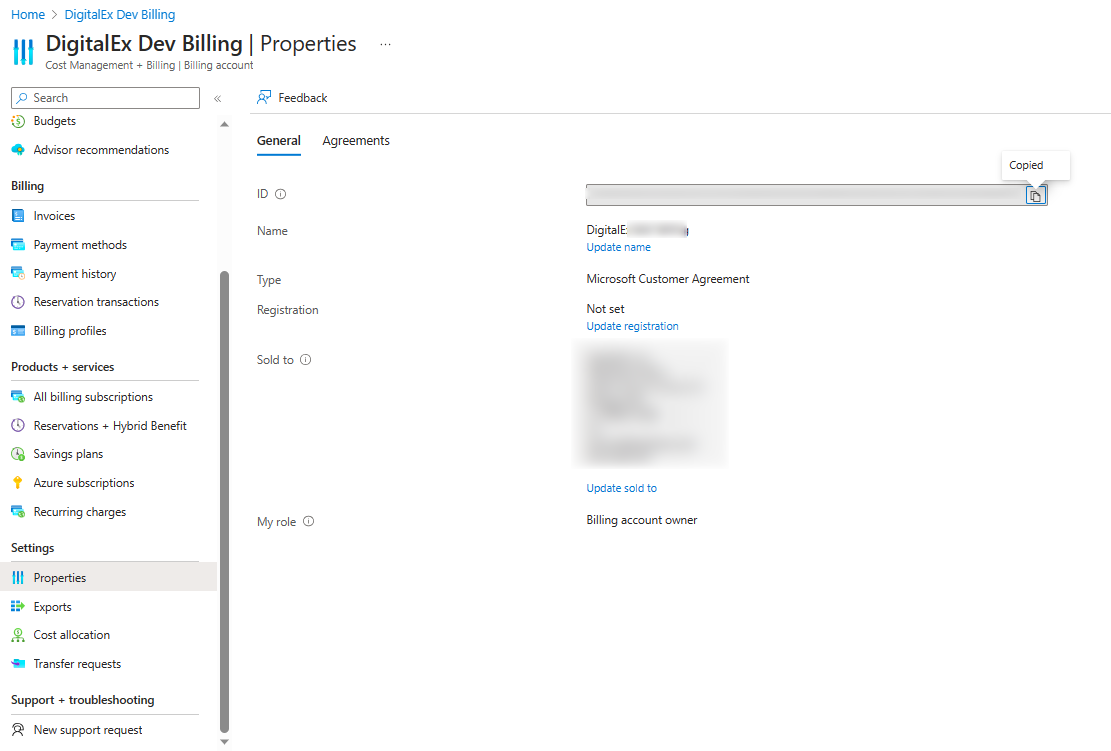
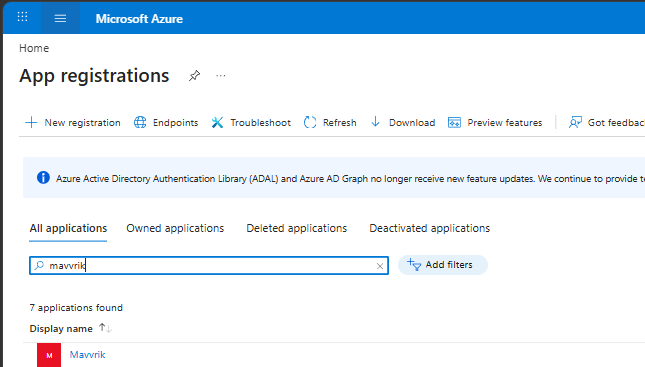
Steps to Retrieve Tenant ID:
-
Click on Menu
-
Search for App Registration
-
Click on your application
-
Copy the Application Client id & Tenant id
-
Client Secret is already copied in Step-1: Create Microsoft Entra ID app
Make sure to record all of the details that are retrieved, as they will be needed for the manual creation of a billing account.
Step- 4: Connect Billing Account
-
Go to the Menu
-
Click on Admin → Accounts → GenAI Accounts
-
Click the + Account button
-
Select M365 Copilot
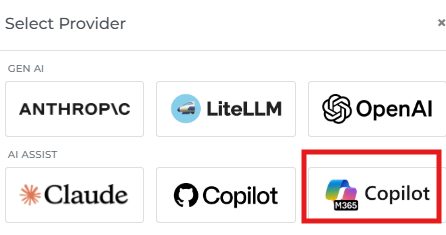
-
Select the Account Type
-
Fill in the following details captured in Step 1
-
Billing Account ID
-
Tenant ID
-
Client ID
-
Client Secret
-
Click Connect
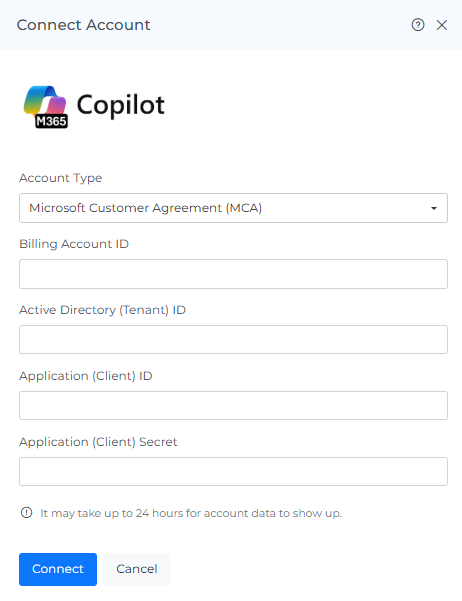
After onboarding is completed, allow up to 24 hours for data ingestion. Once ingestion is complete, cost will be visible under GenAI > Assistants > Cost.
Troubleshooting
-
If the account does not connect, verify the Billing Account ID, Tenant ID, Client ID, and Client Secret entered in Mavvrik.
-
If a permission error appears, confirm the app has been assigned the Billing Account Reader role and the LicenseAssignment.Read.All / User.Read.All API permissions described above.
FAQs
Does the Billing Account Reader role give Mavvrik write access to my Azure account?
No — it only grants read access to account information and cost reports. Mavvrik never writes to your Azure account.
Why does Mavvrik need LicenseAssignment.Read.All and User.Read.All?
These let Mavvrik read which users hold a Copilot license, which is what enables per-user cost attribution in the GenAI dashboard.