.png)
Mavvrik supports both types of AWS authentications
Role-based access is generally considered to be more secure than user-based access, as it allows organizations to control access to resources and functions based on defined roles and responsibilities. We recommend using roles over individual users
Roles
-
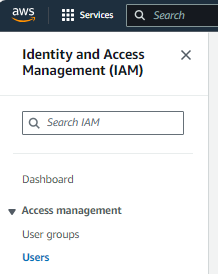
Login to AWS Member account you’re trying to onboard as an Administrator if not already logged in. And navigate to
IAMservice using AWS search bar. -
On a
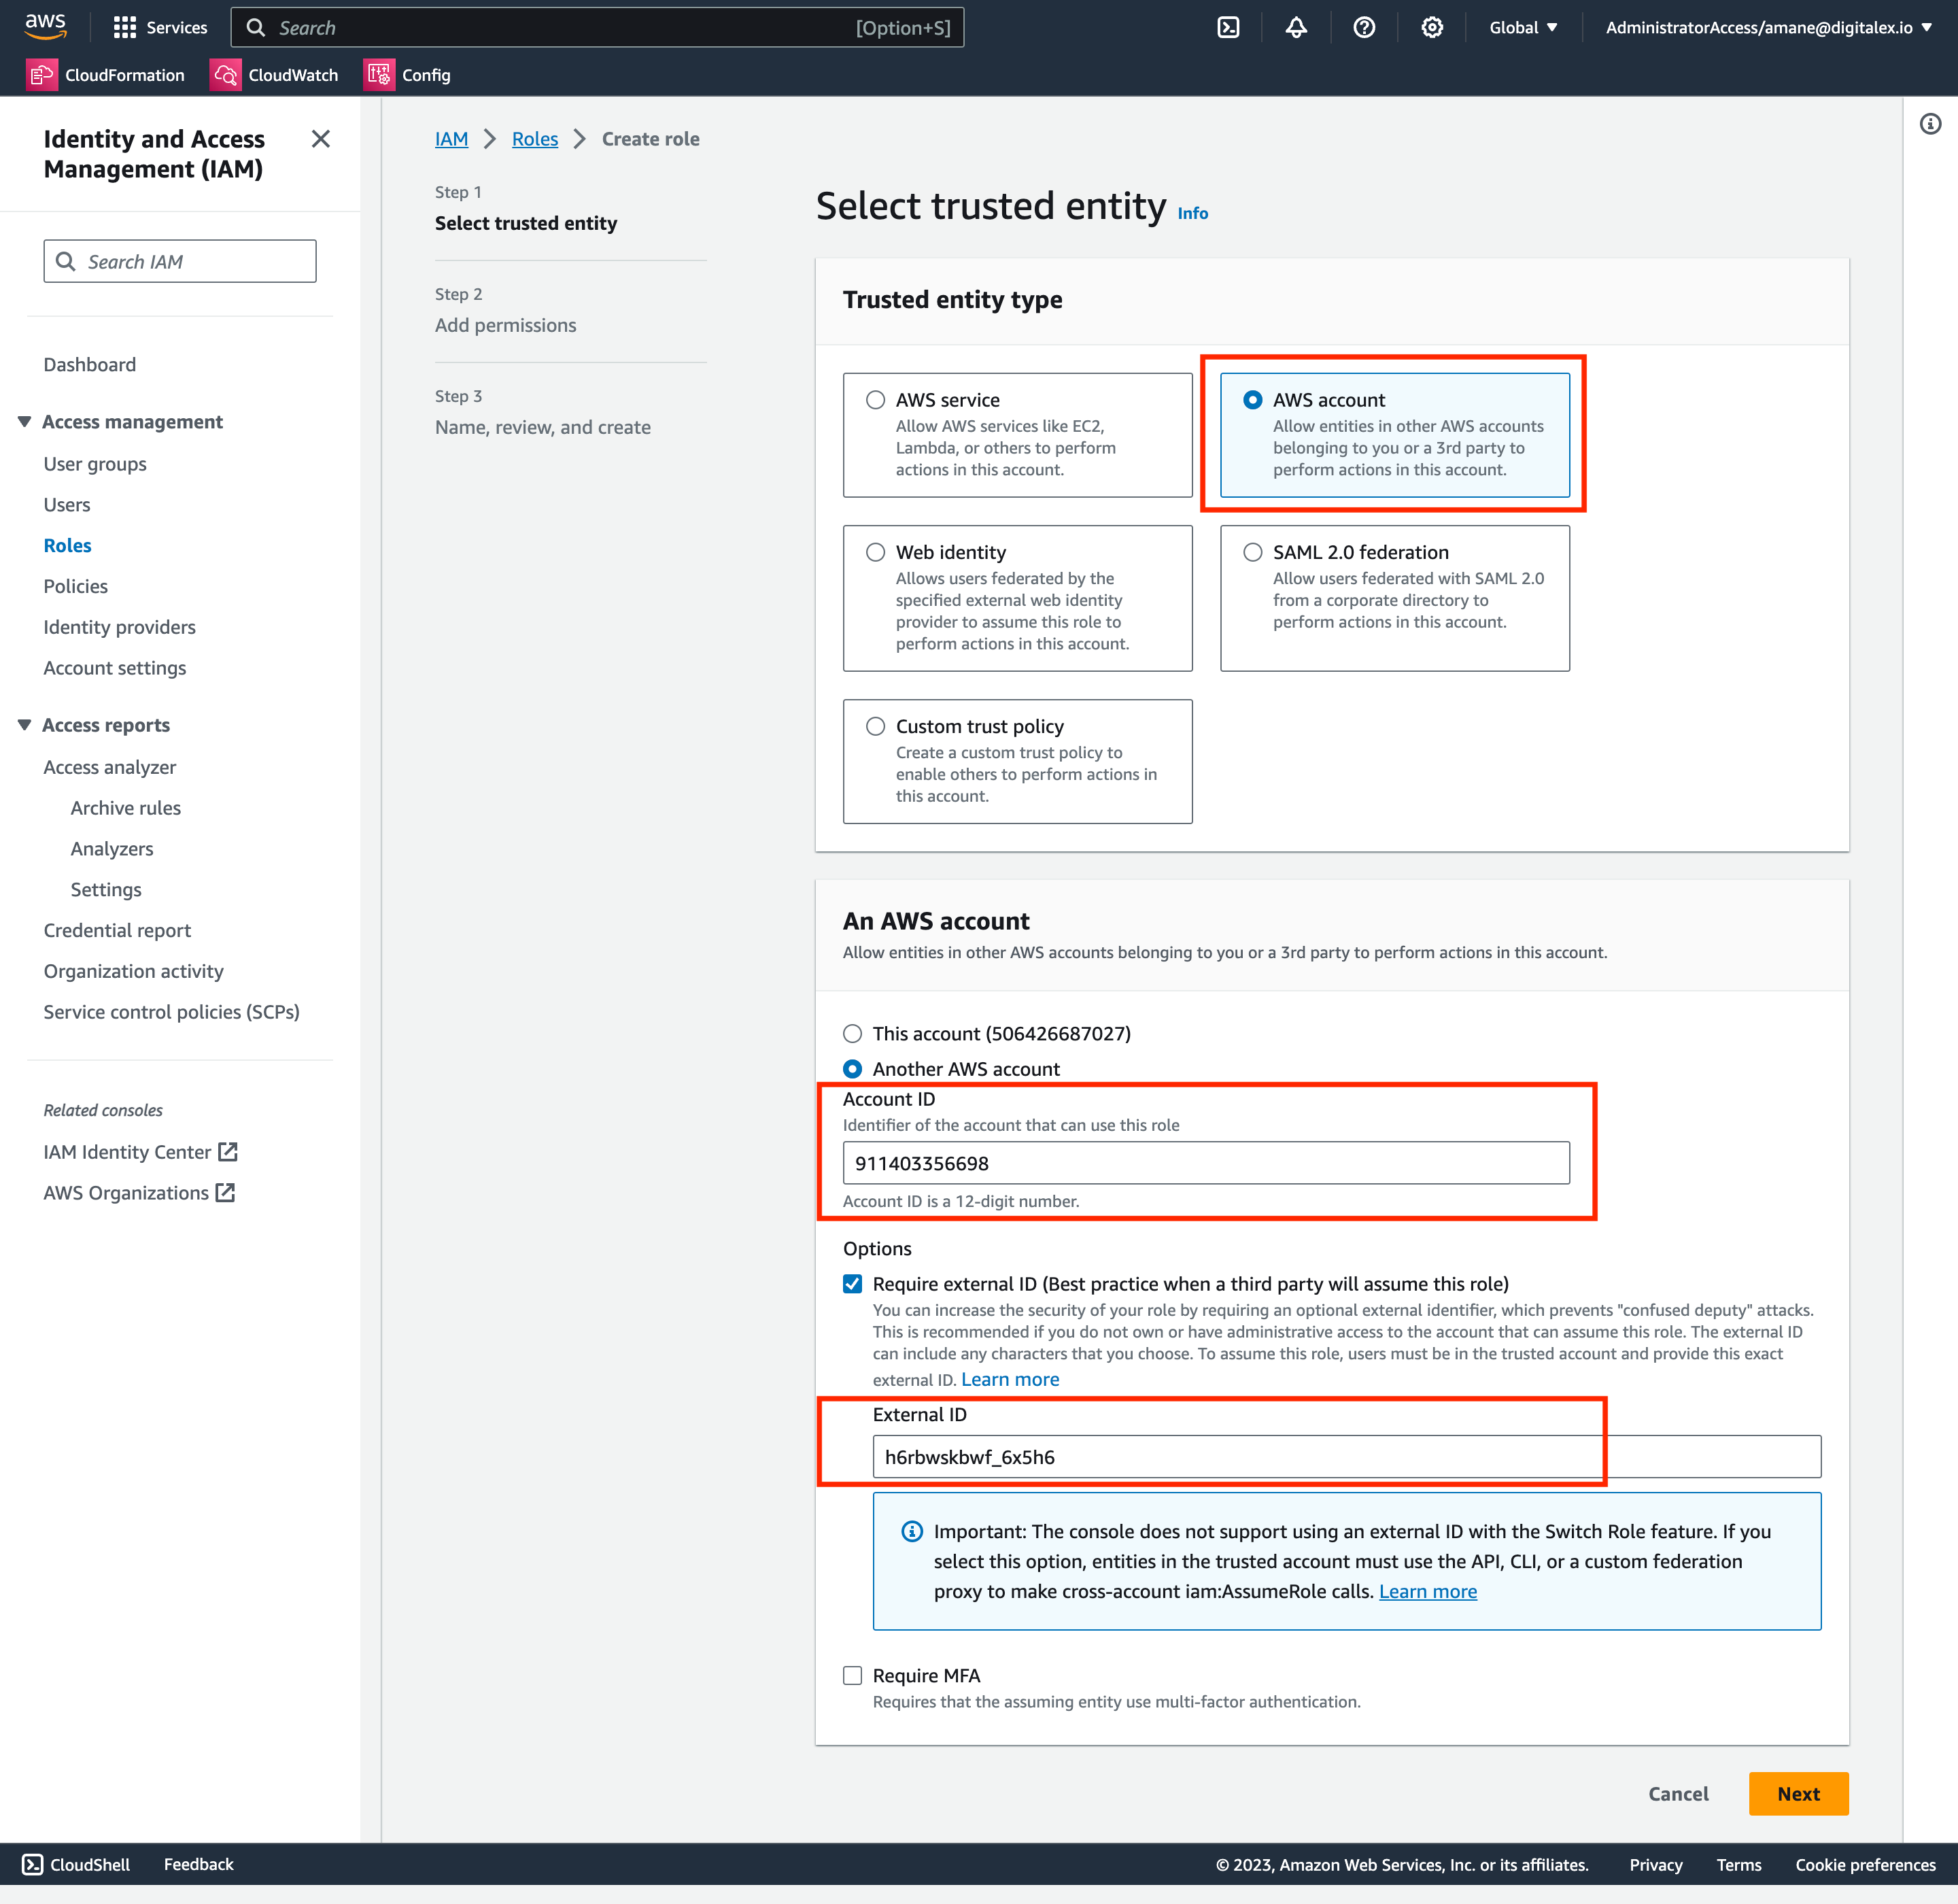
IAMConsole, SelectRolesfrom the left menu, and clickCreate role. One the create role screen please select the configuration as follows
a. Trusted entity type: AWS Account
b. An AWS account: Choose Another AWS account and fill in the account number as 911403356698
c. External ID: In this field, please put the Tenant ID for your Mavvrik account. To get the tenant id follow instructions outlined in this page Retrieve the Tenant Id
d. Click Next
-
Click
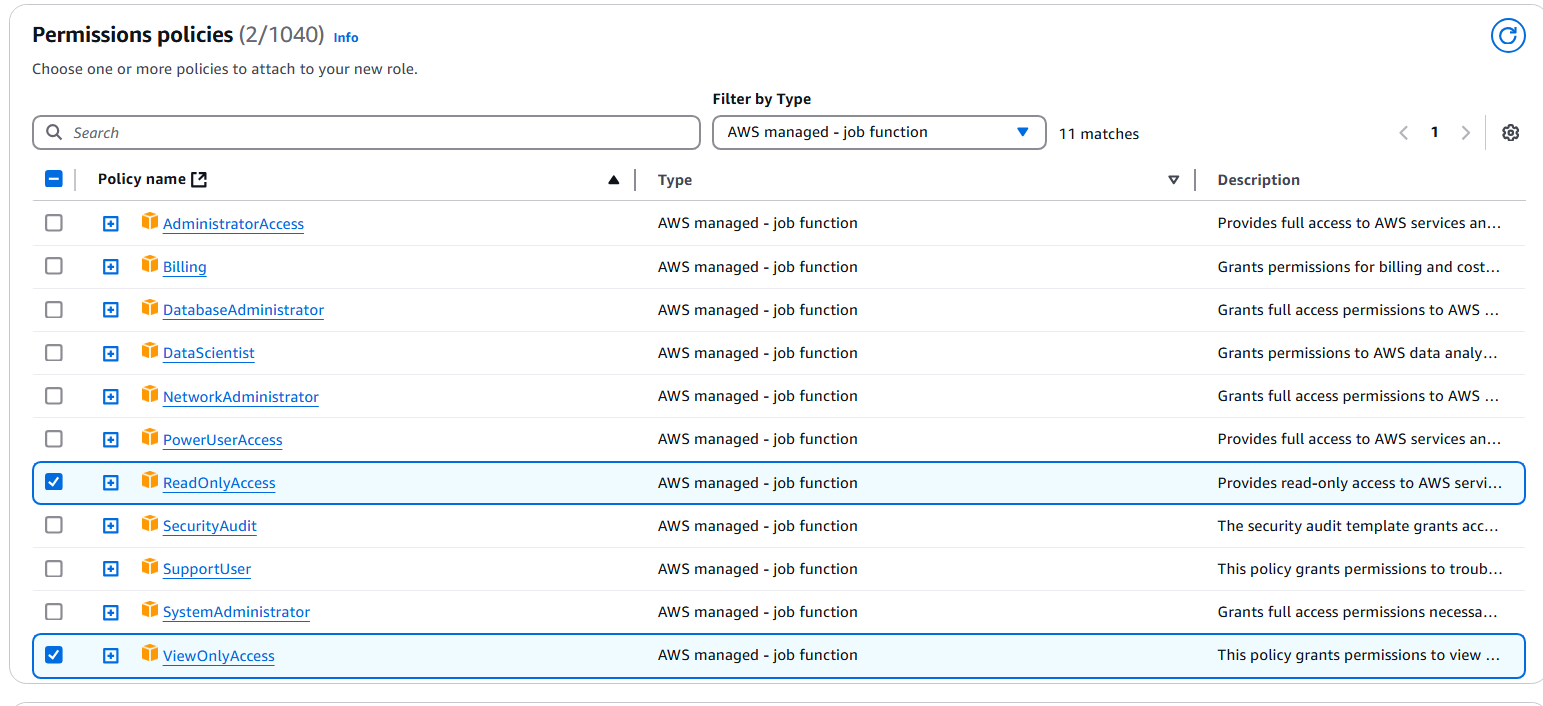
Next, on next screen for permissions, Choose 'AWS Managed - job function' in the filter . Search and select the listed policies below.
-
ReadOnlyAccess -
ViewOnlyAccess
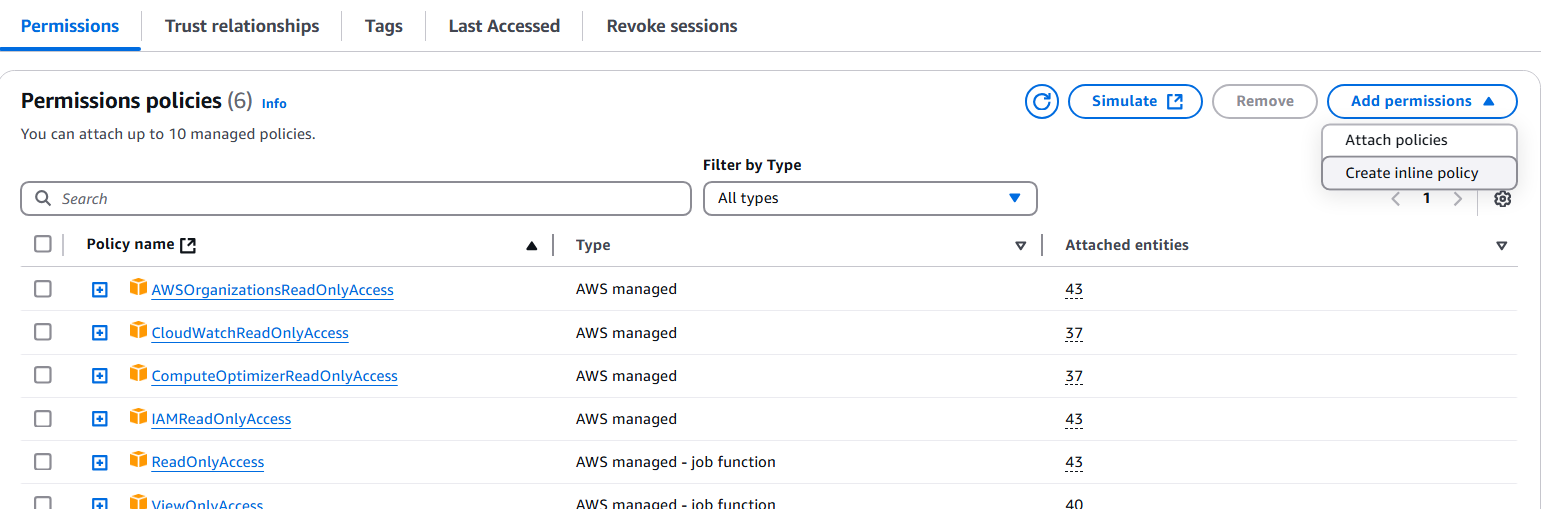
Choose ‘AWS Managed in the filter. Search and select the listed policies below.
-
IAMReadOnlyAccess -
CloudWatchReadOnlyAccess -
ComputeOptimizerReadOnlyAccess -
AWSOrganizationsReadOnlyAccess
or use the policy Step-2: Create an IAM role for Mavvrik | OR use below permissions and create a inline policy for the newly created role if you don’t wish to use IAMReadOnlyAccess
-
Click
Nextagain & on a final page, enter a name to the role & clickCreate role -
Search for the newly created role
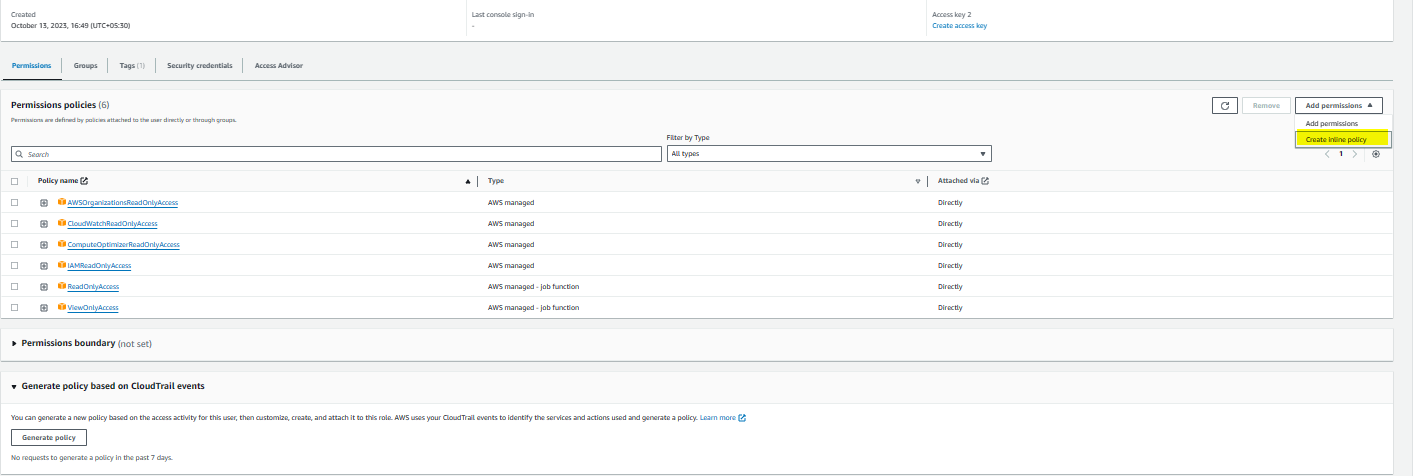
-
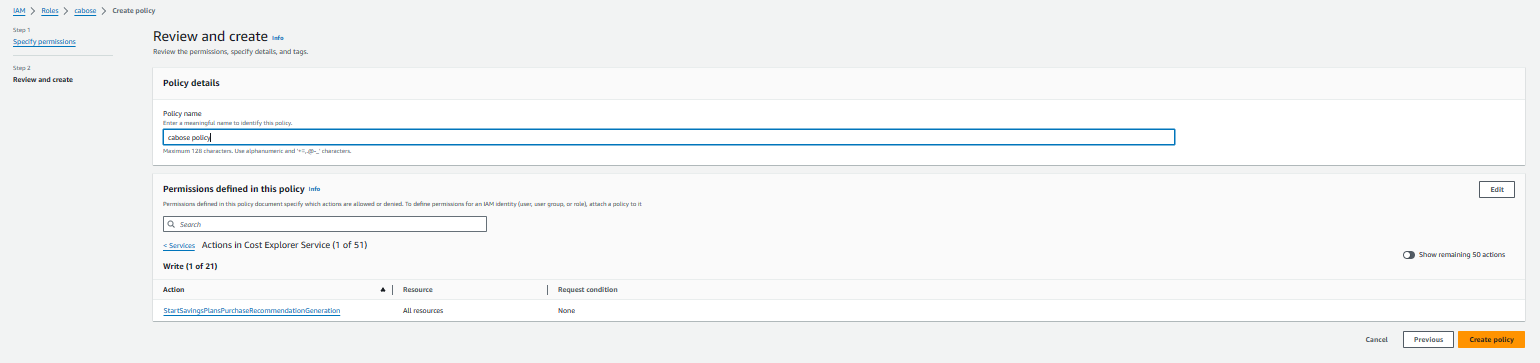
Click on Add permissions → Create inline policy.
-
Search for Cost Explorer Service
-
Click on Write → StartSavingsPlansPurchaseRecommendationGeneration →
Next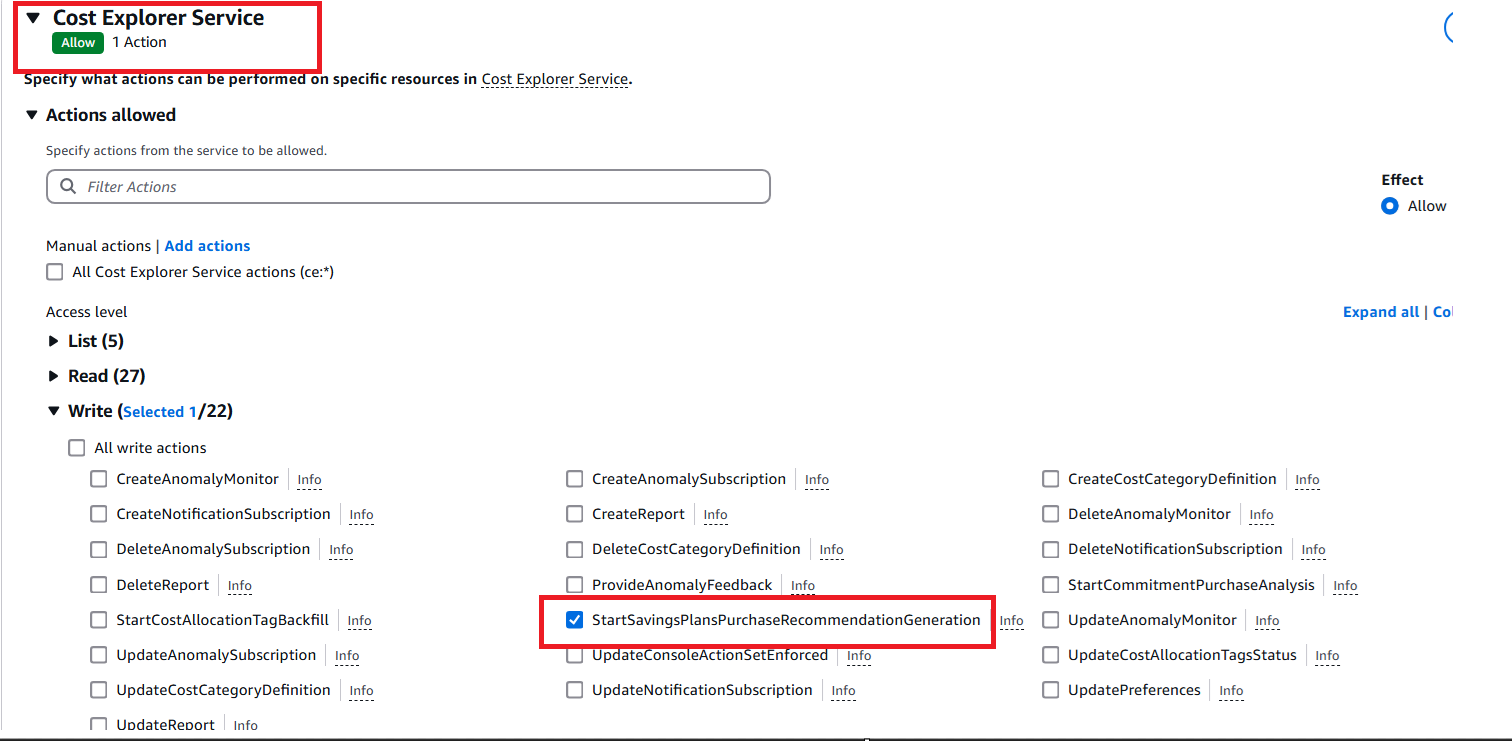
-
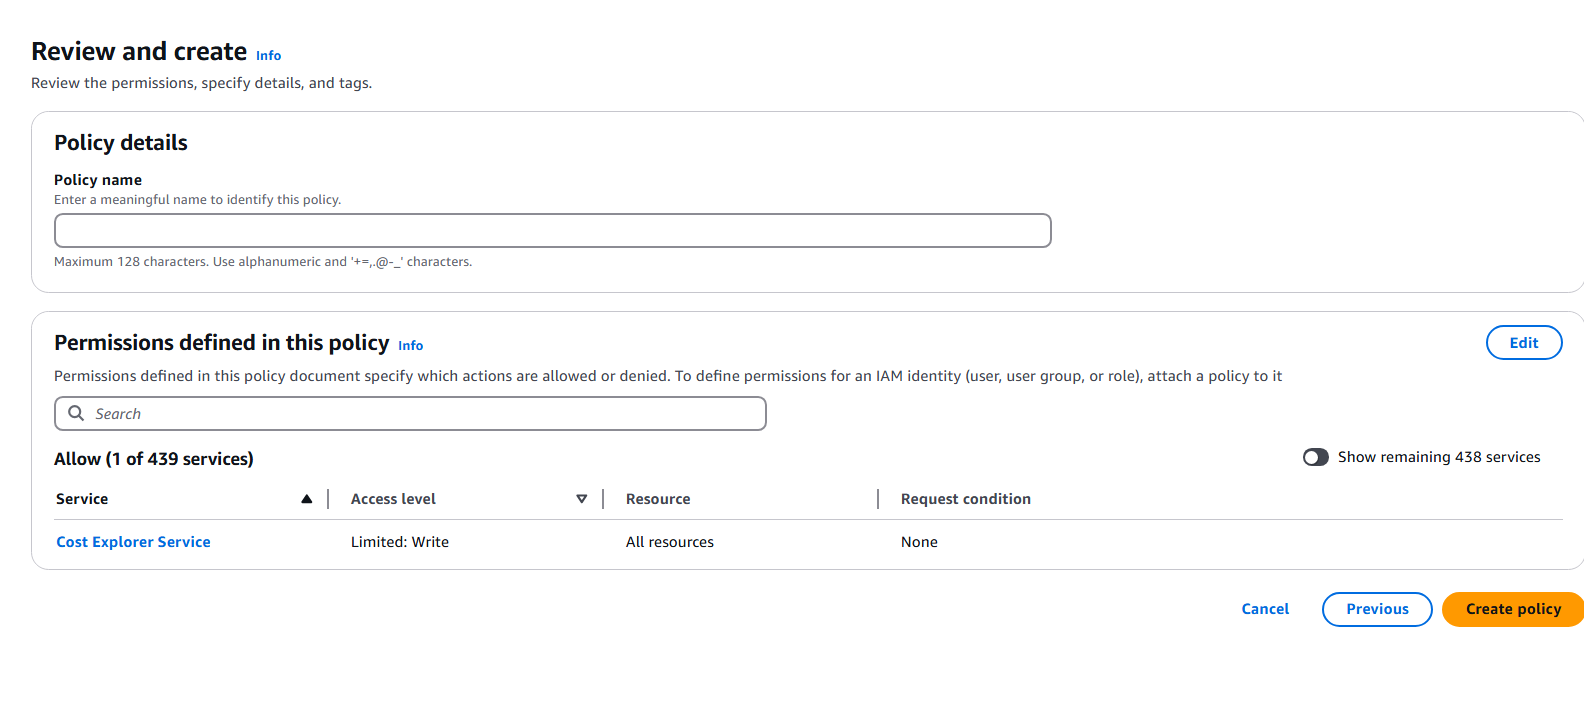
Enter the policy name.
-
Click on
Create policy.
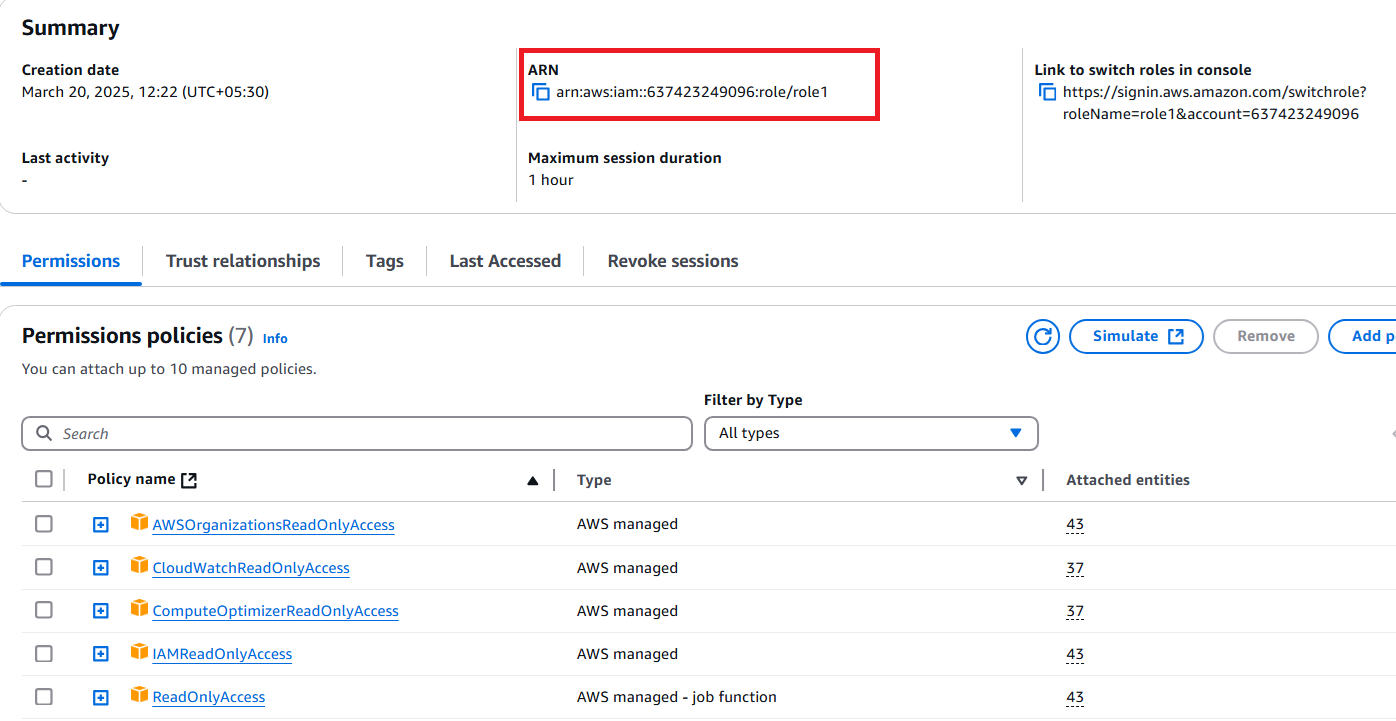
-
Once the role is created, please note the ARN of a role, which will be required in the next step.
OR use below permissions and create a inline policy for the newly created role
ReadOnlyAccess
ViewOnlyAccess
CloudWatchReadOnlyAccess
ComputeOptimizerReadOnlyAccess
AWSOrganizationsReadOnlyAccess
{
    "Version": "2012-10-17",
    "Statement": [
        {
            "Sid": "AllowIAMReadOnlyActions",
            "Effect": "Allow",
            "Action": [
                "iam:SimulatePrincipalPolicy",
                "iam:GetAccountSummary"
            ],
            "Resource": "arn:aws:iam::<ACCOUNT_ID>:role/<ROLE_NAME>"
        },
        {
            "Sid": "DenyAllOtherIAMActions",
            "Effect": "Deny",
            "NotAction": [
                "iam:SimulatePrincipalPolicy",
                "iam:GetAccountSummary"
            ],
            "Resource": "arn:*:iam::*:*"
        }
    ]
}
Users
-
Login to AWS Member account you’re trying to onboard as an Administrator if not already logged in. And navigate to
IAMservice using AWS search bar. -
On a
IAMConsole, SelectUsersfrom the left menu
-
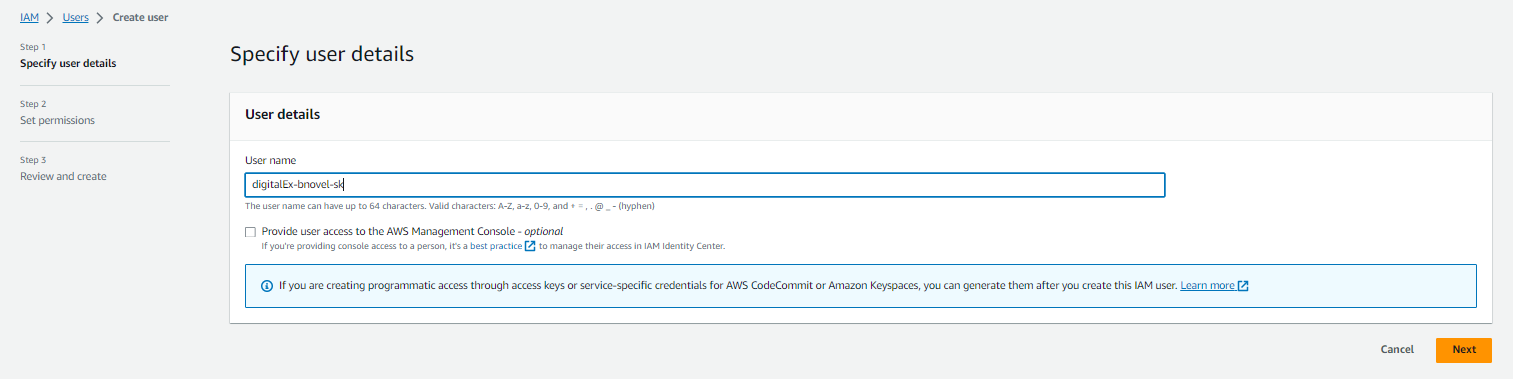
Click on Create User

-
Enter the Username & click Next.
-
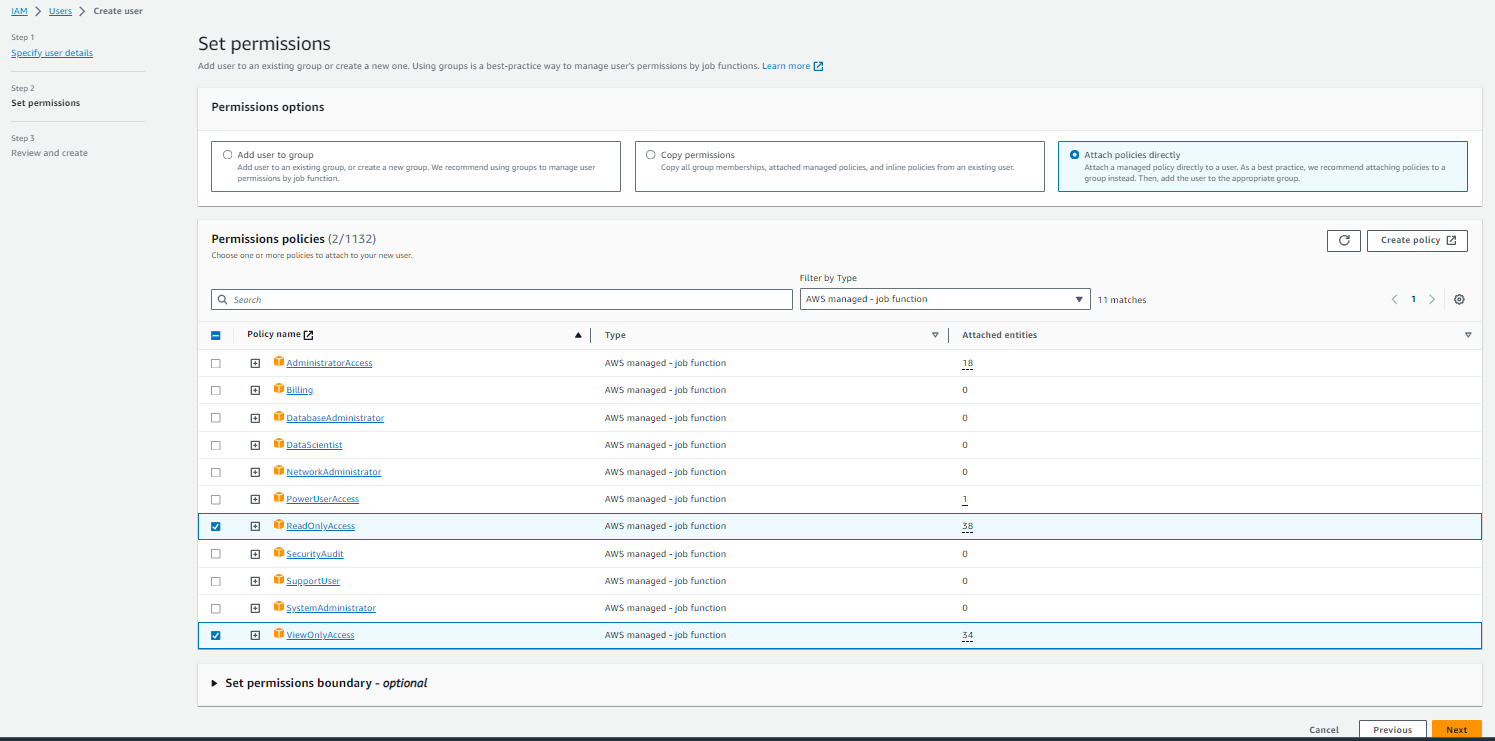
Select Attach policies directly, on next screen for permissions, please choose 'All Types' in the filter and select the listed policies below.
-
ReadOnlyAccess -
ViewOnlyAccess -
IAMReadOnlyAccess -
CloudWatchReadOnlyAccess -
ComputeOptimizerReadOnlyAccess -
AWSOrganizationsReadOnlyAccess
or you can use below policies
ViewOnlyAccess
CloudWatchReadOnlyAccess
ComputeOptimizerReadOnlyAccess
AWSOrganizationsReadOnlyAccess
-
Click
Nextagain & on a final page, give a name to the role & clickCreate user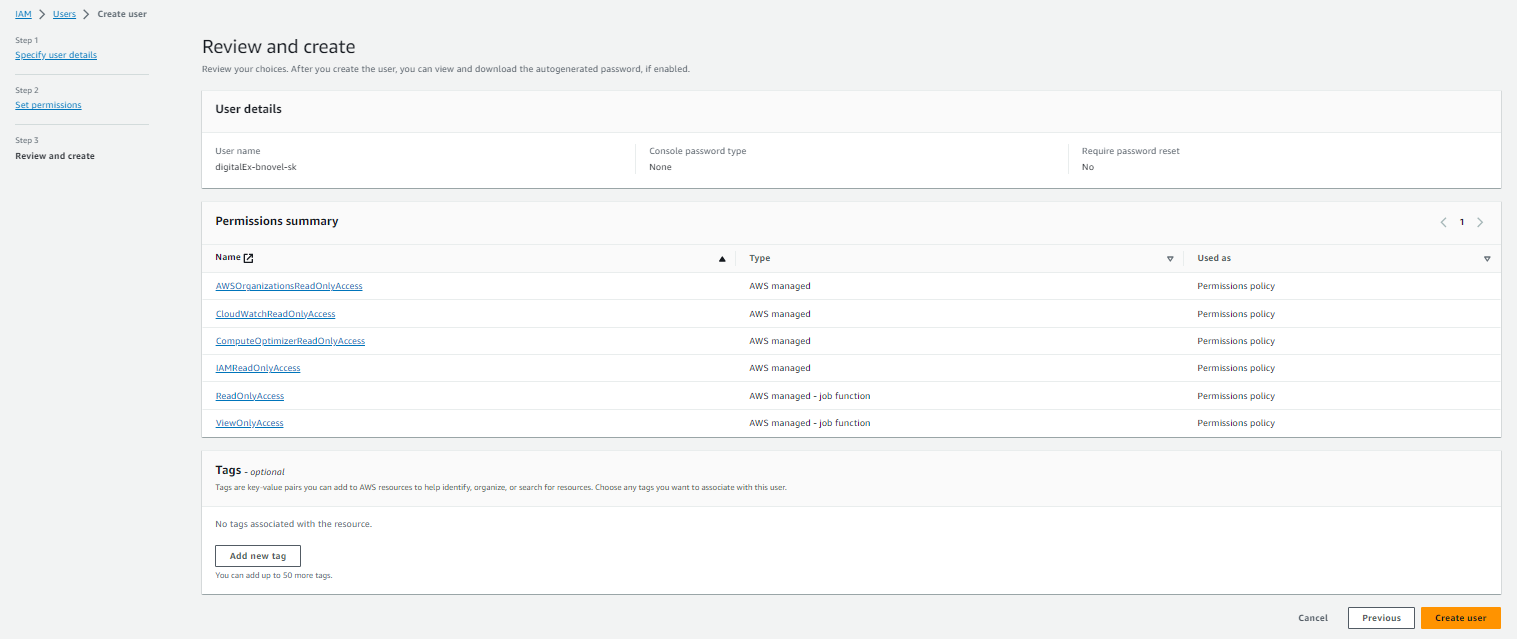
-
Once the user is created, please click on the user to create a Secret Key
-
Go to Security Credentials tab & Click on Create Access Key
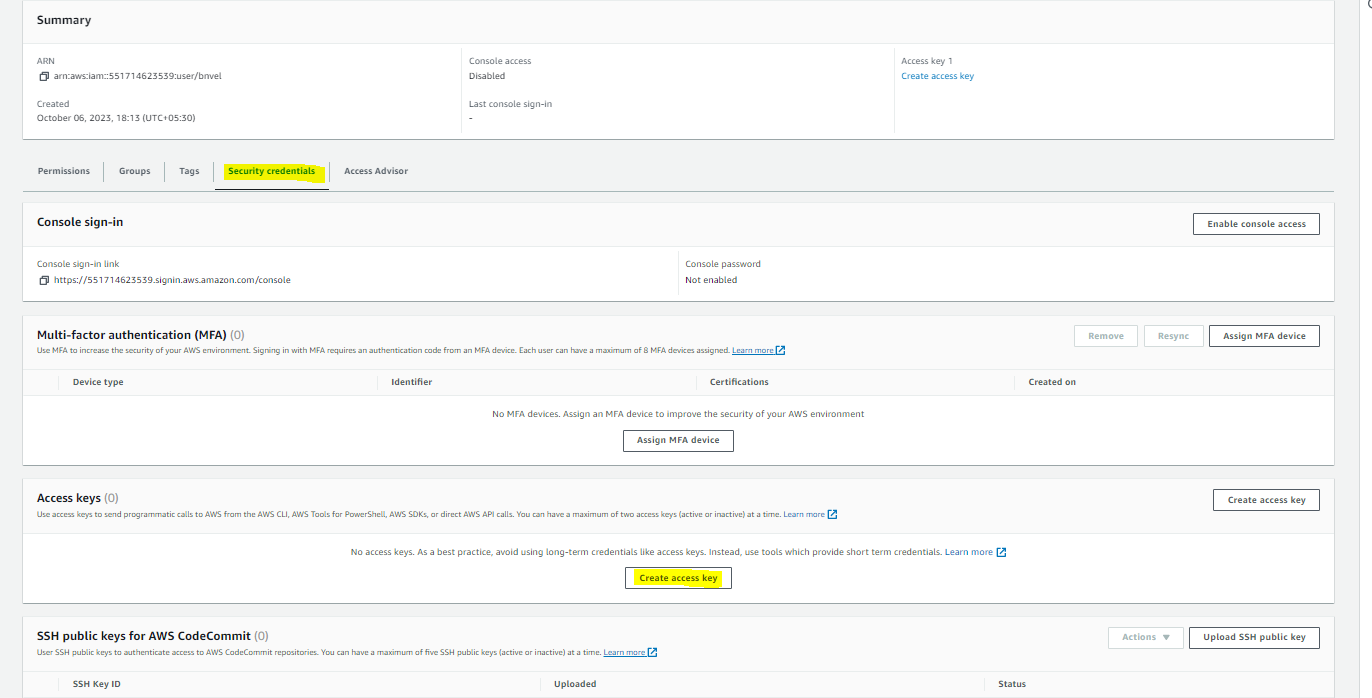
-
Select Application running outside AWS & Click on Next
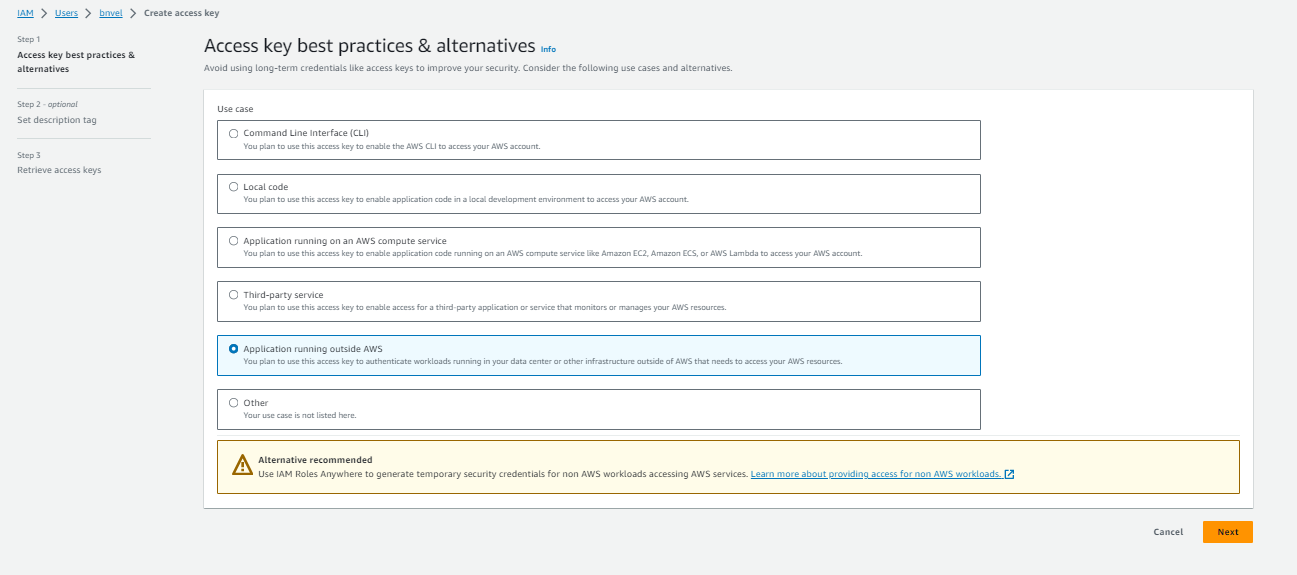
-
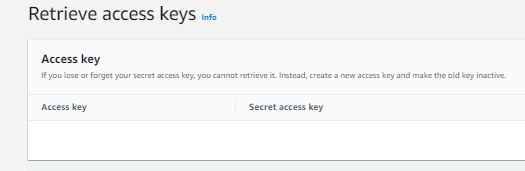
Click on Create access key.

-
Secret Key will get generated.
-
Copy the Access Key & Secret Key which will be required in the next step.
-
Open newly created user
-
Click on Add permissions → Create inline policy.
-
Search for Cost Explorer Service
-
Click on Write → StartSavingsPlansPurchaseRecommendationGeneration →
Next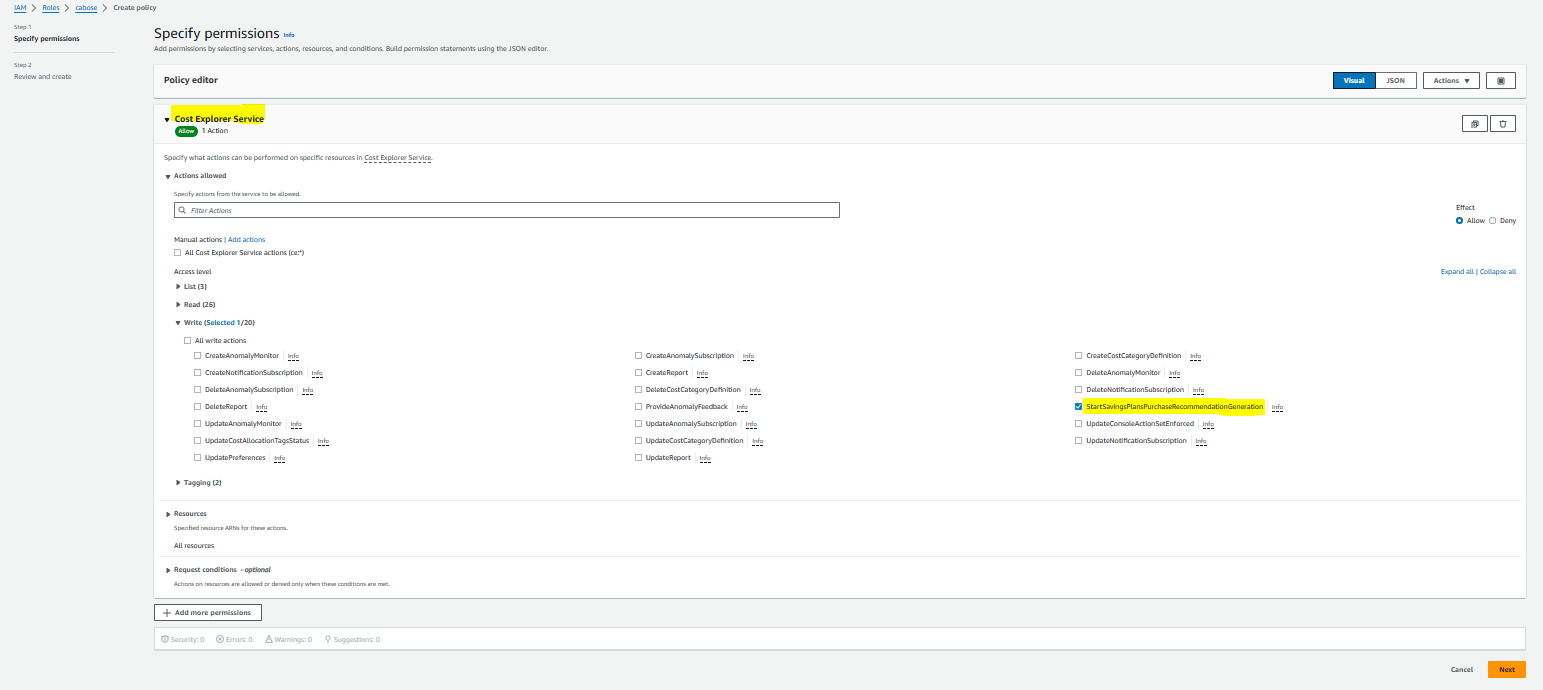
-
Enter the policy name.
-
Click on
Create policy.