.png)
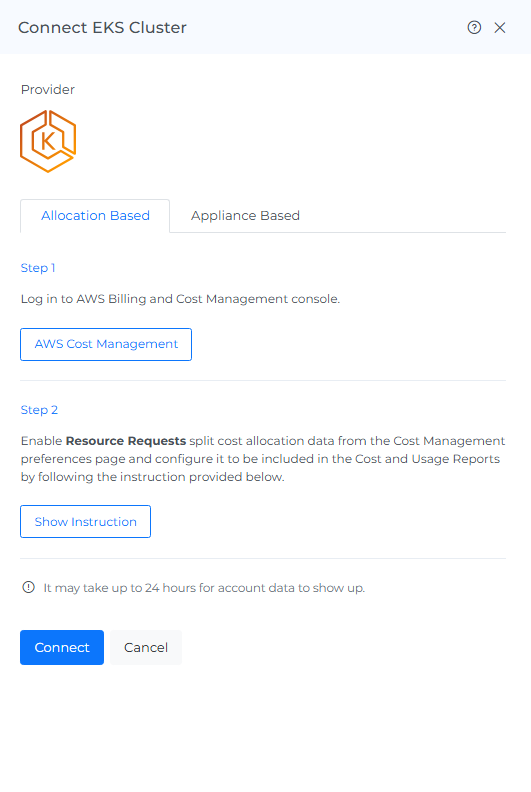
Mavvrik supports three ways to connect an EKS cluster, as shown in the Connect EKS Cluster screen:
-
Allocation-Based – recommended when you want quick onboarding and cost allocation visibility without deep cluster telemetry.
-
Appliance-Based – recommended when you need deeper telemetry and more detailed Kubernetes insights.
-
Auto-discover and connect — recommended when you want to connect clusters that are created frequently
Steps to onboard the EKS cluster(Appliance based)
Before onboarding your EKS account, you must have the admin rights on the cluster that you want to onboard and follow the steps below
Step 1: Enable Cost Allocation Tags
-
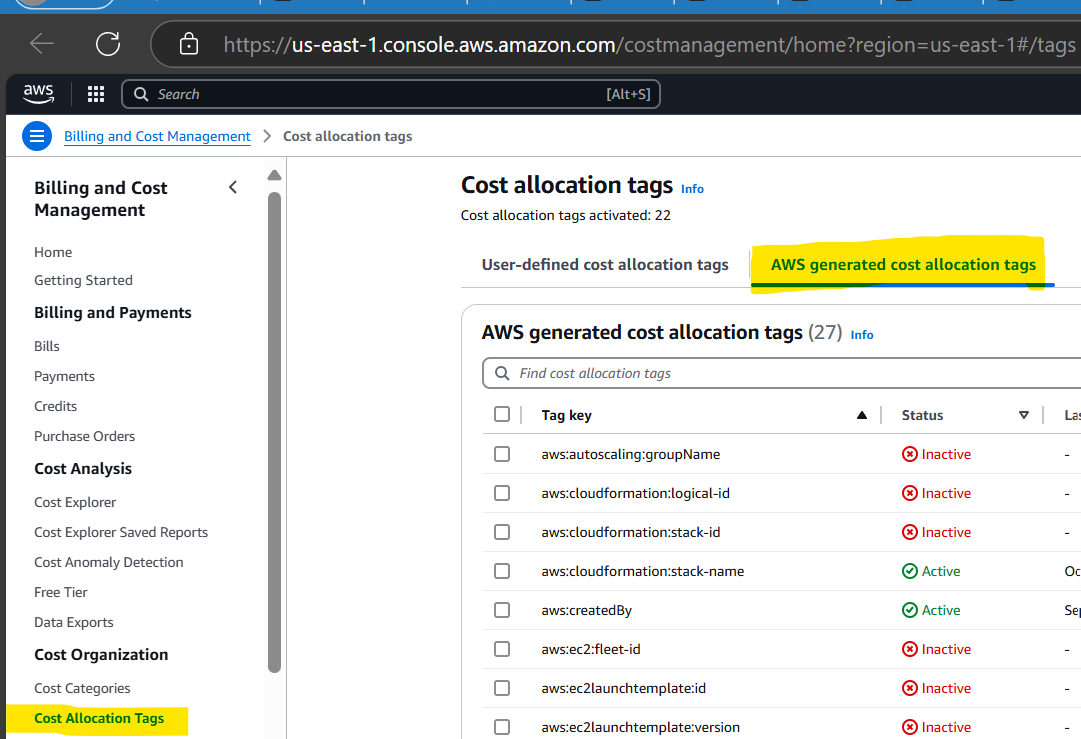
Access the AWS Portal, then search for and select Billing and Cost Management.

-
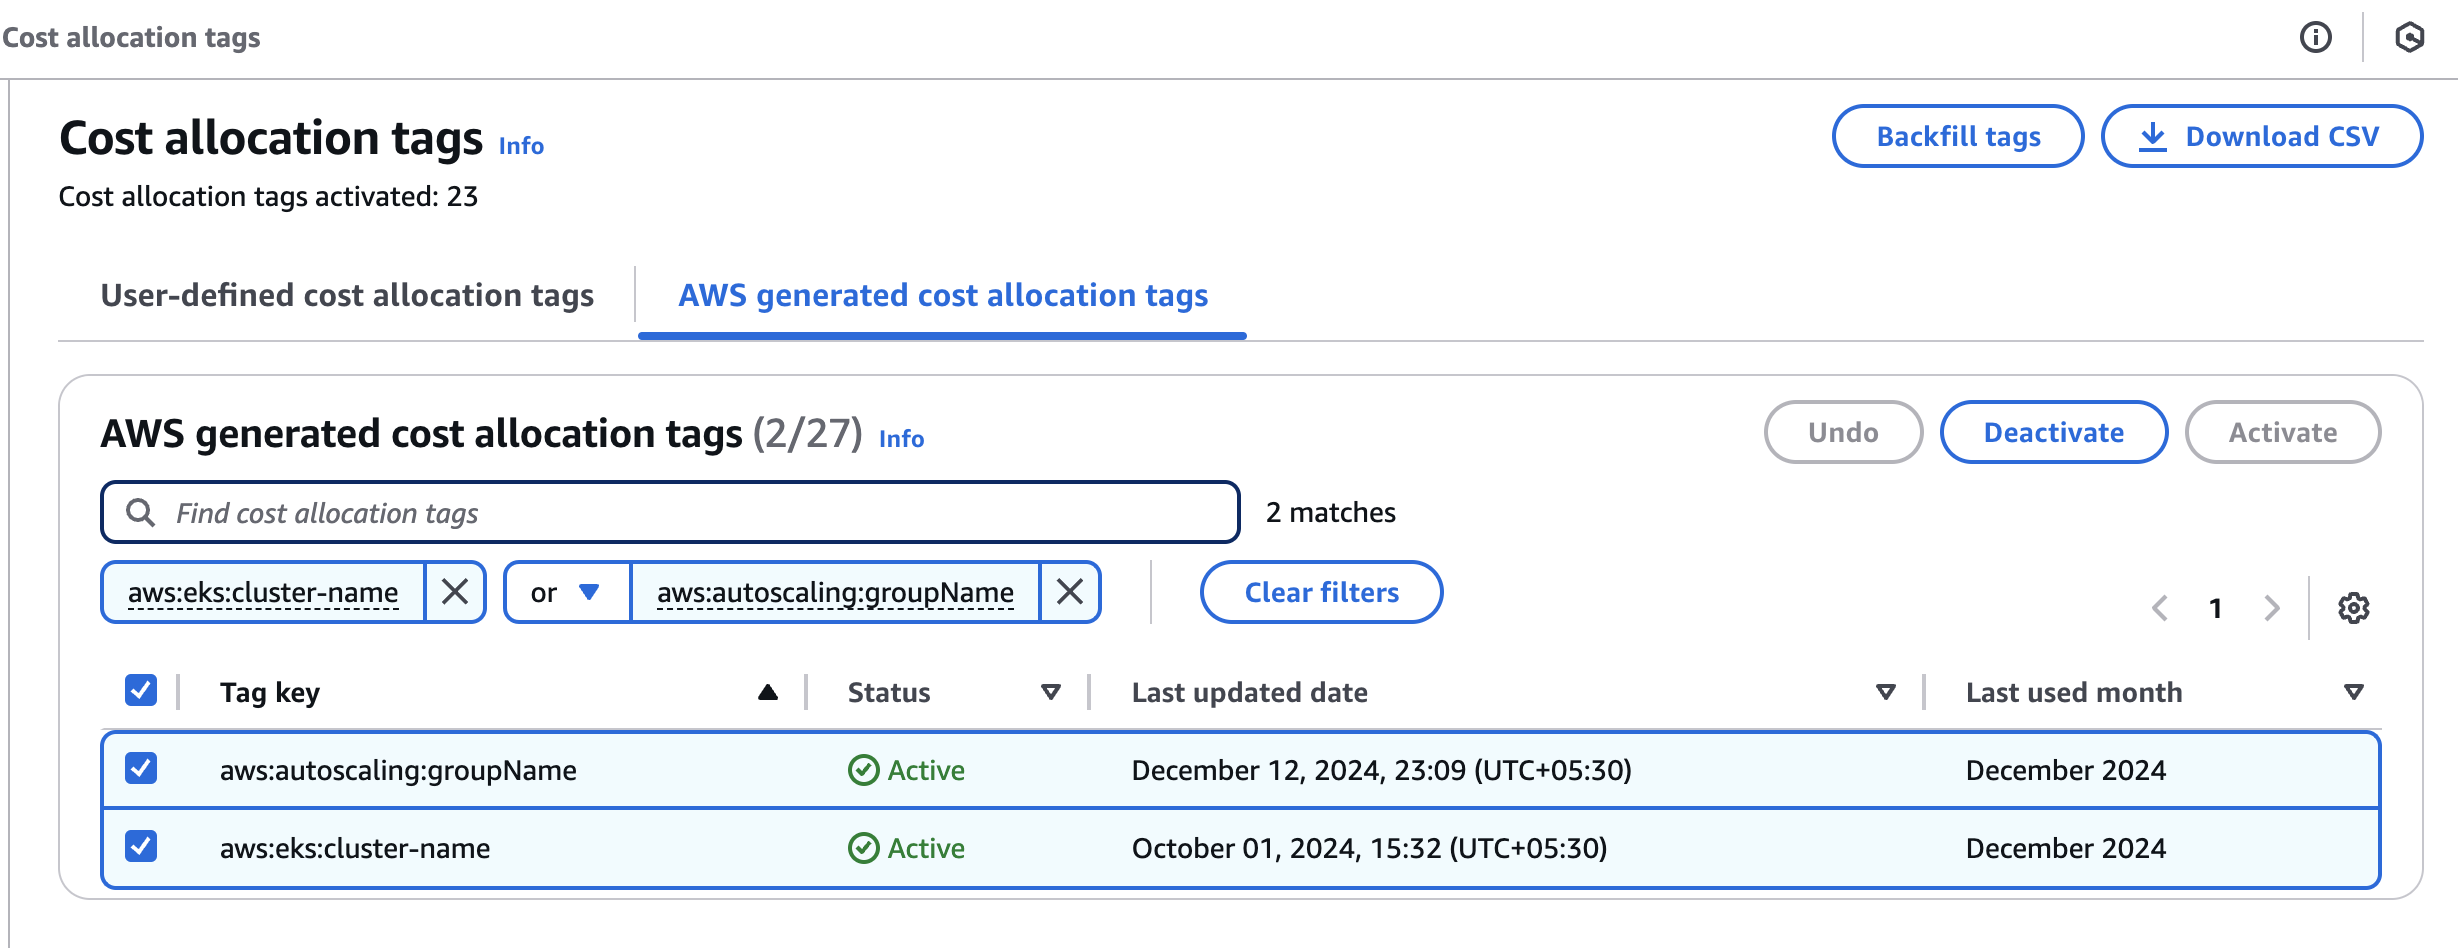
Navigate to Cost Allocation Tags and select AWS-generated cost allocation tags.
-
Search aws:eks:cluster-name & aws:autoscaling:groupName and enable the tag.
Ref link: https://us-east-1.console.aws.amazon.com/costmanagement/home?region=us-east-1#/tags
Step-2: Install Kubectl and Helm.
-
Login to AWS console where EKS clusters are created
-
Click on Cloud Shell on top right corner
-
Select the cluster you wanna onboard by running the command below. Replace 'your-cluster-name' with the name of the specific cluster you want to onboard.
aws eks update-kubeconfig --region us-east-1 --name dx-enteryourclustername -
If kubctl and helm are installed then skip the below steps and perform https://help.mavvrik.ai/content/eks-amazon-elastic-kubernetes-service-onboarding#EKS-AmazonElasticKubernetesserviceonboarding-Step-3:StepstoperforminMavvrik
-
Steps to install kubectl
#macOS brew install kubectl #Windows winget install Kubernetes.kubectl #Linux curl -LO "https://dl.k8s.io/release/$(curl -L -s https://dl.k8s.io/release/stable.txt)/bin/linux/amd64/kubectl" chmod +x kubectl sudo mv kubectl /usr/local/bin/ -
Steps to install helm
brew install helm   # macOS
winget install Helm.Helm  # Windows
-
Step-3 : Steps to perform in Mavvrik
-
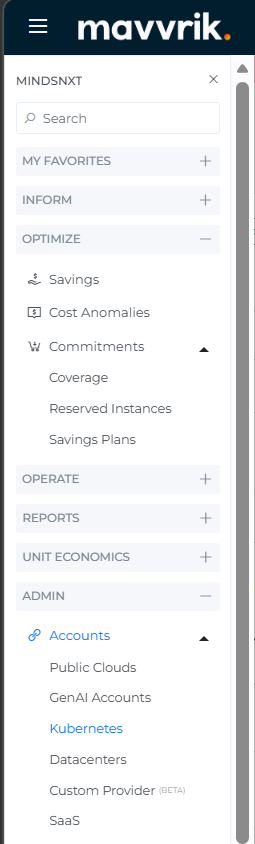
Go to the Menu
-
Click on Admin → Kubernetes

-
Click on the EKS tab
-
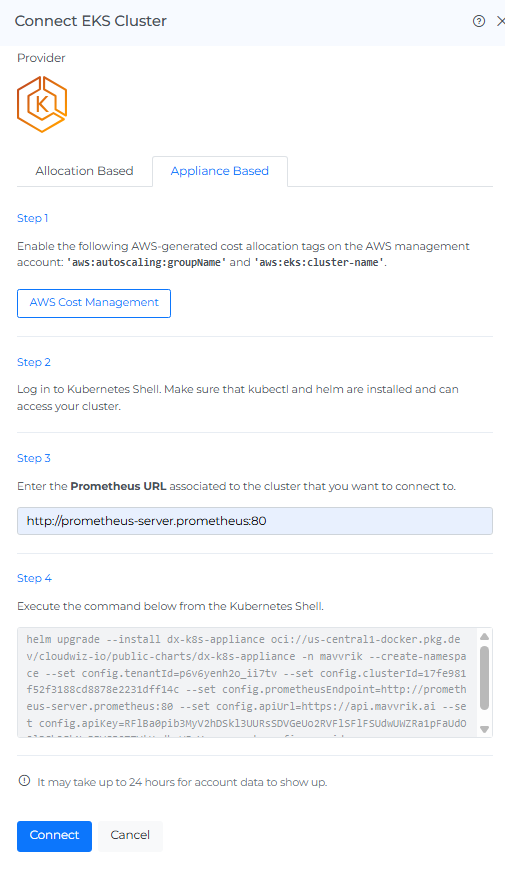
Click on Connect > Appliance based
-
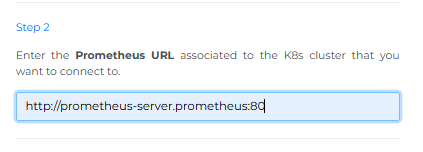
Enter your Prometheus URL
Steps to get Prometheus URL
-
Capture the Prometheus URL associated with the K8s cluster:
a. Enter the following URL in Mavvrik UI
http://<prometheus-server-name>.<namespace>:<prometheus-internal-port>
b. To find the Prometheus service, run the following command in Kubernetes shell
kubectl get svc -n prometheus

-
In URL Replace
prometheus-server-name,namespace&prometheus-internal-portwith your data -
The following screenshot shows an example of a URL
-
Copy the mavvrik UI Step-4 Kubernetes Shell command and run it in aws console cloudshell
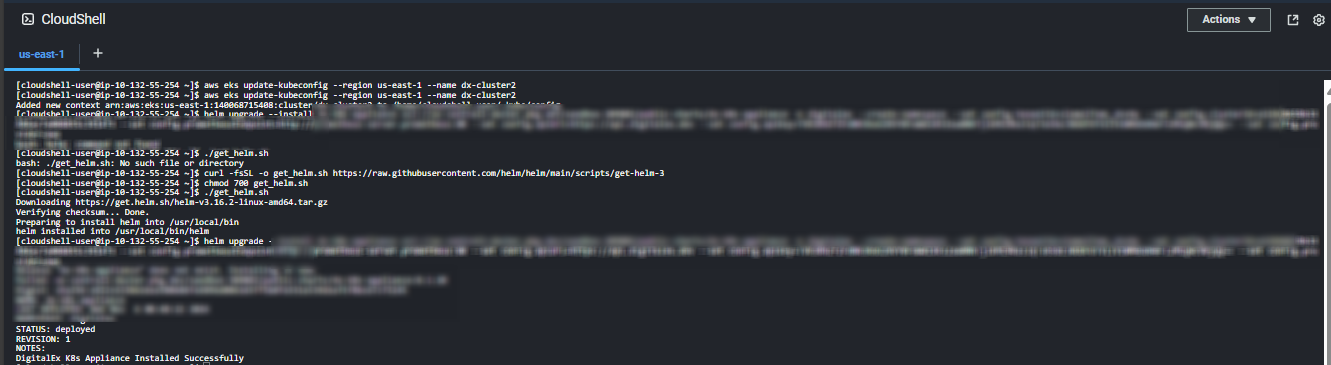
-
After executing the command the Kubernetes appliance will be installed.
-
Click on the Connect button in Mavvrik.
Instructions to Enable Resource Requests split cost allocation in Cost & Usage Reports (Allocation based)
-
Steps to enable AWS Cost Allocation Tags:
-
Access the AWS Portal, then search for and select Billing and Cost Management.
-
Navigate to Cost Allocation Tags .
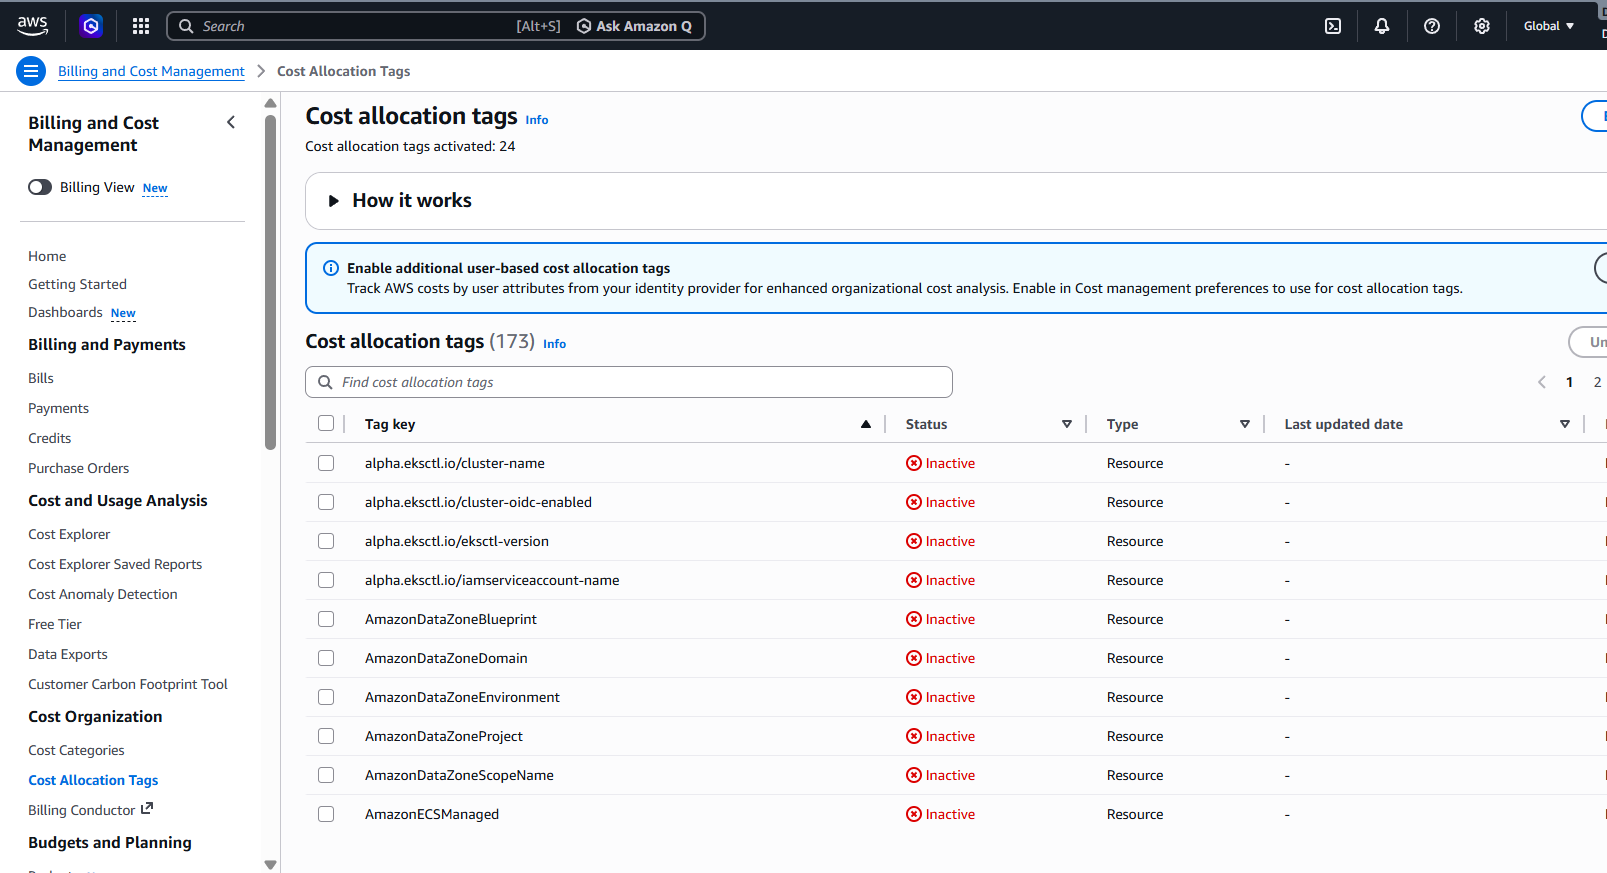
-
Click select all chechbox
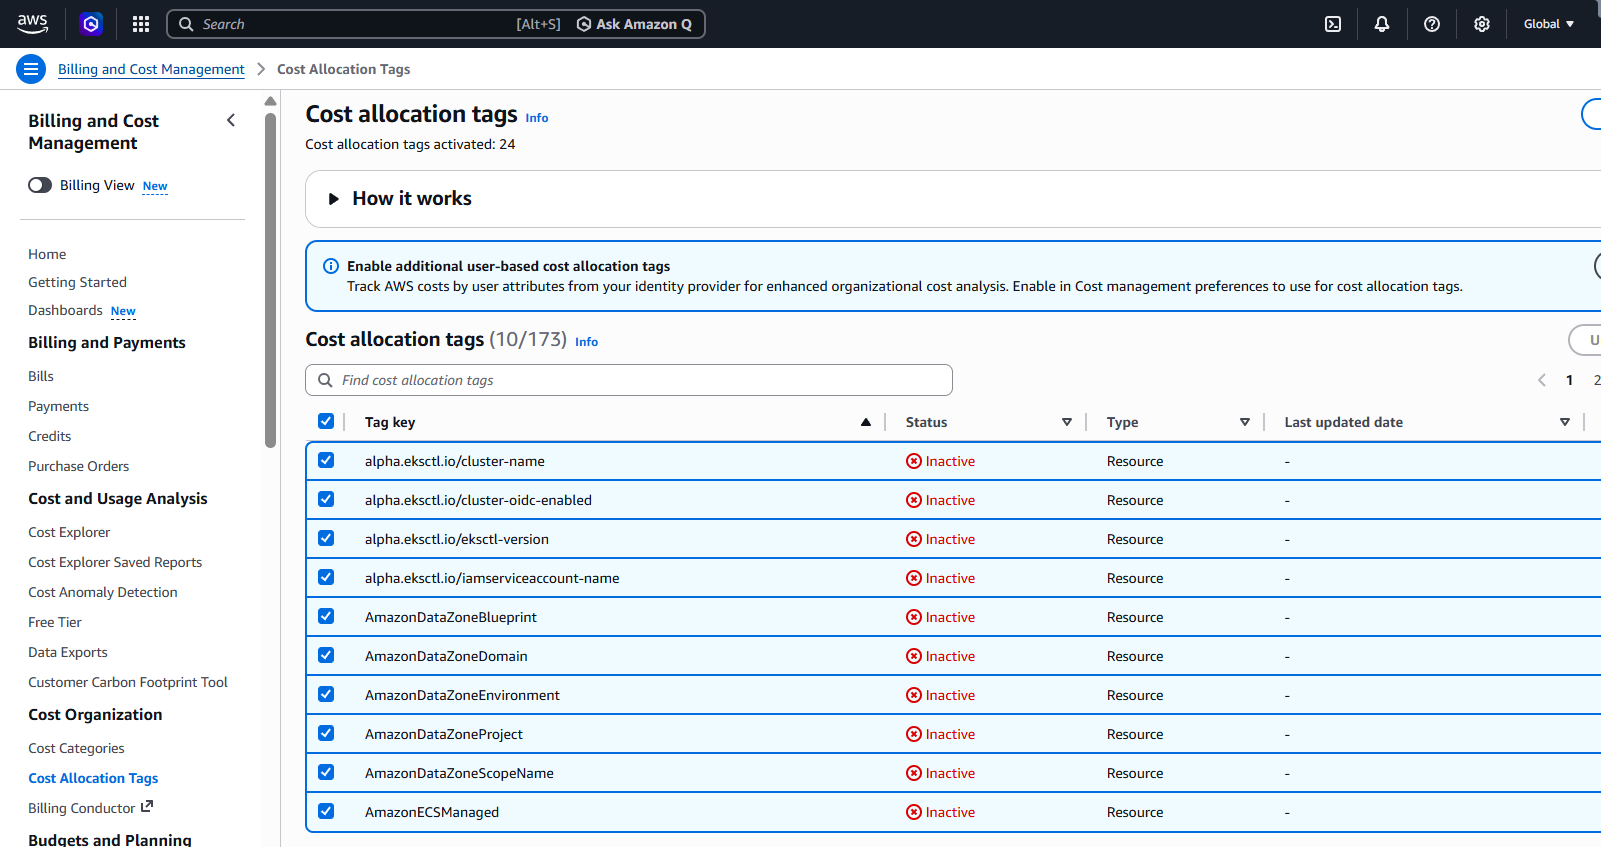
-
Then click on Active button
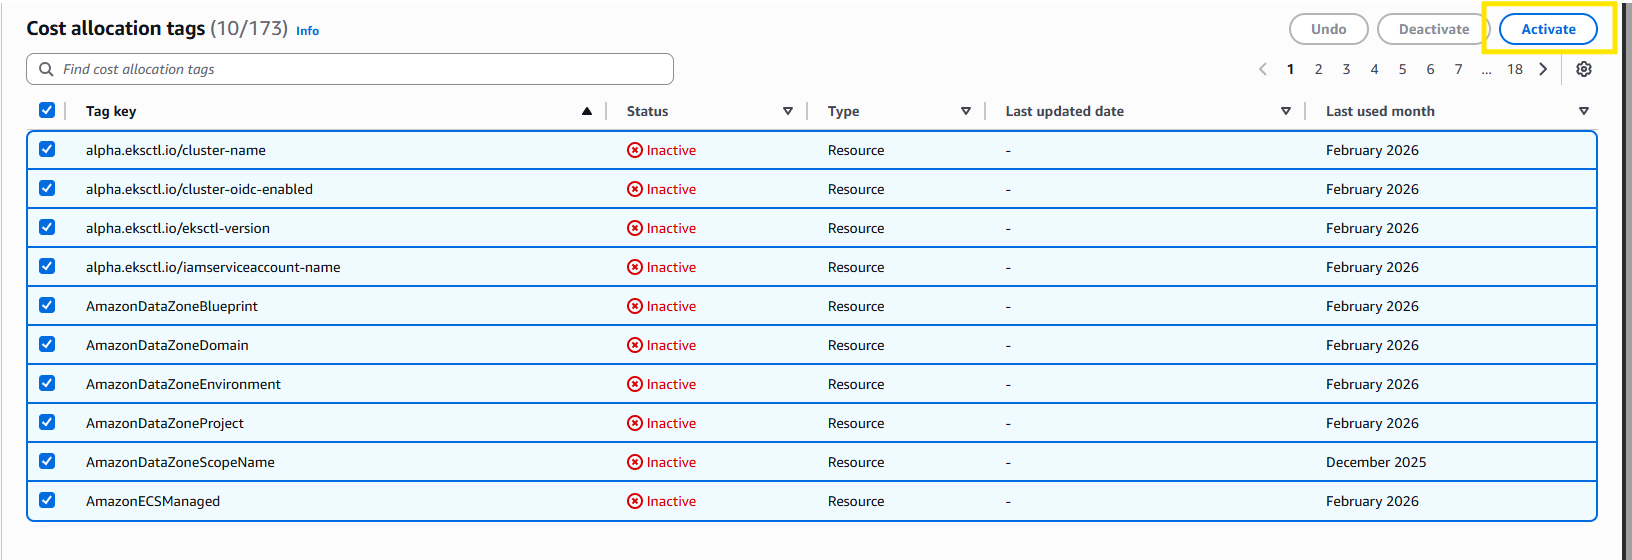
-
-
To opt in to split cost allocation data
-
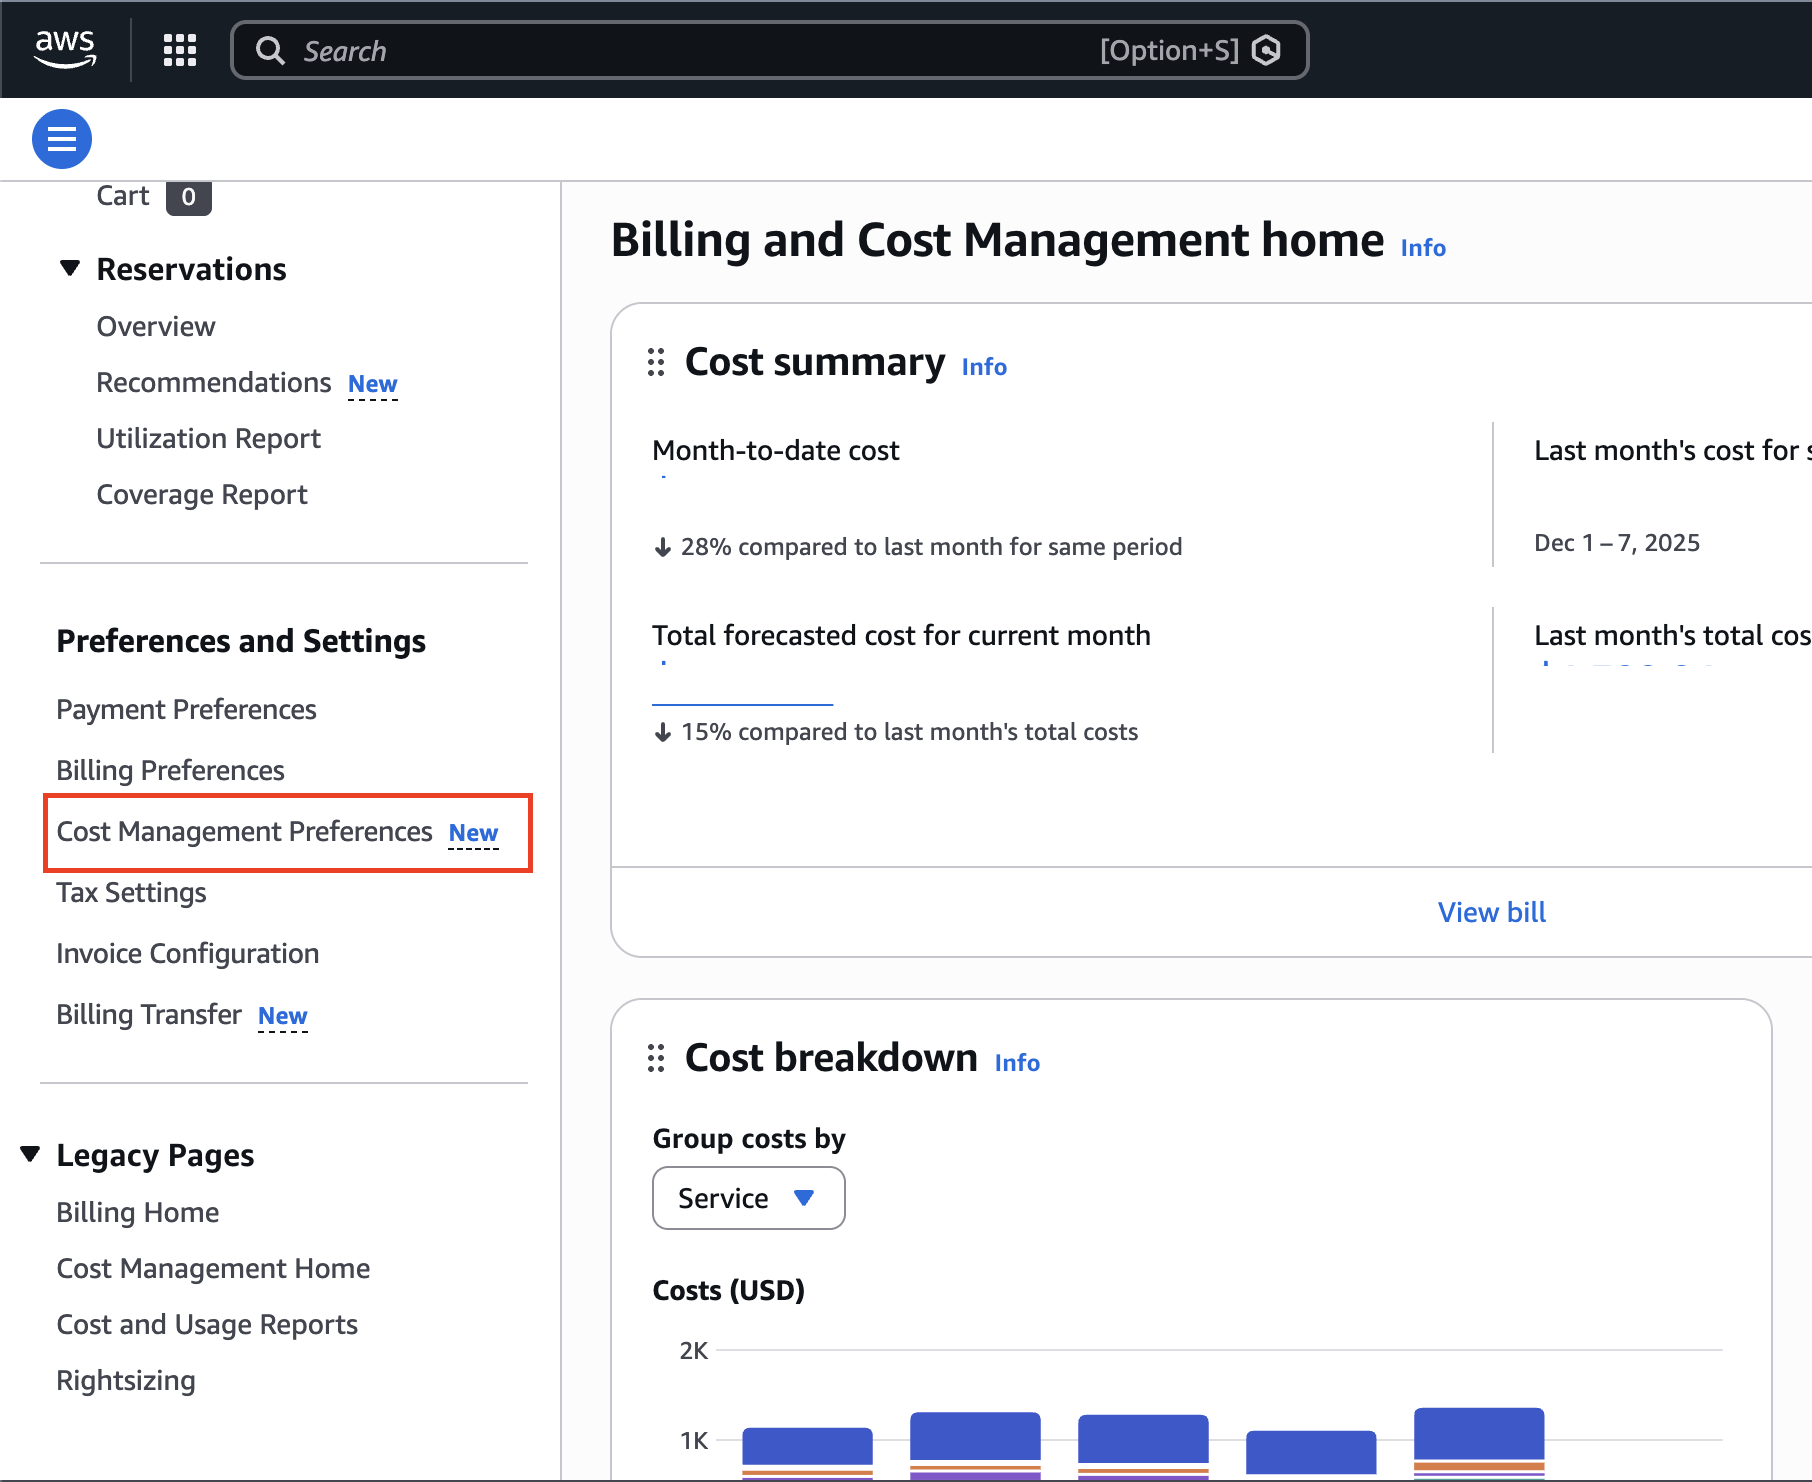
Open the Billing and Cost Management console at the main billing account level
-
In the navigation pane, choose Cost Management preferences in the left side panel.
-
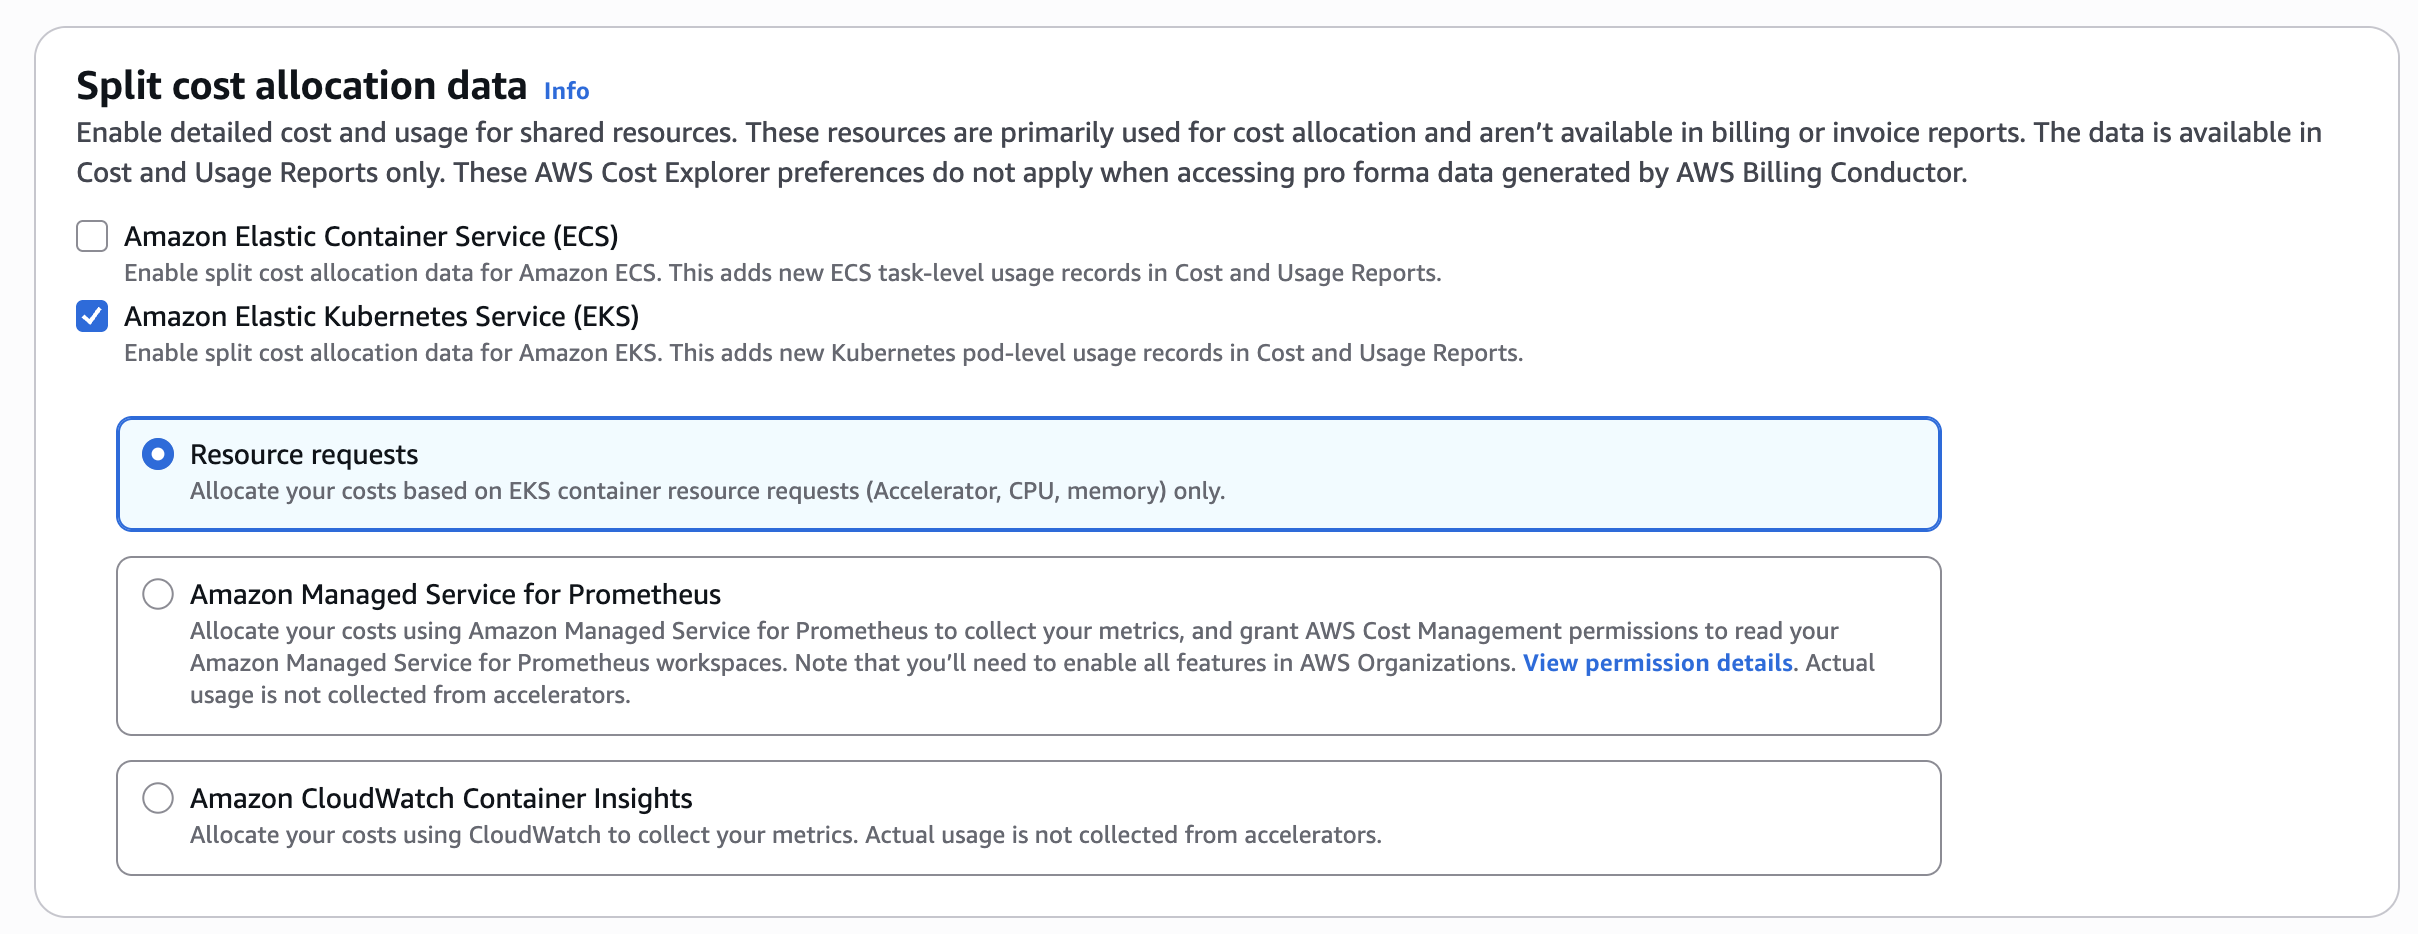
c. Under General, in the Split cost allocation data section, choose between the following:
Amazon Elastic Kubernetes Service (Amazon EKS) to opt in to Amazon EKS only. For Amazon EKS, choose between the following:
Resource requests: This allocates your Amazon EC2 by Kubernetes pod CPU and memory resources only. This will encourage application teams to only provision what they need.
-
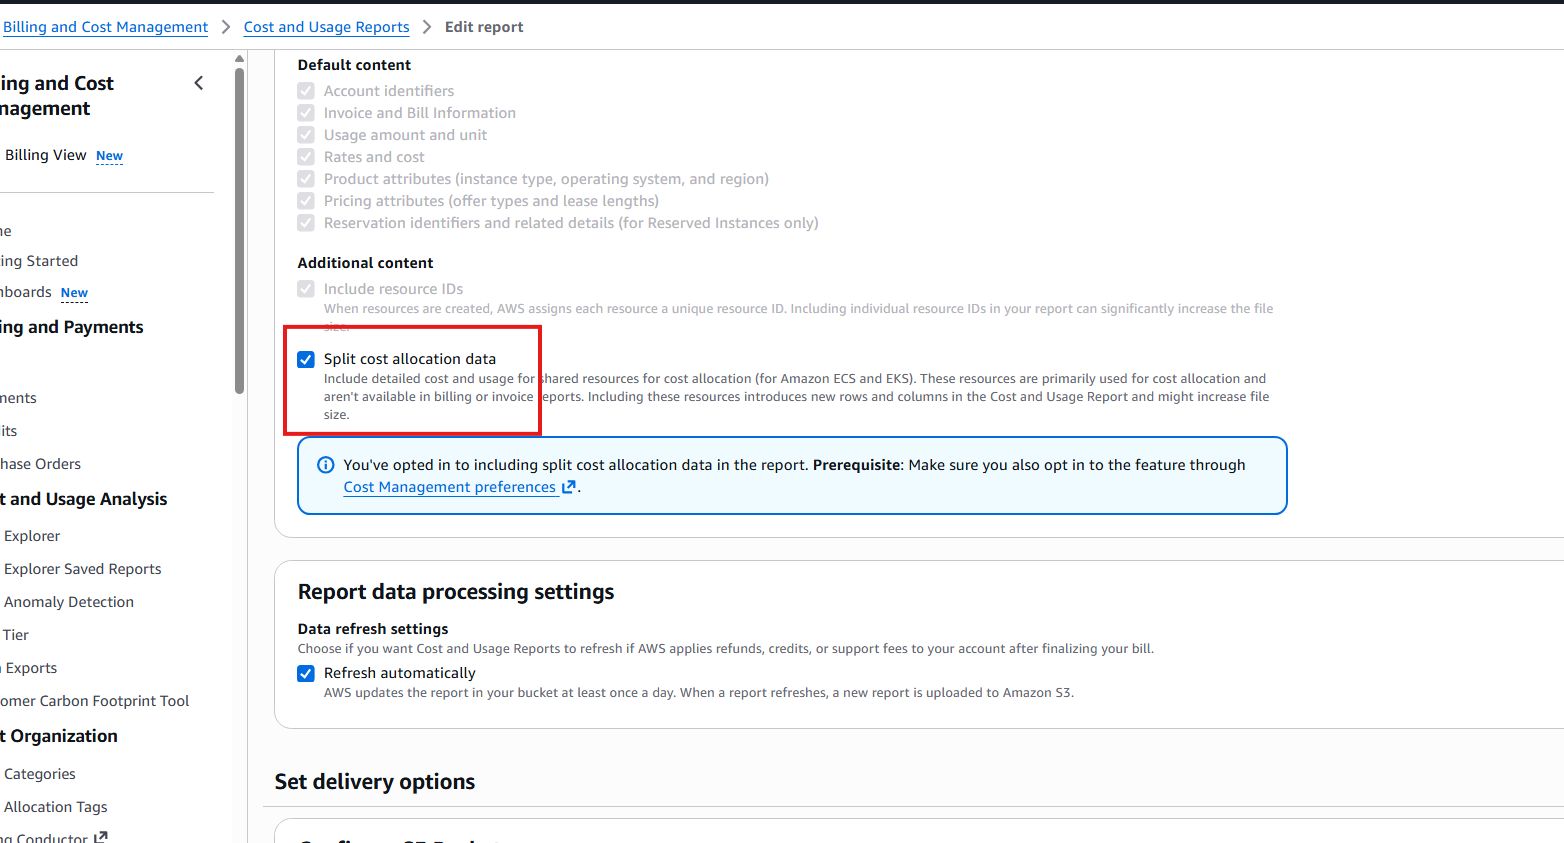
Include cost and usage data in your report
-
Open the Billing and Cost Management console at https://console.aws.amazon.com/costmanagement/.
-
In the navigation pane, under Legacy Pages, choose Cost and Usage Reports.
-
Edit an existing report created while onboarding AWS, in the Specify report details page, under Report content, select Split cost allocation data.
-
-
Navigate to Mavvrik portal > Admin > K8s and connect the Allocation based cluster
Steps to onboard the EKS cluster(Auto-discover and connect based)
Before onboarding your EKS account, you must have the admin rights on the cluster that you want to onboard and follow the steps below
Step 1: Enable Cost Allocation Tags
-
Access the AWS Portal, then search for and select Billing and Cost Management.
-
Navigate to Cost Allocation Tags and select AWS-generated cost allocation tags.
-
Search aws:eks:cluster-name & aws:autoscaling:groupName and enable the tag.
Ref link: https://us-east-1.console.aws.amazon.com/costmanagement/home?region=us-east-1#/tags
Step-2: Enable the discovery and connect cluster in Mavvrik
-
Login to Mavvrik Portal
-
Click on Menu
-
In Admin section, Click on Accounts
-
Click on Kubernetes
-
Tap on EKS
-
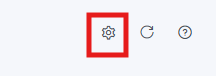
Click on the setting icon
-
then enable the EKS cluster
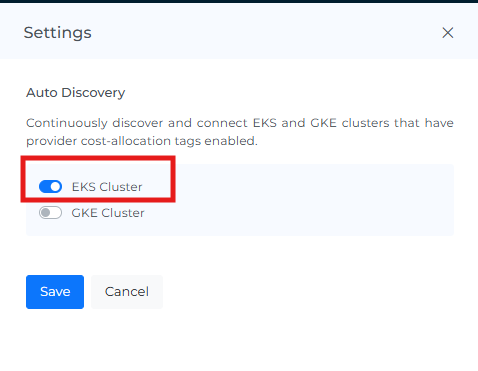
After enabling the cost allocation tags, wait for 24 hours for the cluster to be automatically onboarded