.png)
Mavvrik integrates with ServiceNow to automate incident creation and streamline ticketing workflows for cost, resource, and operational events. This integration enables seamless communication between Mavvrik and ServiceNow, allowing recommendations and alerts to be automatically logged as incidents. By using a dedicated Service Account with admin permissions, Mavvrik can create, update, and manage incidents directly within your ServiceNow instance, ensuring efficient issue tracking and faster response actions.
Below are the steps to Integrate ServiceNow with Mavvrik
-
Login into Mavvrik and navigate to Integration page.
-
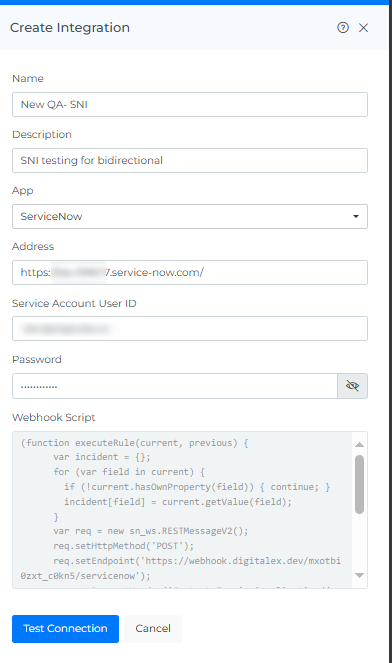
Click on Create Integration.
-
Click on the App and select ServiceNow.
-
Enter Integration name of your choice
-
Enter Integration description
-
Enter the address of the your ServiceNow i.e. the Service Now instance URL (Eg https://dev199677.service-now.com)
-
For integrating with Service Now we recommended you to create a Service Account User.
-
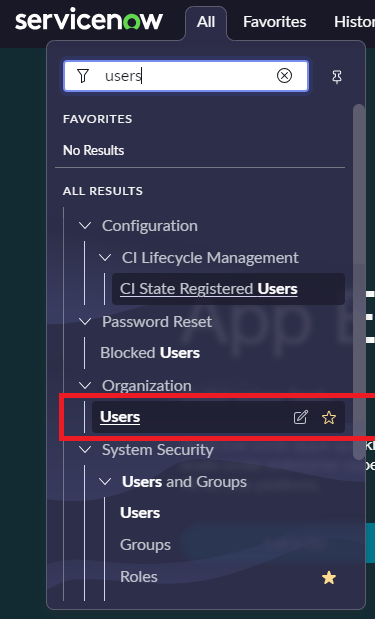
Create a separate service account in the User table under the Organization section, for each new integration.
-
Click on New

-
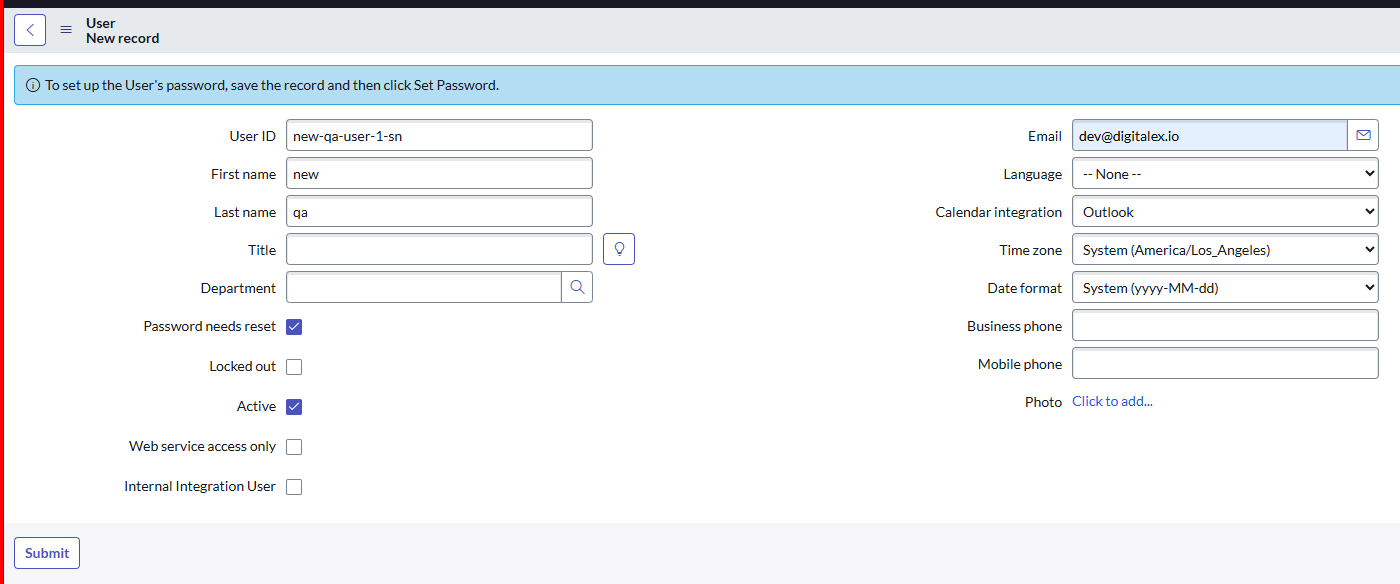
Enter the User ID, First name, Last name, and email address
-
If you wish to change the password on the first login, then select the password needs reset check, else uncheck it.
-
Click on Submit
-
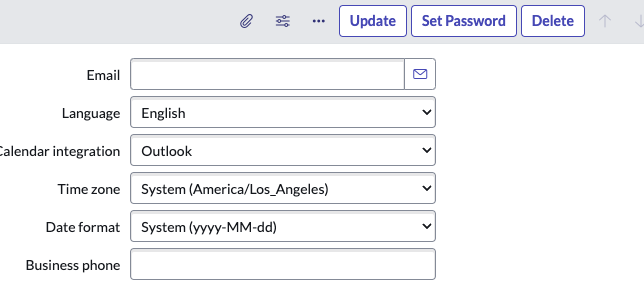
Open newly created user
-
To set the Password for your Service Now account, click Set Password.
-
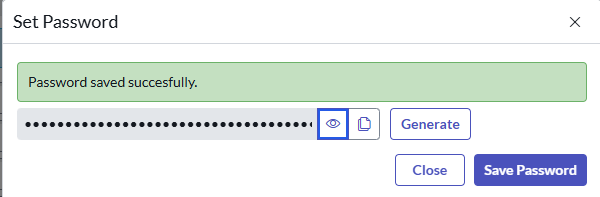
Click on Generate
-
Copy the Password
-
Please make sure to copy the user ID and password, as you will need them for subsequent steps.
i. Click on Save Password & close
Additionally, if you need to update credentials or add new service account users, ensure that those users are active, and they have admin access.
Furthermore, we strongly recommend maintaining the ServiceNow instance up and running while managing incidents through Mavvrik.
j. Grant the service account user Admin role access as it is necessary to perform the actions that will be carried out by the integration.
k. Go to roles & click on edit

l. Search admin and select admin, then click on save

m. Click on the arrow to assign the role to the user
n. Click on save.
o. If you have selected that the password needs to be reset, then change the password and perform the steps below
-
Enter the user id that you have created
-
Enter the copied password/changed password from the previous step
-
Copy the Webhook Script from Mavvrik
-
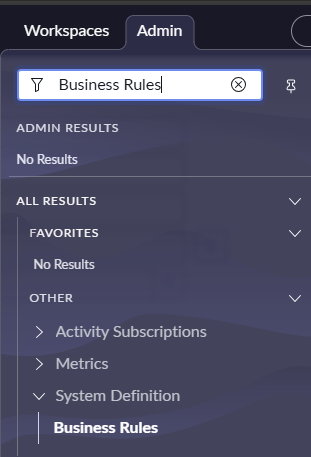
To paste a script into ServiceNow, follow these steps by login with newly created user:
a. Go to Admin< System Definition < Business Rules
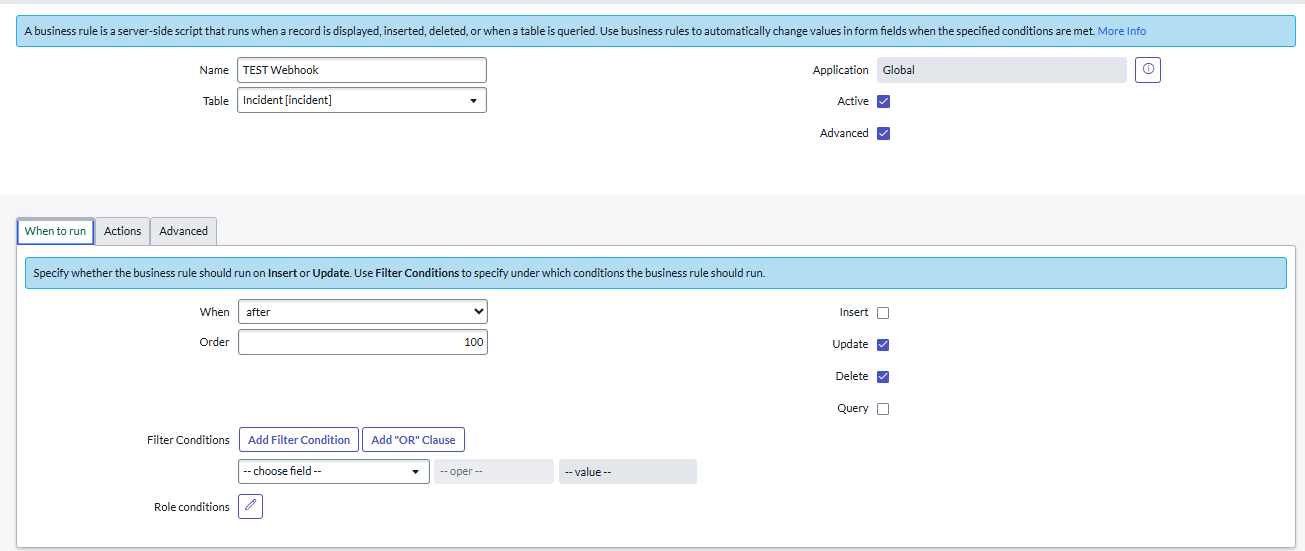
b. Click on New
c. Enter Name
d. Select Table Incident
e. Select Advanced Checkbox
f. Go to When to run tab
g. Select after from when dropdown
h. Check Update & Delete checkbox
i. Go to Advanced tab
I. Paste the copied script in the script textbox and leave the condition textfield empty
II. Click on the Submit button
-
Click on Test connection
-
Click on Create
Upon completing the integration, access the Savings Cost Anomaly pages to create a ticket and assign it to the appropriate individual responsible for executing actions based on the recommendations.