.png)
This steps only provides illustrations on creating a role but a user with access/secret key is also supported. If you wish to create a user, please assign similar permissions as documented for a role below. We encourage a use of a Role over a User as its more secure.
-
Login to AWS Member account you’re trying to onboard as an Administrator if not already logged in. And navigate to
IAMservice using AWS search bar. -
On the
IAMConsole, SelectRolesfrom the left menu, and clickCreate role. -
Select
Custom trust policy -
Copy the JSON
{ "Version": "2012-10-17", "Statement": [ { "Effect": "Allow", "Action": ["sts:AssumeRole"], "Principal": { "AWS": [ "arn:aws:iam::911403356698:user/global-user-for-assume-role", "arn:aws:iam::911403356698:user/mavvrik-svc-user", "arn:aws:iam::911403356698:role/mavvrik-svc-role" ] }, "Condition": { "StringEquals": { "sts:ExternalId": "<TENANT-ID>" } } } ] } -
Paste the copied JSON in Custom trust policy editor
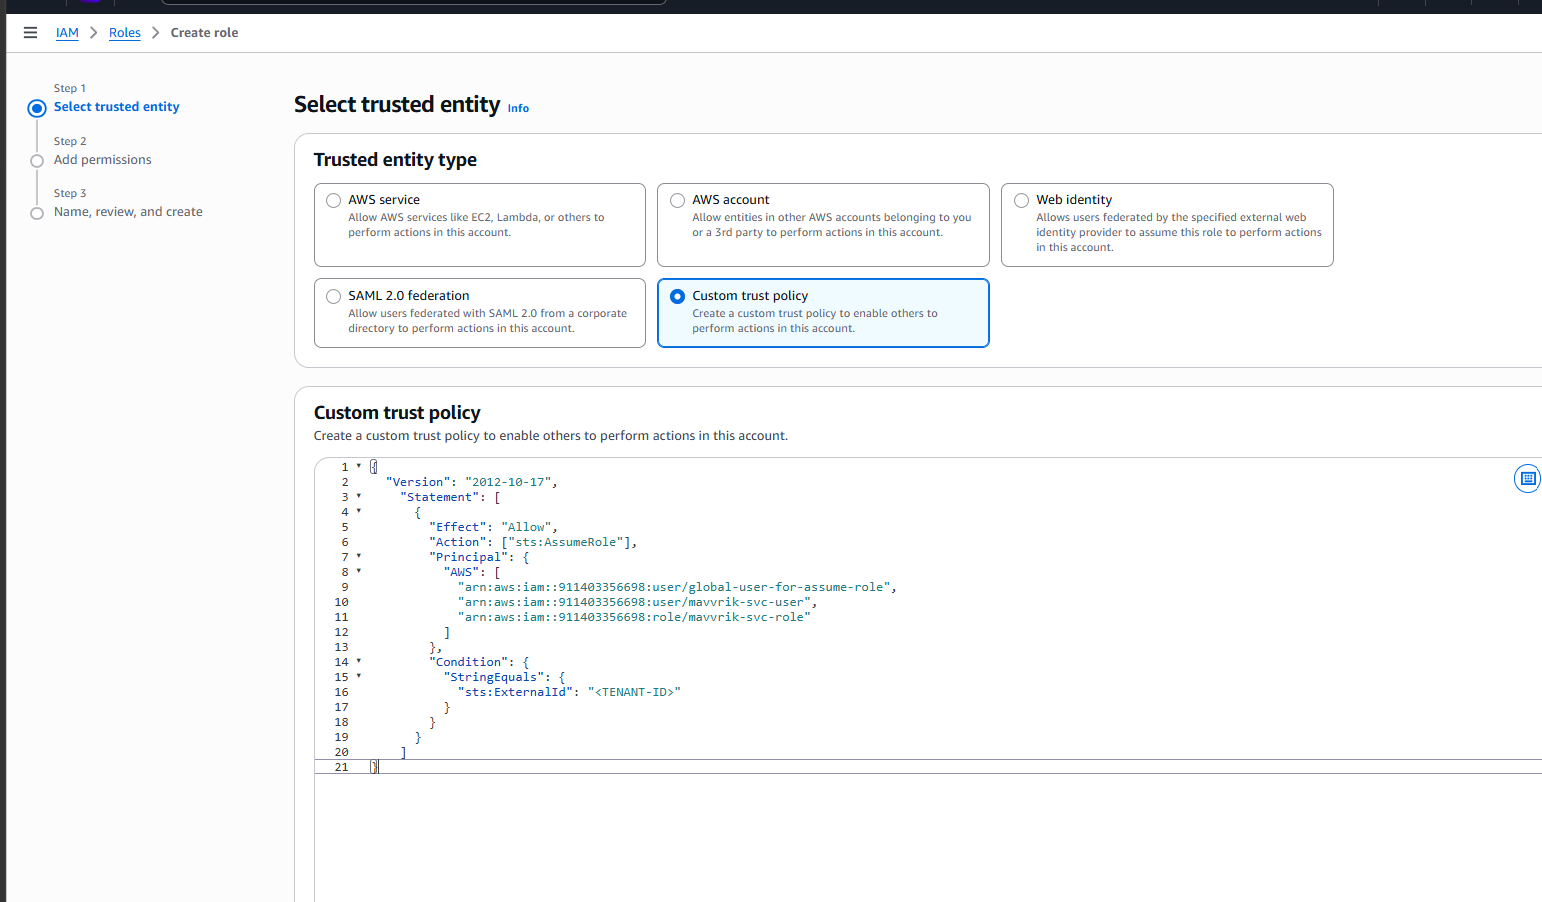
-
Remove <TENANT-ID>

-
Enter your tenant id as shown image. To get the tenant id to
-
-
Login to Mavvrik
-
From the side menu, select
APIunder theAdminsection -
Capture the Tenant ID
-
8. Click Next, on next screen for permissions, please choose 'All Types'in the filter and select the listed policies below.
-
ReadOnlyAccess -
ViewOnlyAccess -
IAMReadOnlyAccess -
CloudWatchReadOnlyAccess -
ComputeOptimizerReadOnlyAccess -
AWSOrganizationsReadOnlyAccess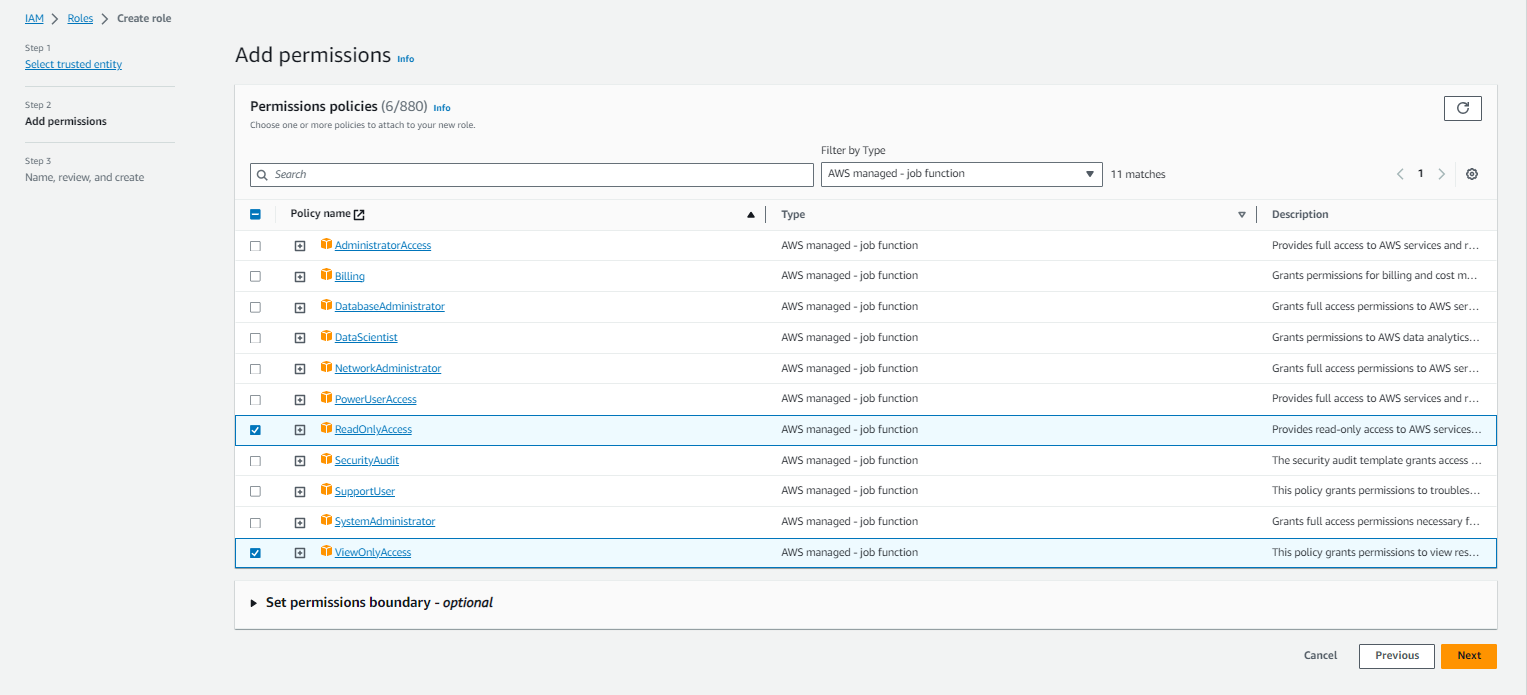
-
Click
Nextagain & on a final page, give a name to the role & clickCreate role -
Open the newly created role
-
Click on Add permissions → Create inline policy.
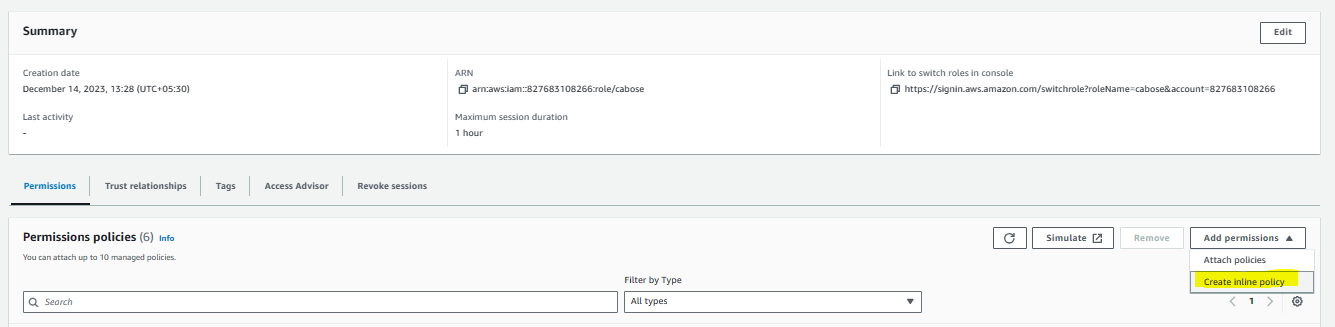
-
Search for Cost Explorer Service
-
Click on Write → StartSavingsPlansPurchaseRecommendationGeneration →
Next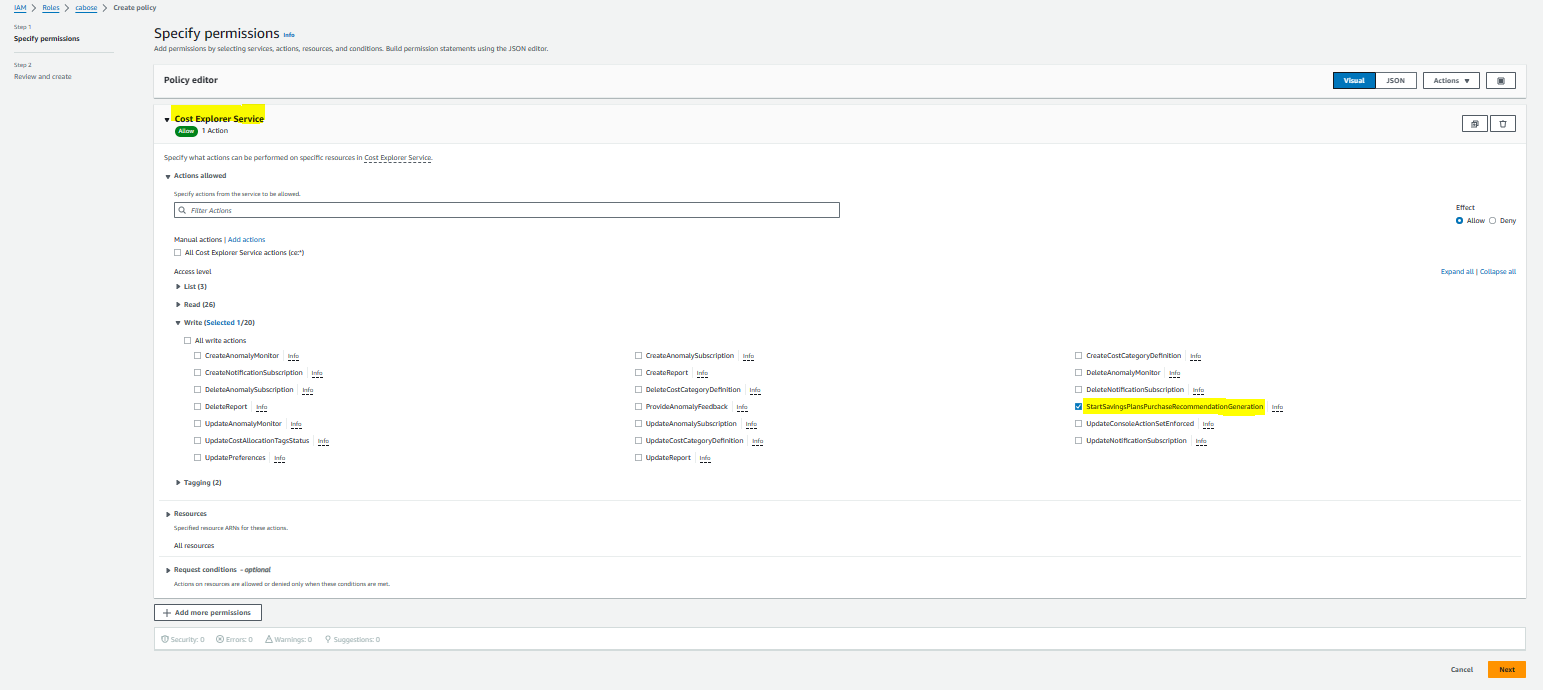
-
Enter the policy name.
-
Click on
Create policy.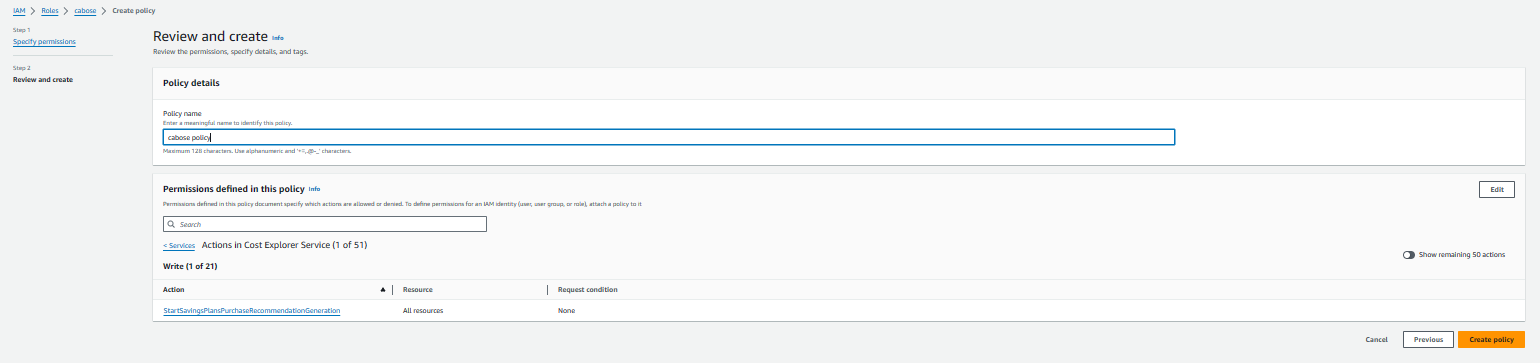
-
Once the role is created, please note the ARN of a role, which will be required in the next step.
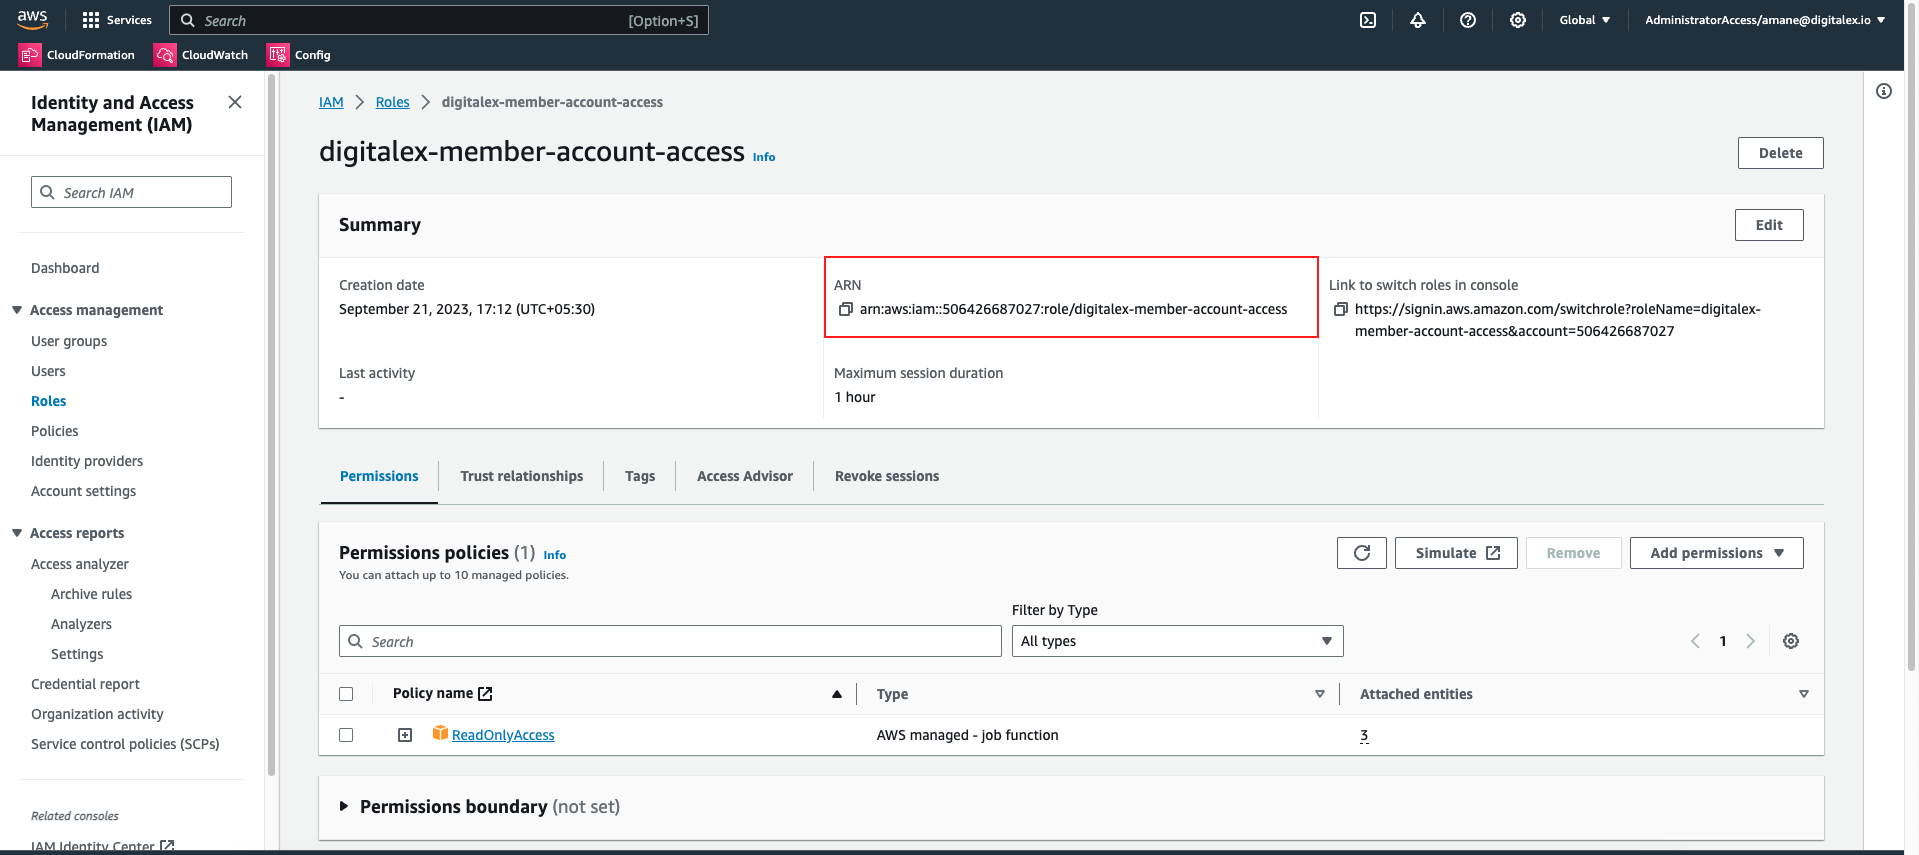
If you still wish to prefer using access/secret access key. Follow below steps
-
Login to AWS Member account you’re trying to onboard as an Administrator if not already logged in. And navigate to
IAMservice using AWS search bar. -
On a
IAMConsole, SelectUsersfrom the left menu
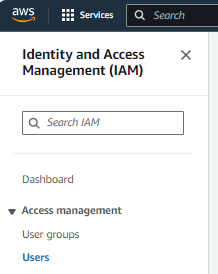
-
Click on Create User

-
Enter the Username & click Next.
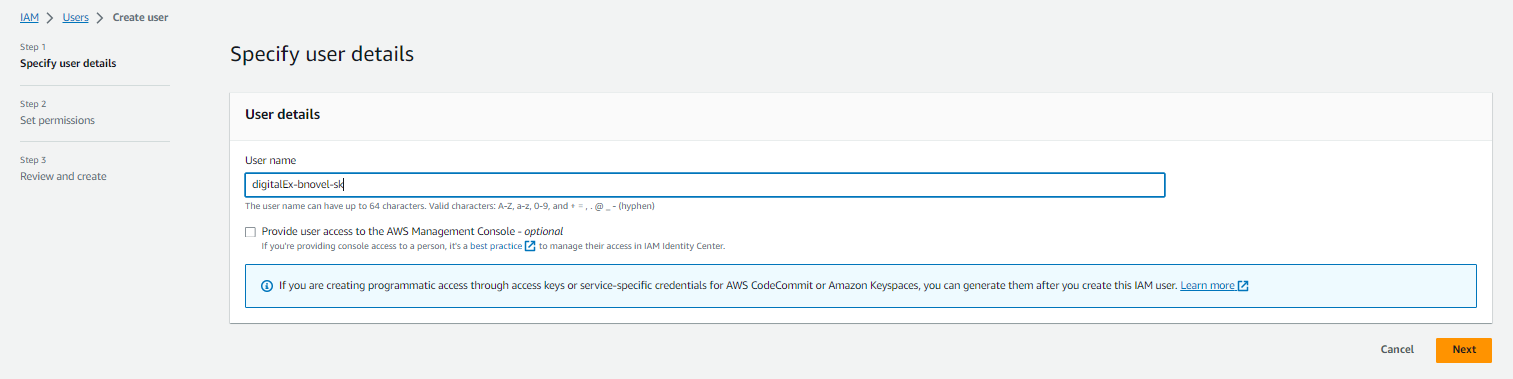
-
Select Attach policies directly, on next screen for permissions, please choose 'All Types' in the filter and select the listed policies below.
-
ReadOnlyAccess -
ViewOnlyAccess -
IAMReadOnlyAccess -
CloudWatchReadOnlyAccess -
ComputeOptimizerReadOnlyAccess -
AWSOrganizationsReadOnlyAccess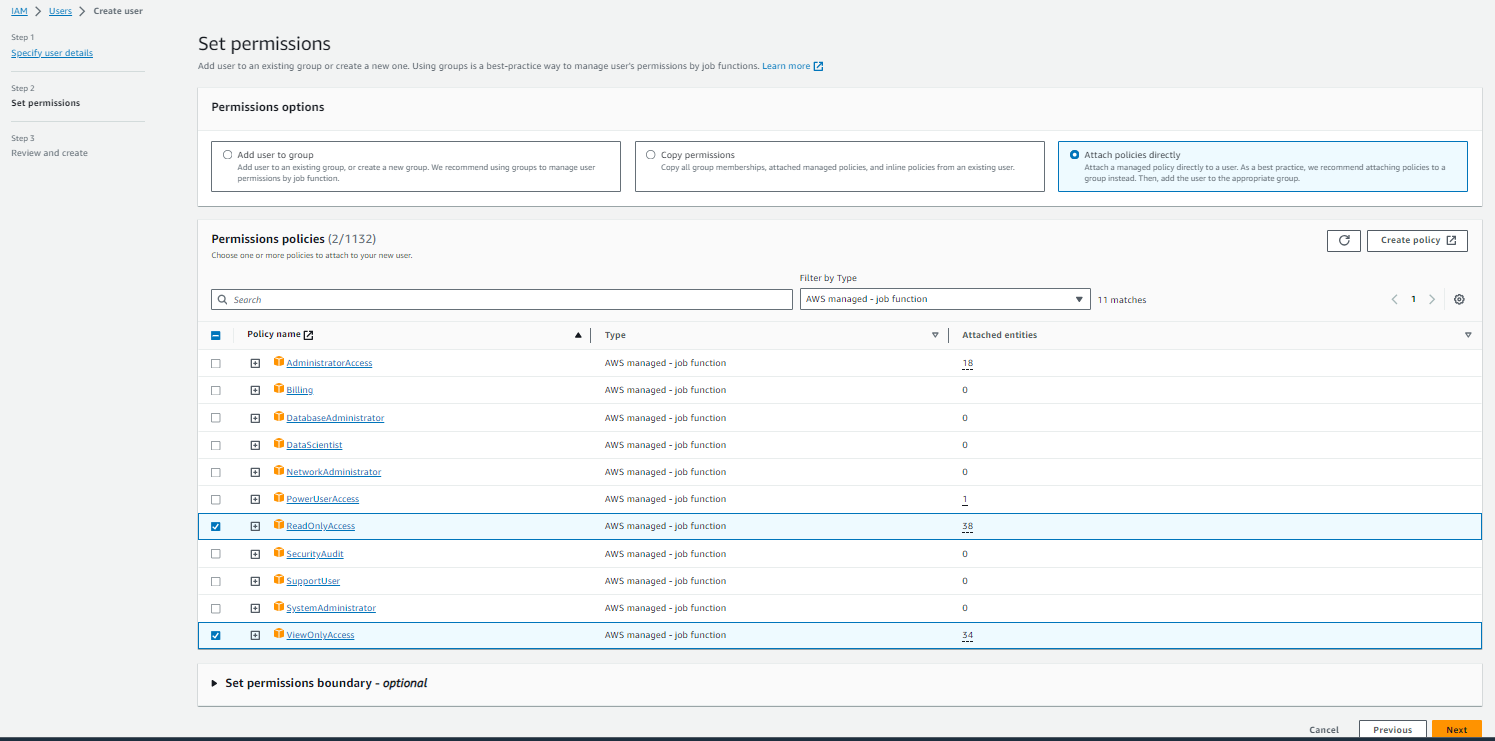
-
Click
Nextagain & on a final page, give a name to the role & clickCreate user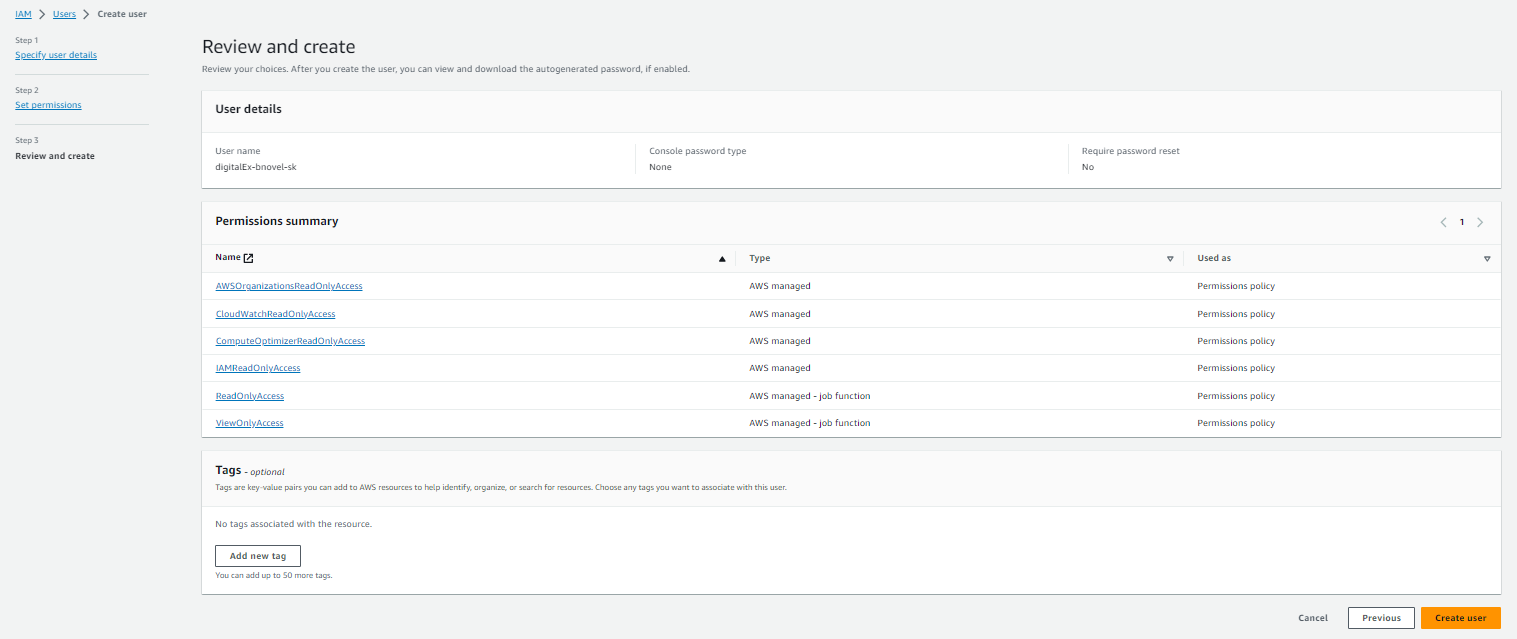
-
Once the user is created, please click on the user to create a Secret Key
-
Go to Security Credentials tab & Click on Create Access Key
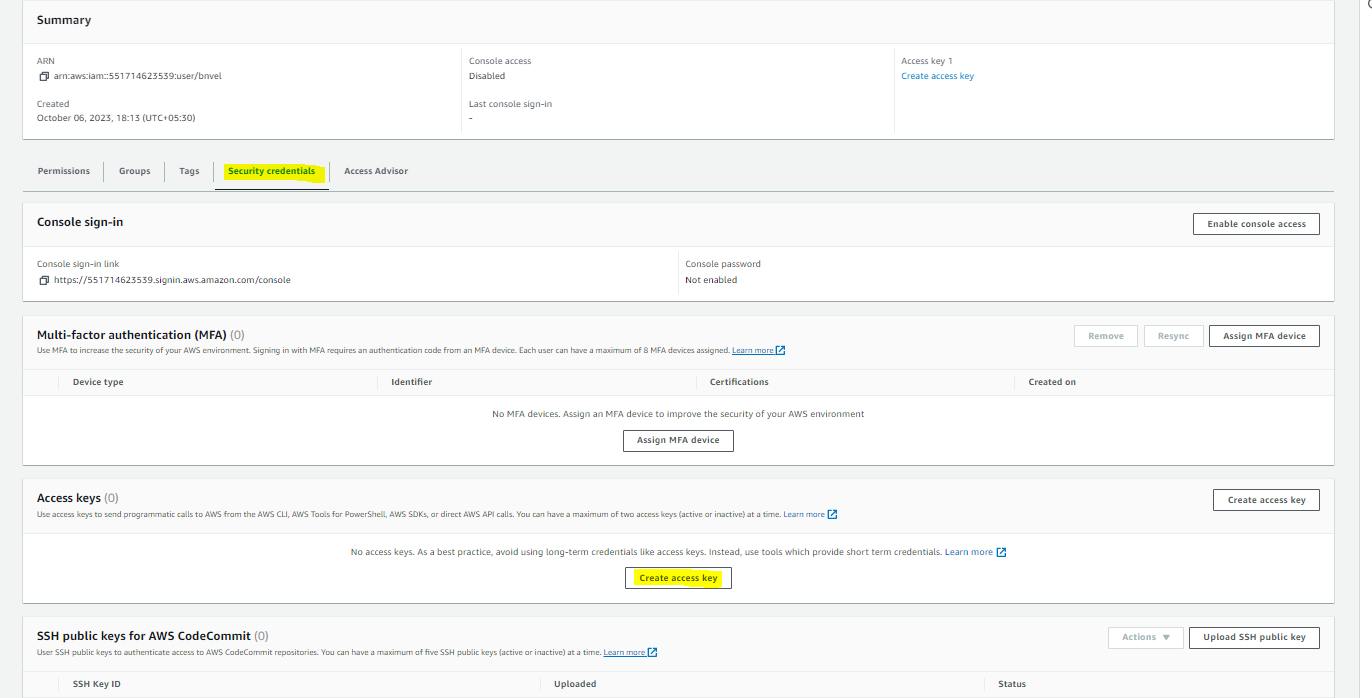
-
Select Application running outside AWS & Click on Next
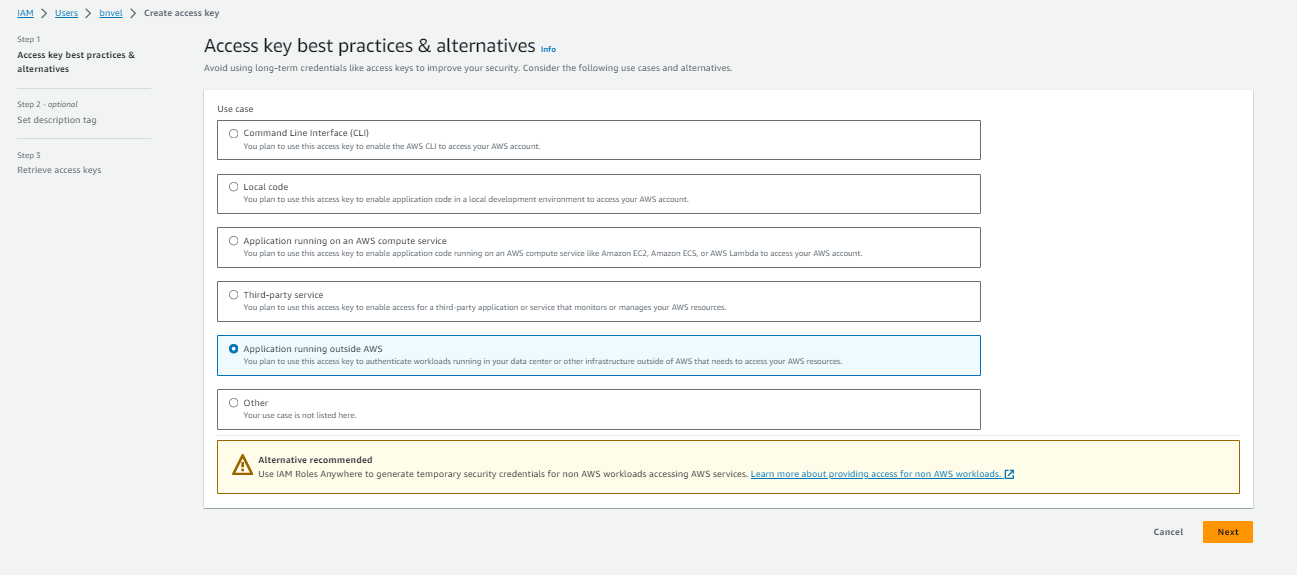
-
Click on Create access key.

-
Secret Key will get generated.
-
Copy the Access Key & Secret Key which will be required in the next step.
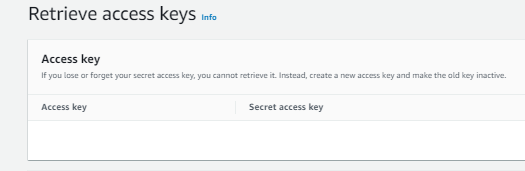
-
Open newly created user
-
Click on Add permissions → Create inline policy.
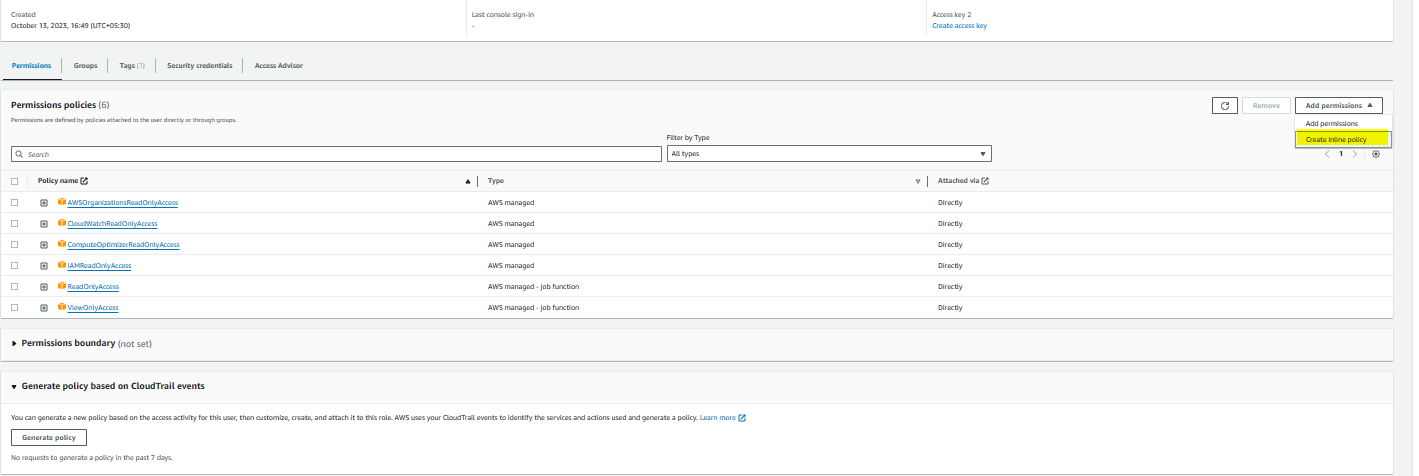
-
Search for Cost Explorer Service
-
Click on Write → StartSavingsPlansPurchaseRecommendationGeneration →
Next
-
Enter the policy name.
-
Click on
Create policy.