.png)
Mavvrik MCP connects Copilot to Mavvrik through a secure sign-in and authorization flow.
The connection uses the Mavvrik tenant associated with your authenticated Mavvrik user account. After authorization is complete, Mavvrik MCP becomes available inside Copilot , allowing you to ask cloud cost intelligence questions directly in a natural conversation.
To enable this experience, connect Copilot to the Mavvrik MCP server using a Agent. Copilot connects to Mavvrik through OAuth, ensuring access is tied to your authorized Mavvrik account and tenant.
Below are the Steps to Connect
-
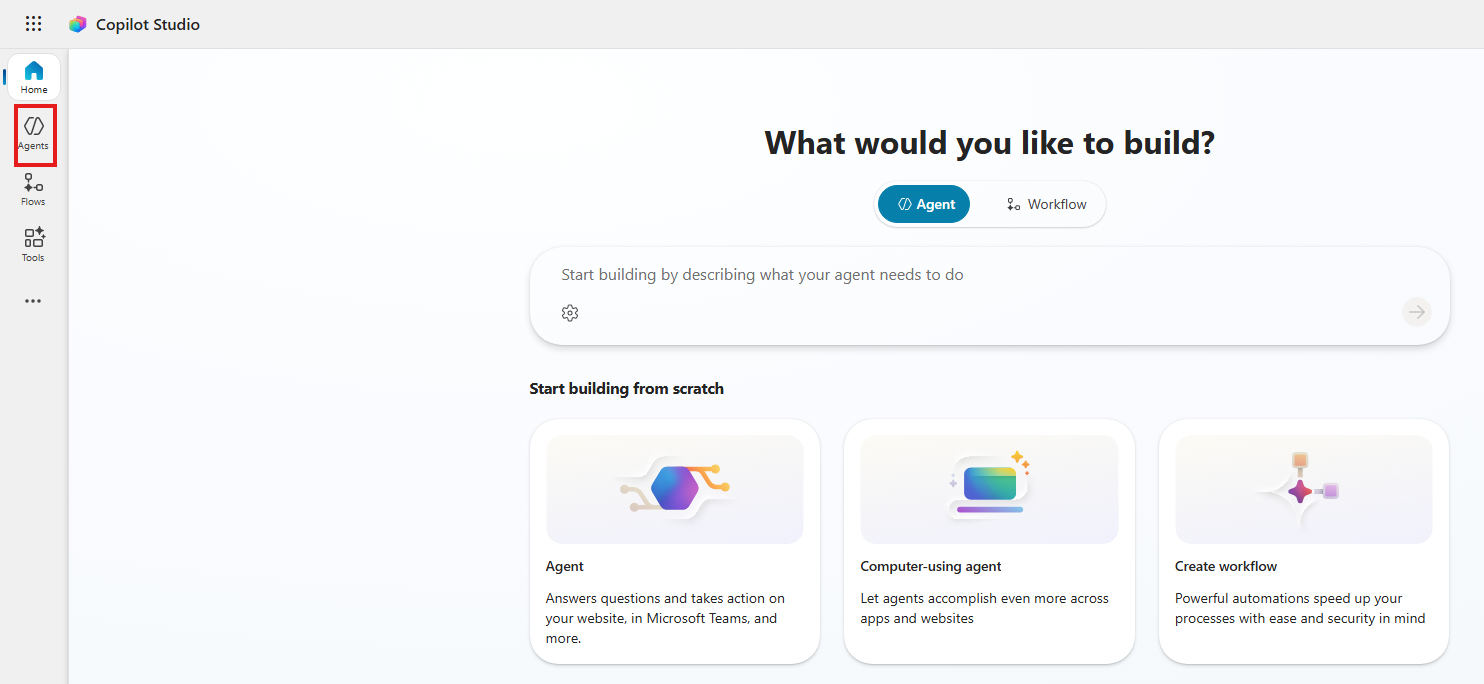
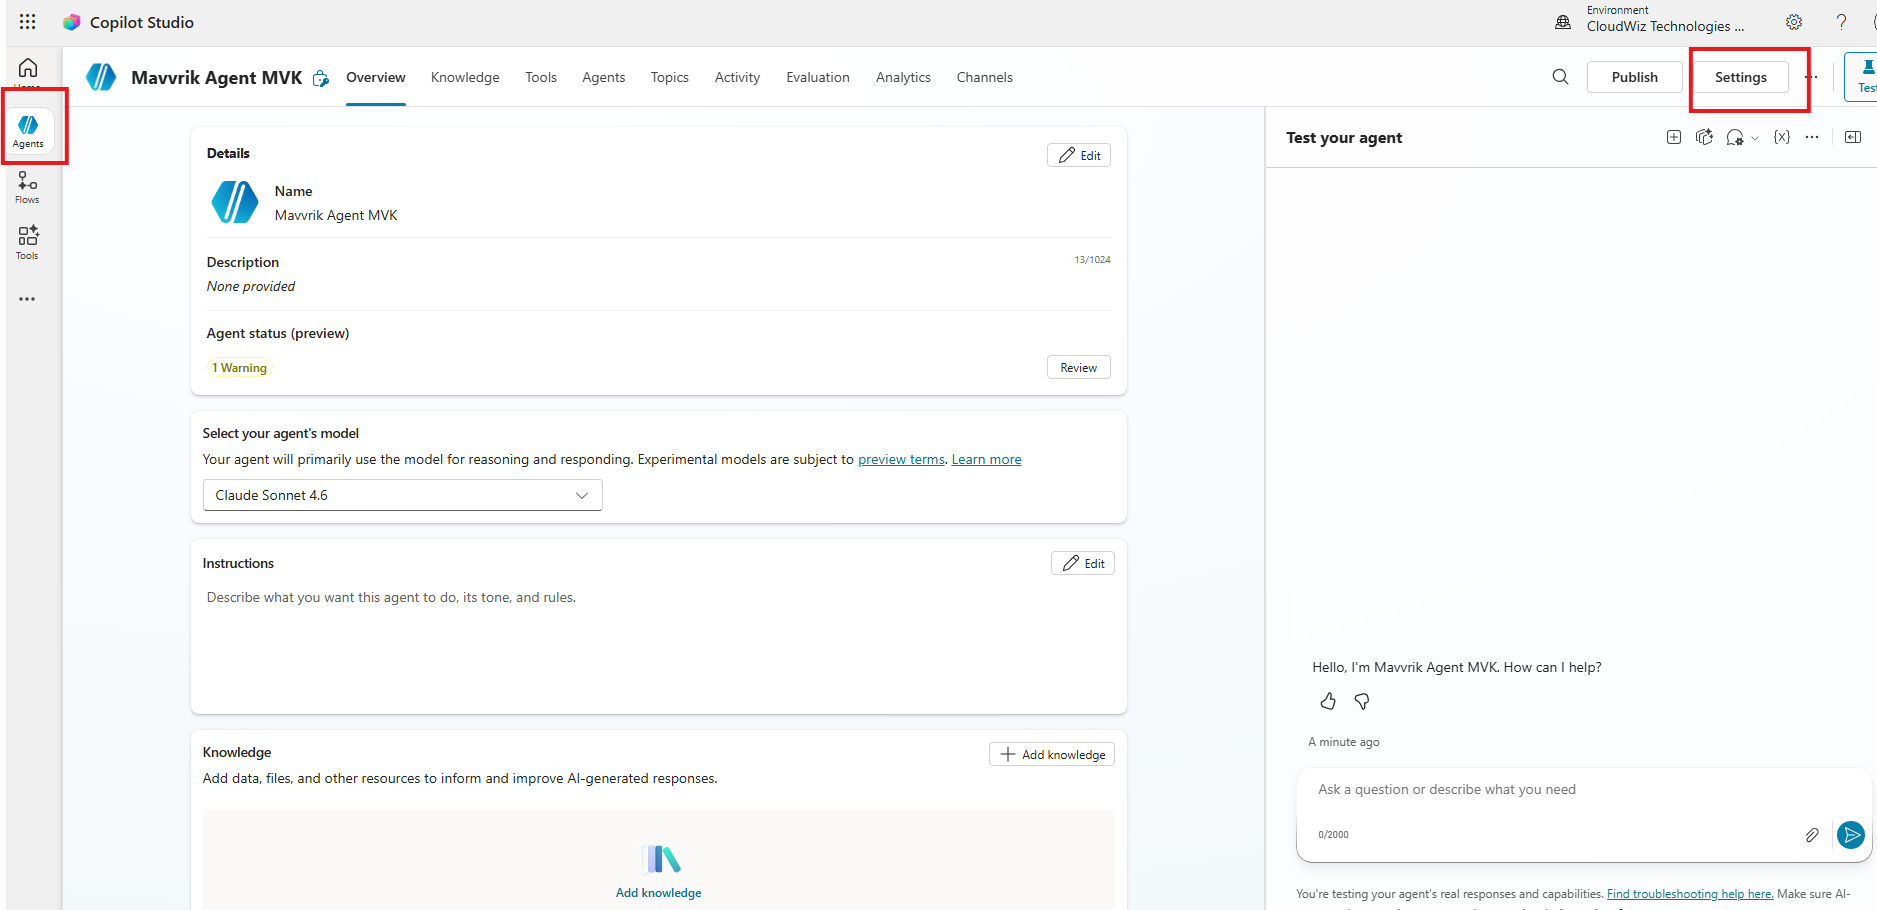
Login to Copilot Studio
-
Click on Agents
-
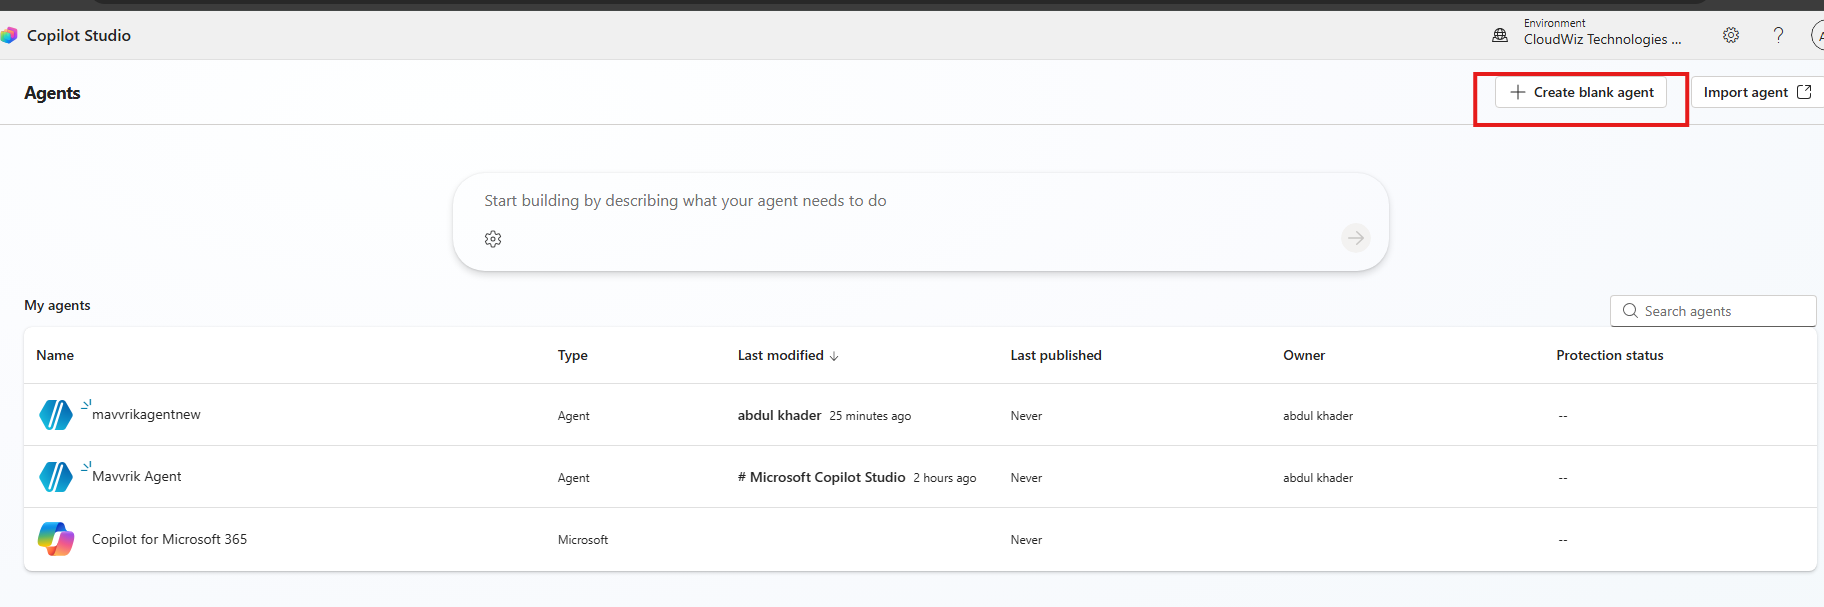
Click on Create blank agent
-
Name your Agent (e.g. Mavvrik Agent MVK) and create
-
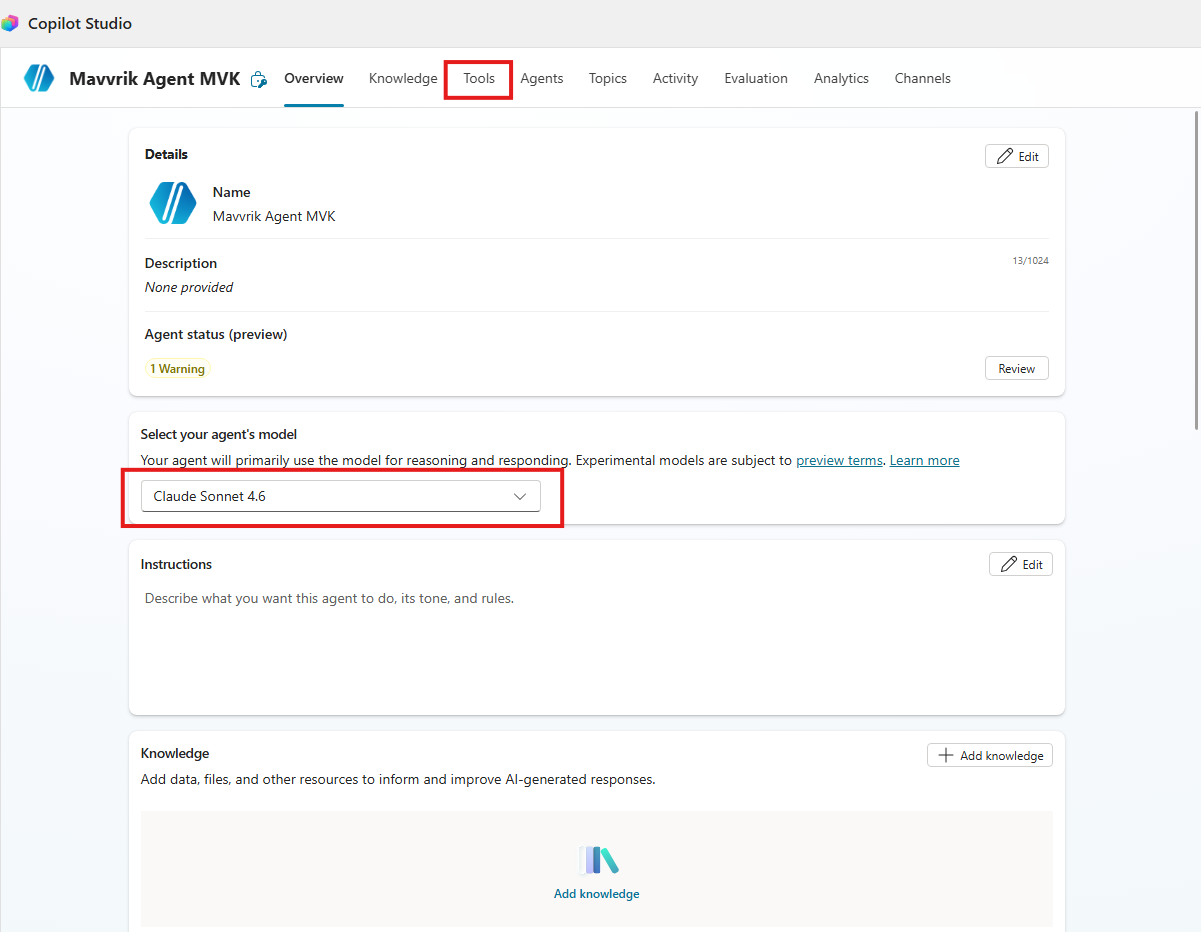
Under Select your agent's model, the agent here uses Claude Sonnet 4.6.
-
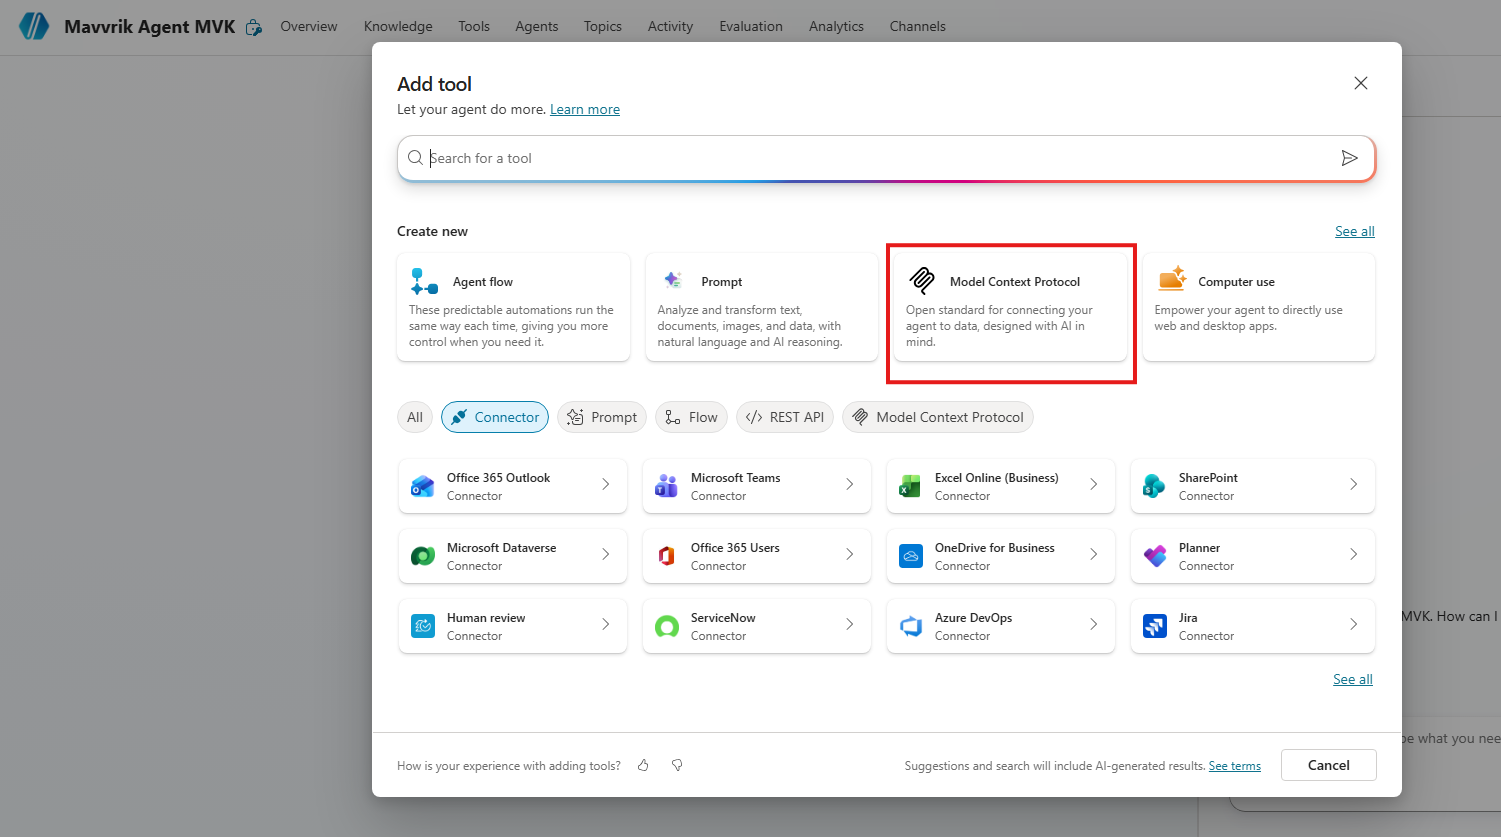
Open the Tools tab and add a tool using the MCP wizard.
-
Fill in the name, description, and the other required fields the wizard asks for.
-
Set the MCP server URL to
https://mcp.mavvrik.ai/ -
Select OAuth 2.0 & Dynamic discovery and Create

-
After clicking Create, below page is displayed, click Create new connection →Click Create
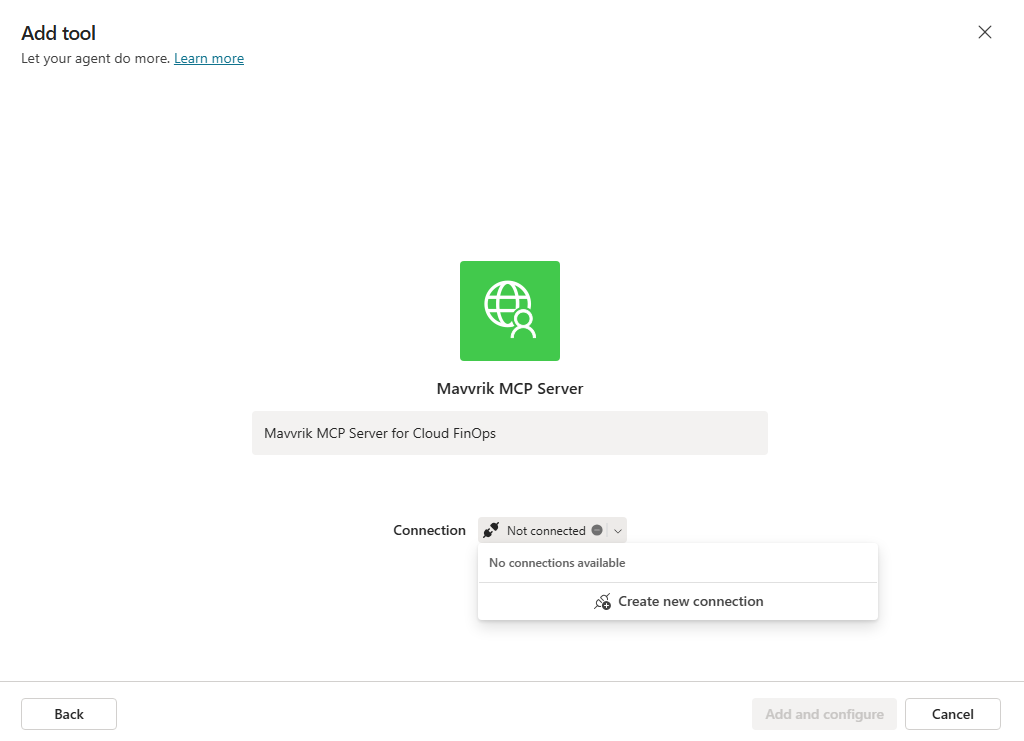
-
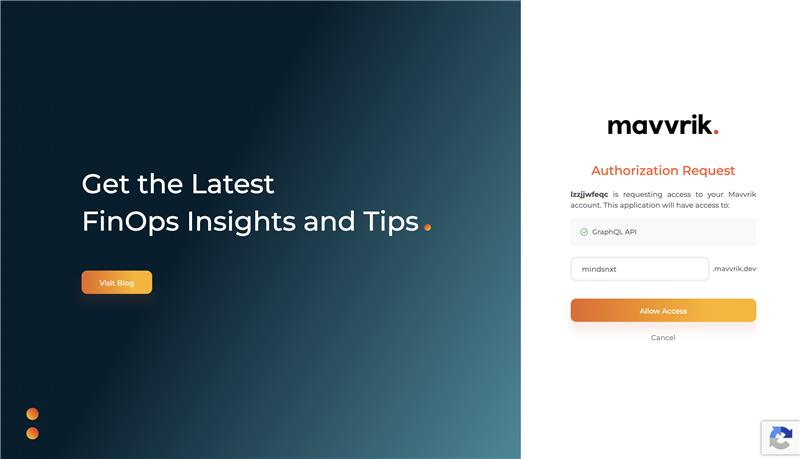
Enter your tenant domain URL, allow access, and then enter your Mavvrik login credentials.
-
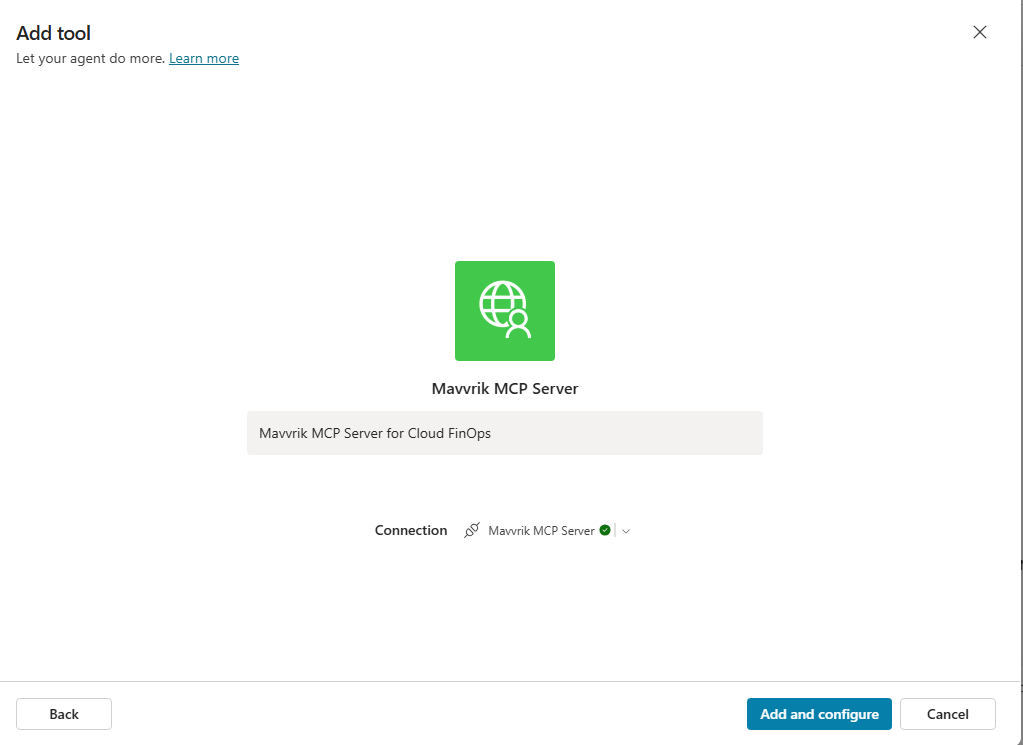
After authorization and login are completed, the connection appears in green. Click the Add and configure button to continue.
-
Click on Tools on left menu
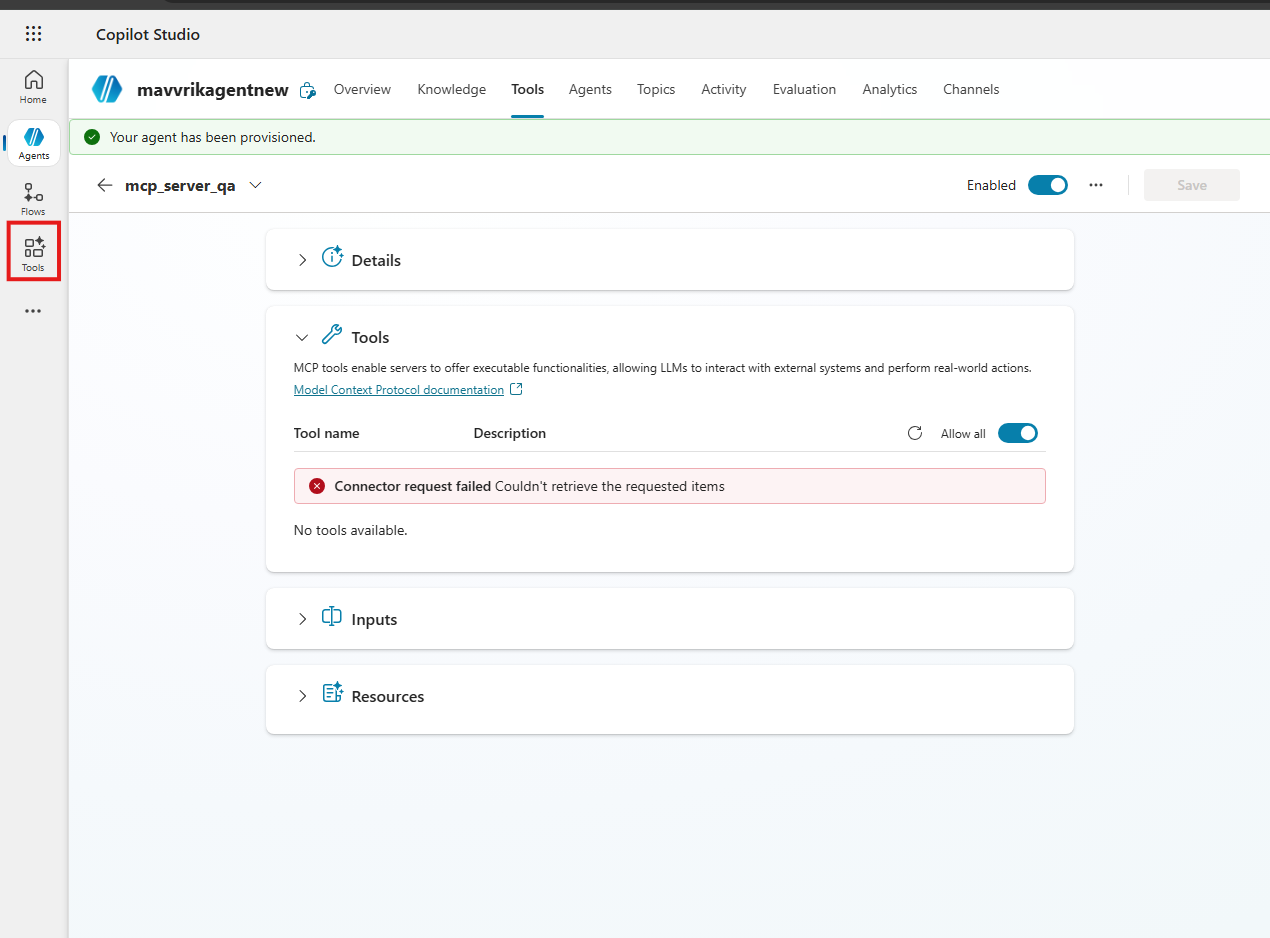
-
Click on the created server
-
Add mcp under Base URL
-
Click Update Connector

-
Navigate back to agents and click on the created agent to validate the connection
-
To validate the connection:
-
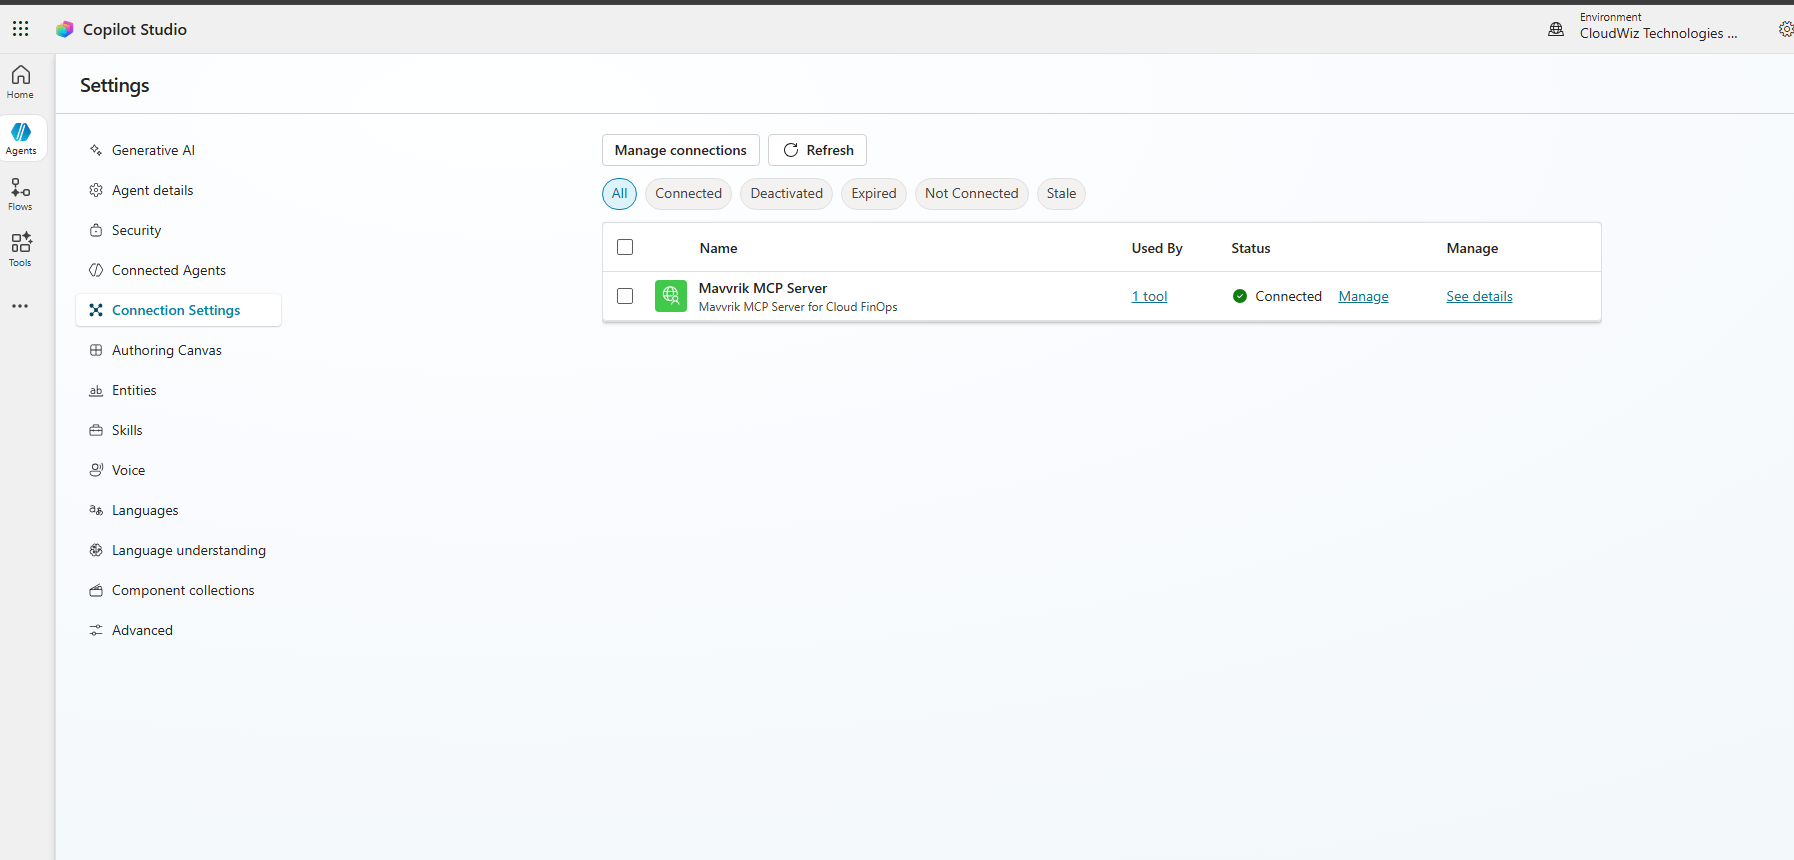
Click Settings.
-
Click Connection Details.
-
Click Connect and Submit

-
Confirm that the status shows Connected. Connected
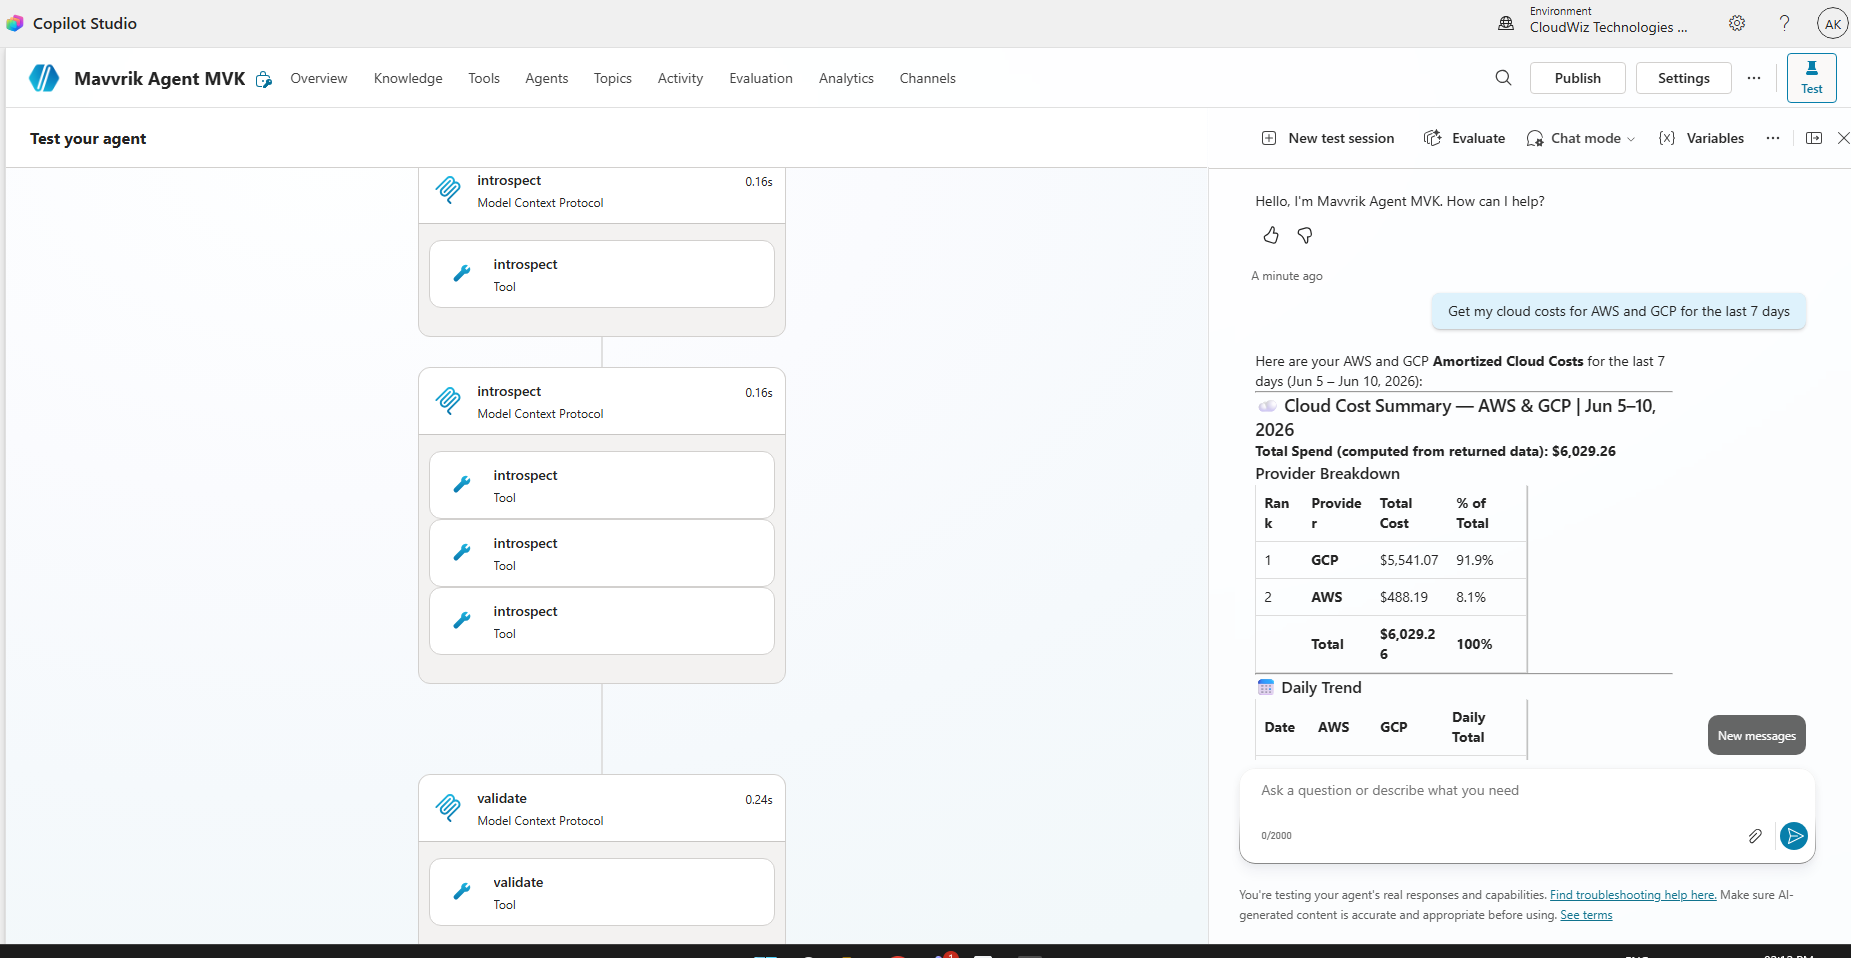
16. To test the agent:
-
Open your agent.
-
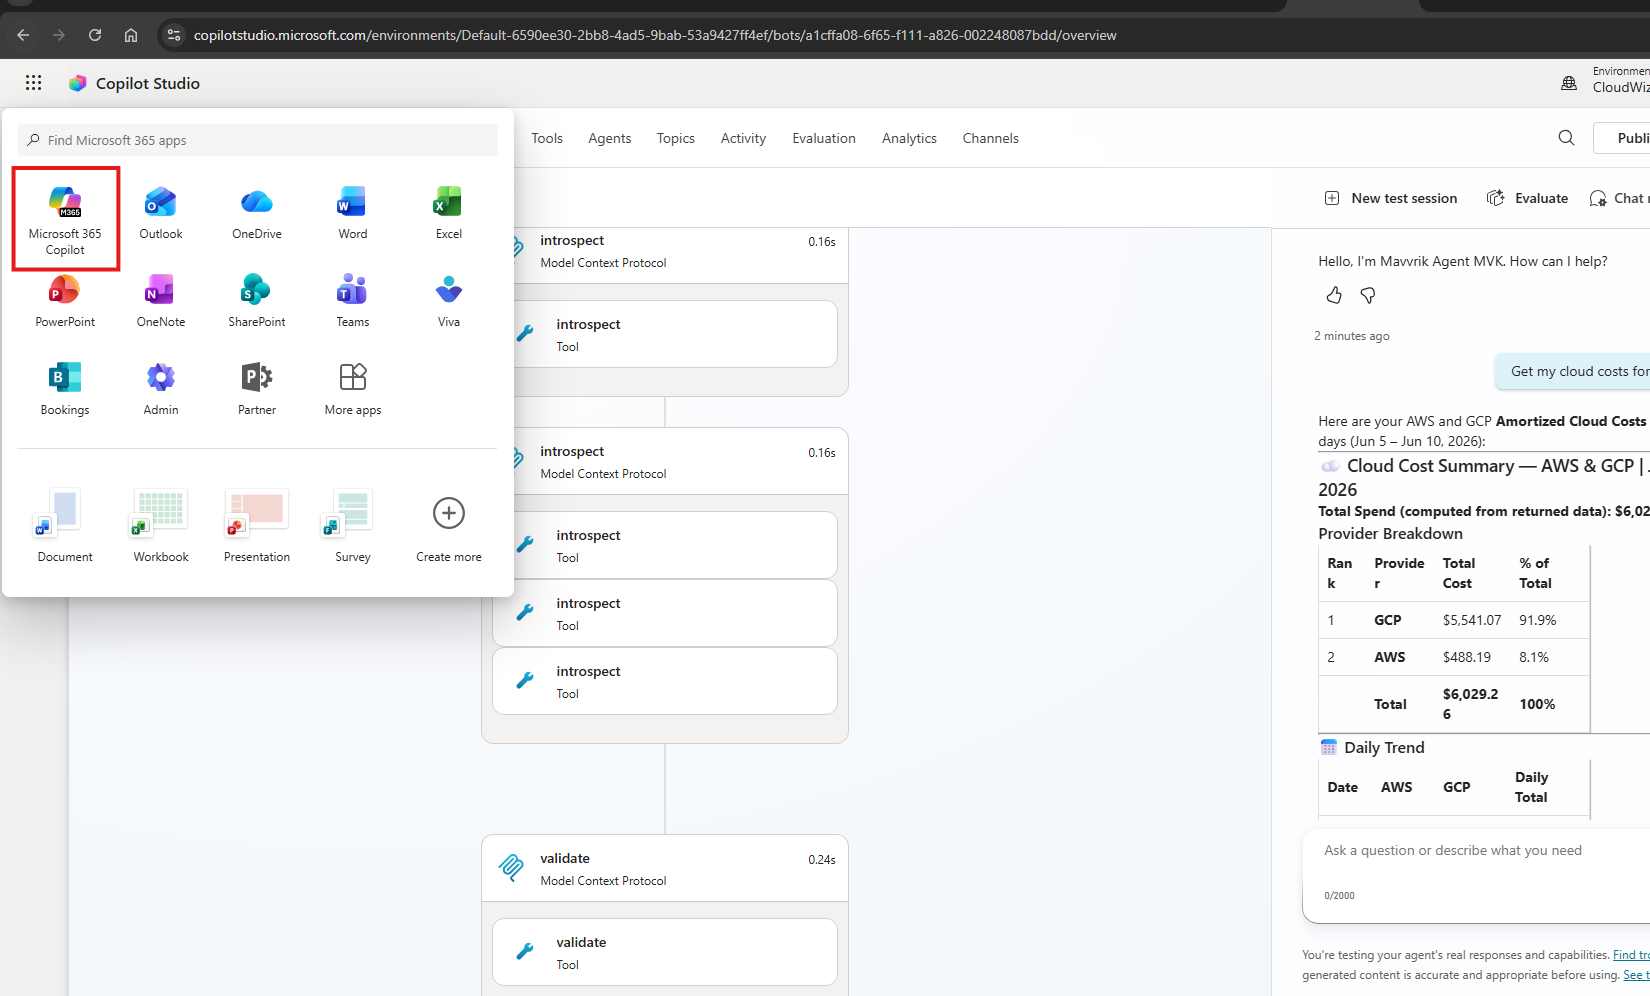
Run a prompt such as: Get my cloud costs for AWS and GCP for the last 7 days.
-
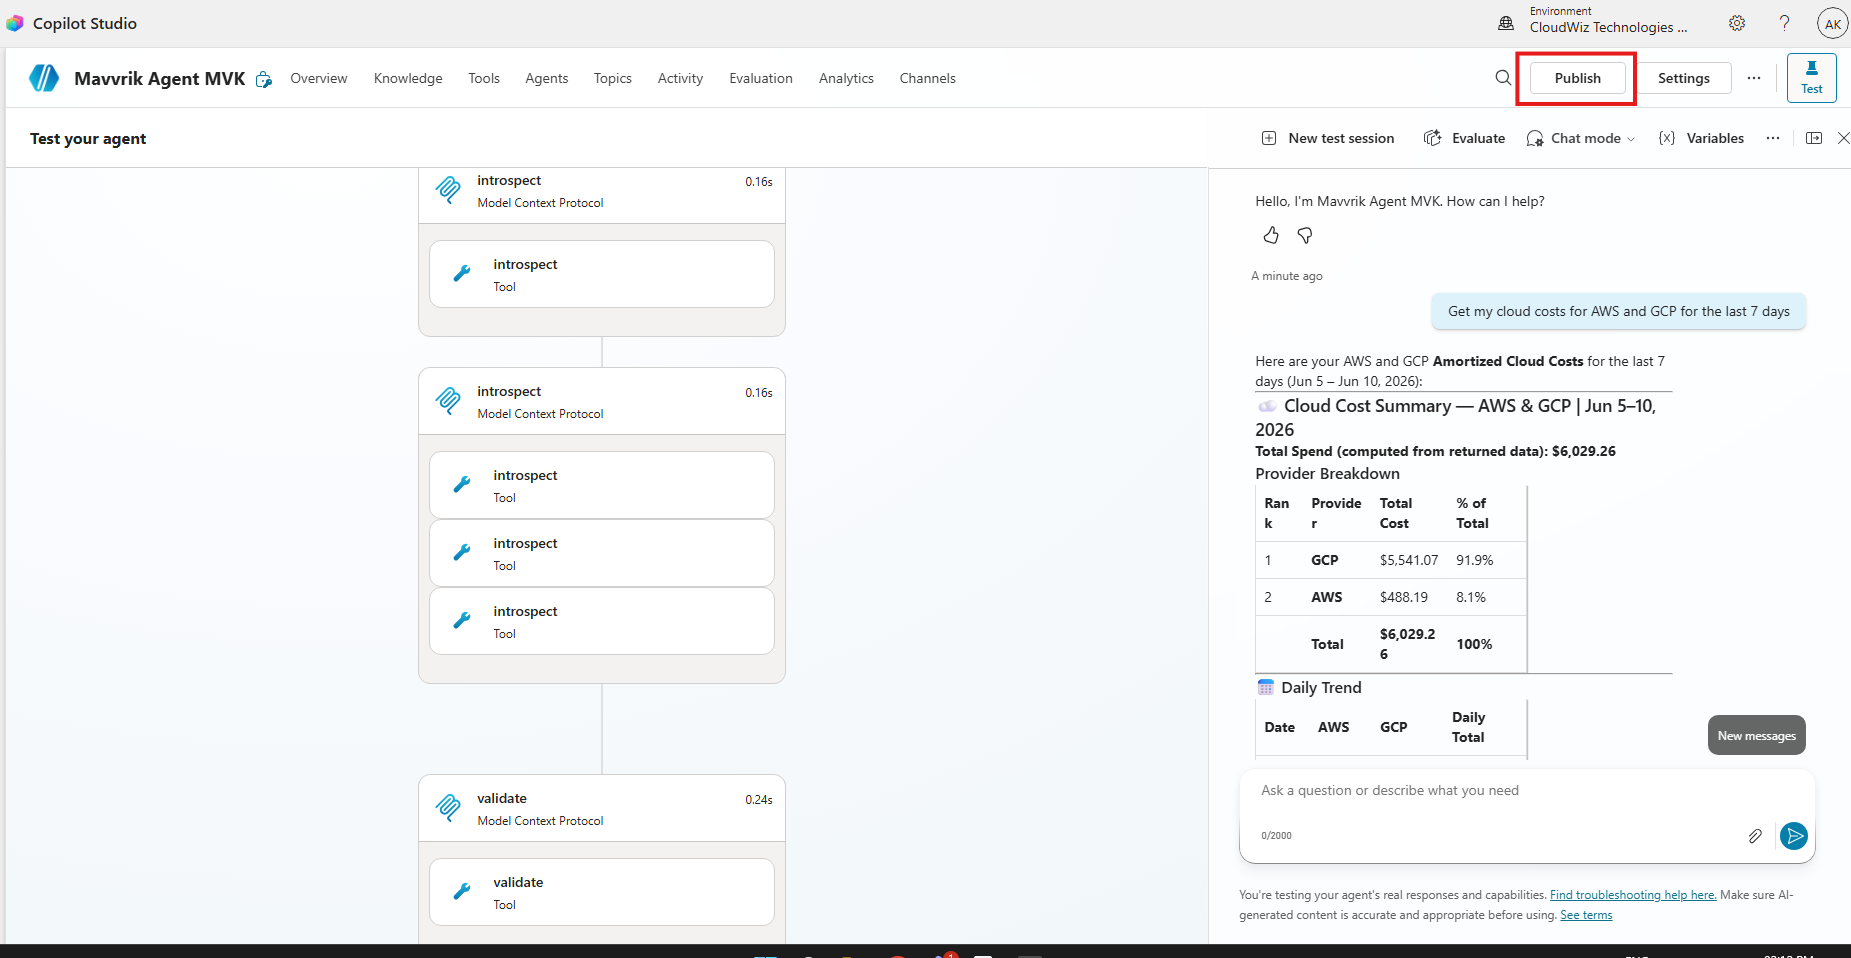
Once the test looks right, click Publish.(requires admin access)
-
After Publish, Navigate to Microsoft 365 Copilot
-
Search the agent in agent store and start using it
Troubleshooting — Connection Shows Green, but Tool Calls Fail
Before the OAuth fix shipped in this release, Copilot's connection manager could show the connection as green, while every tool call failed after the first handshake.
Root cause: during token refresh, the manager reused the refresh token instead of completing the initial authorization-code login. It also called the OAuth authorize endpoint as a public client without PKCE, which produced the following errors:
-
OAuthController:authorize HTTP 400 ("requires public clients to use PKCE RFC-7636") -
TokenRepository:issueToken failure ("uid argument must be a non-empty string")
The connection flow now performs a proper PKCE authorization-code login, so this issue is resolved in current builds.
If you still encounter this issue, recreate the connection in Step 7 to force a fresh login instead of relying on a cached or refreshed token.