.png)
Mavvrik does not support IDP-initiated flow for single sign-on (SSO). In order to use SSO with Mavvrik, you will need to initiate the SSO process from Mavvrik
Below is the description of the steps to Create SAML App in Microsoft 365
-
Login to Microsoft 365 Admin Console.
-
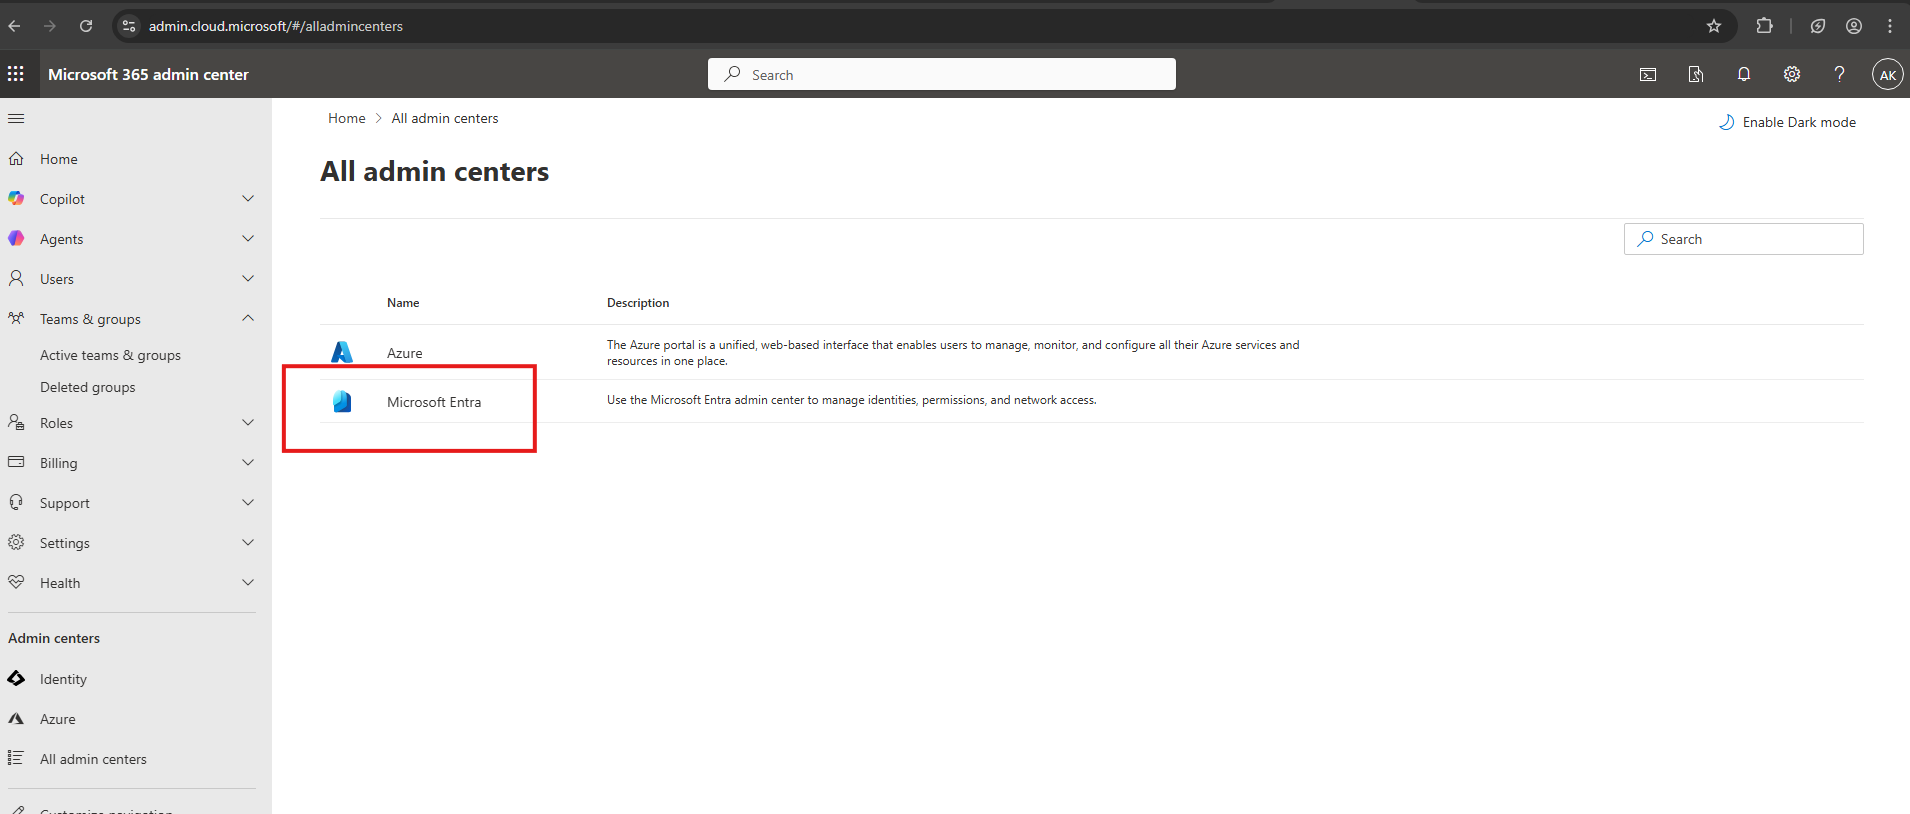
In the Microsoft 365 Admin Center, click on All Admin Centers
-
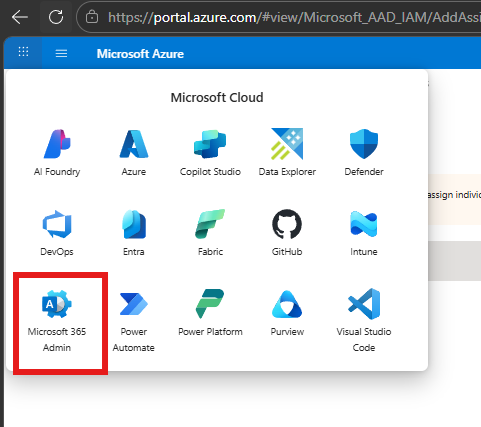
Click on Microsoft Entra, as shown below.
-
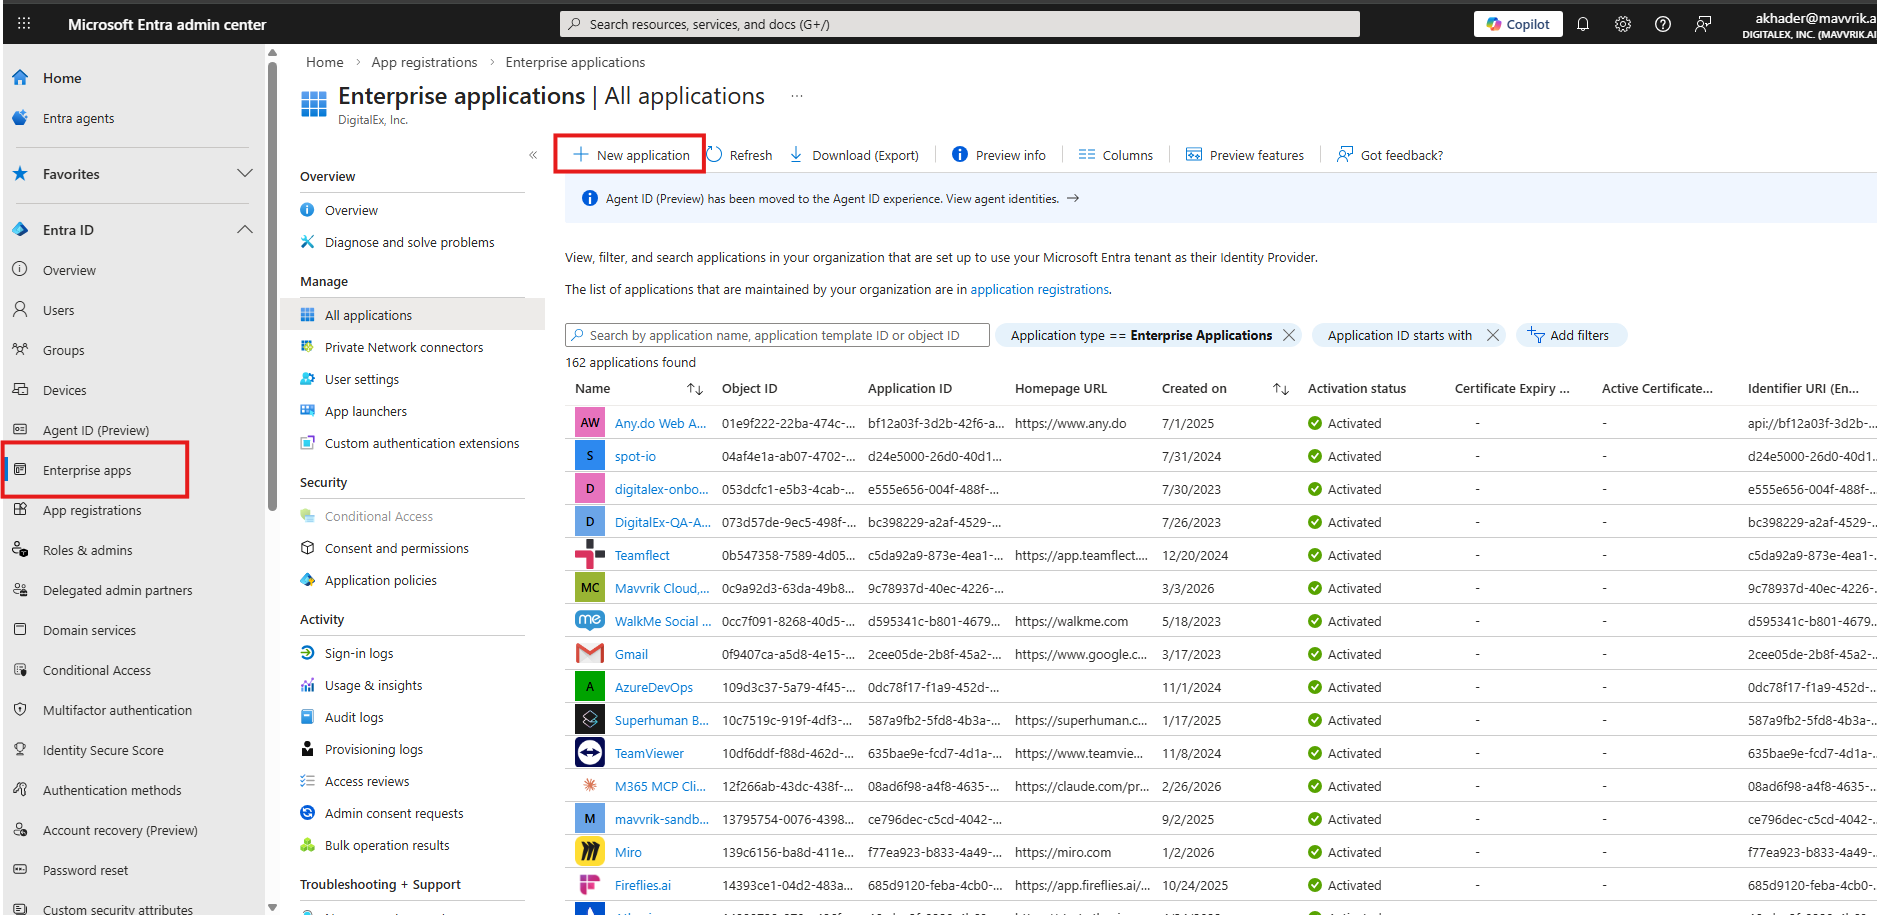
Go to Enterprise apps
-
From Enterprise apps click on “New application” as shown below.
-
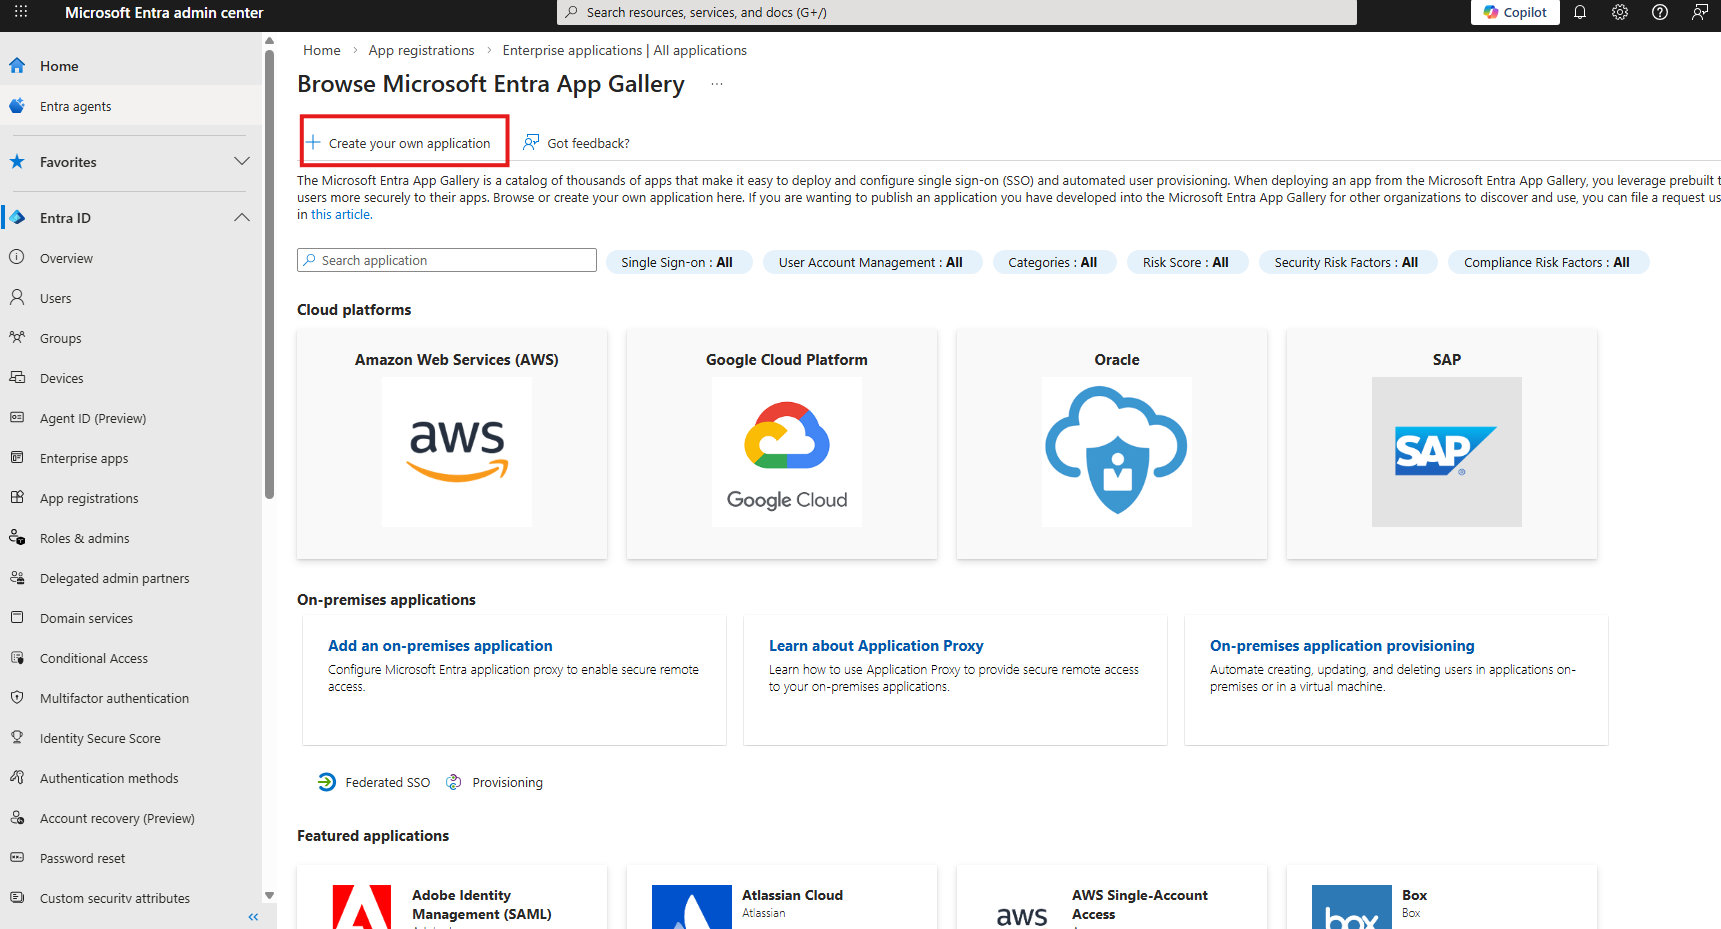
Click on “Create your own application” as shown below
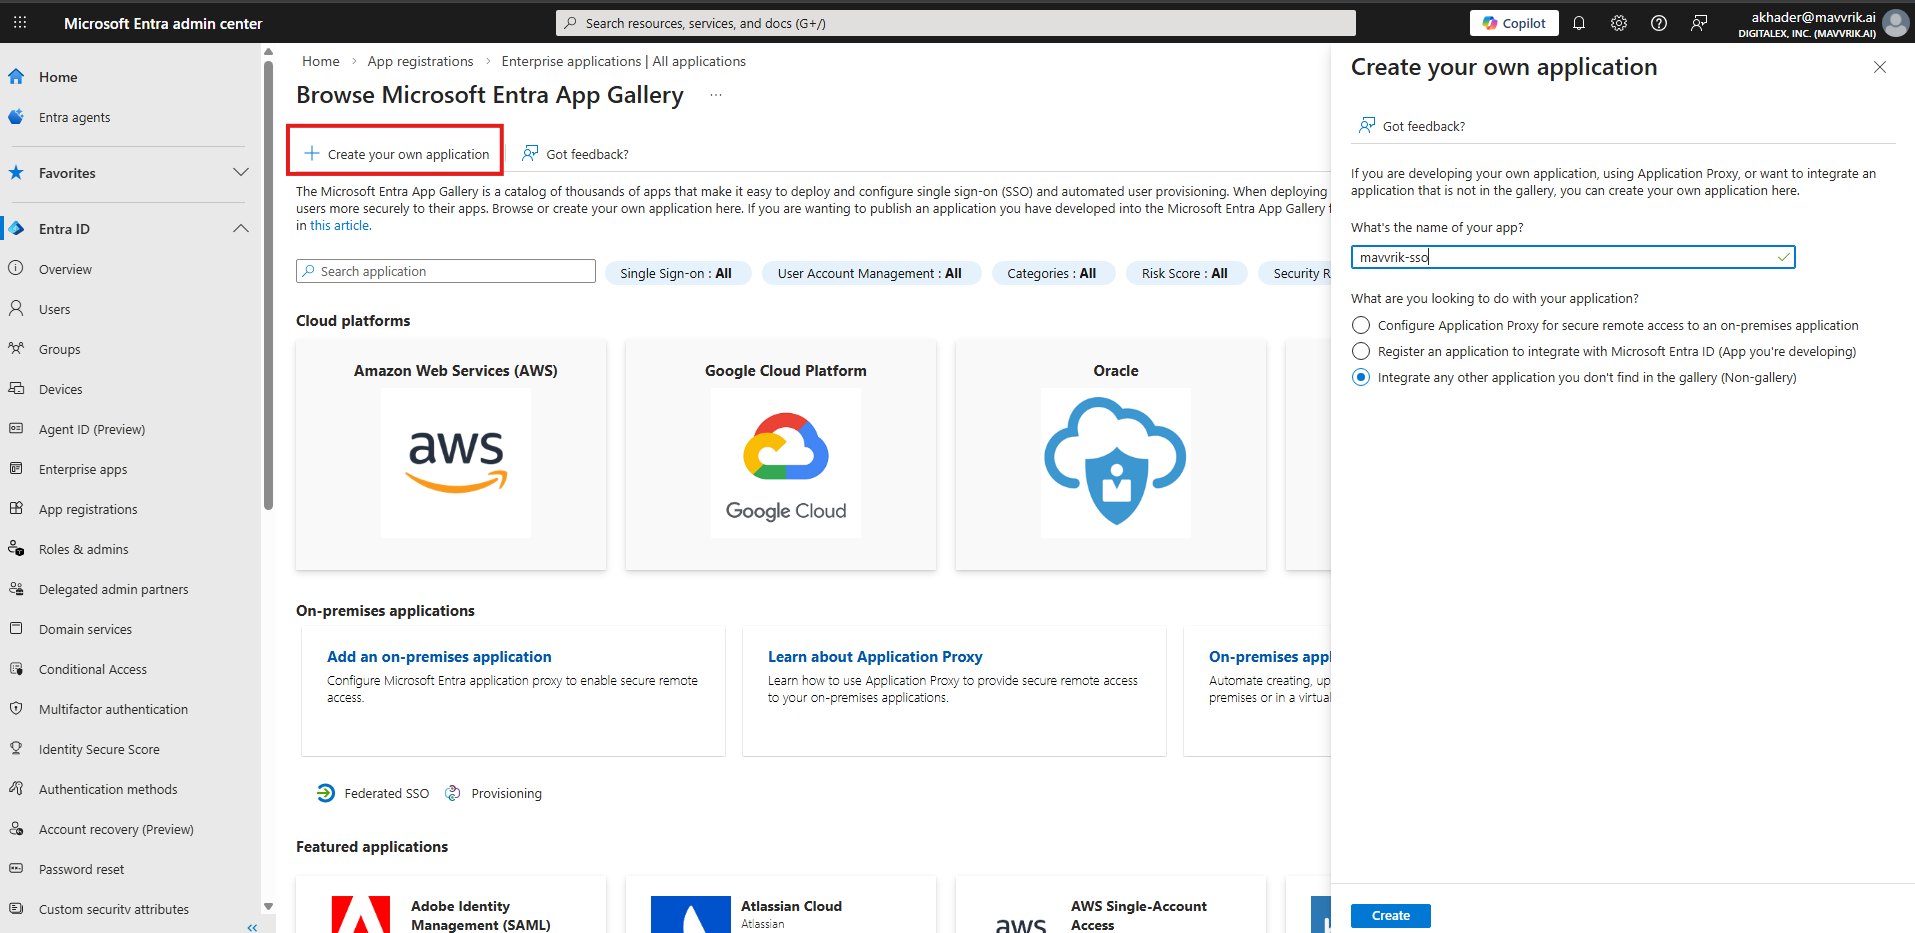
7. Enter the application name (e.g. “Mavvrik”) and select the third option, “Integrate any other application you don’t find in the gallery”, as shown below.
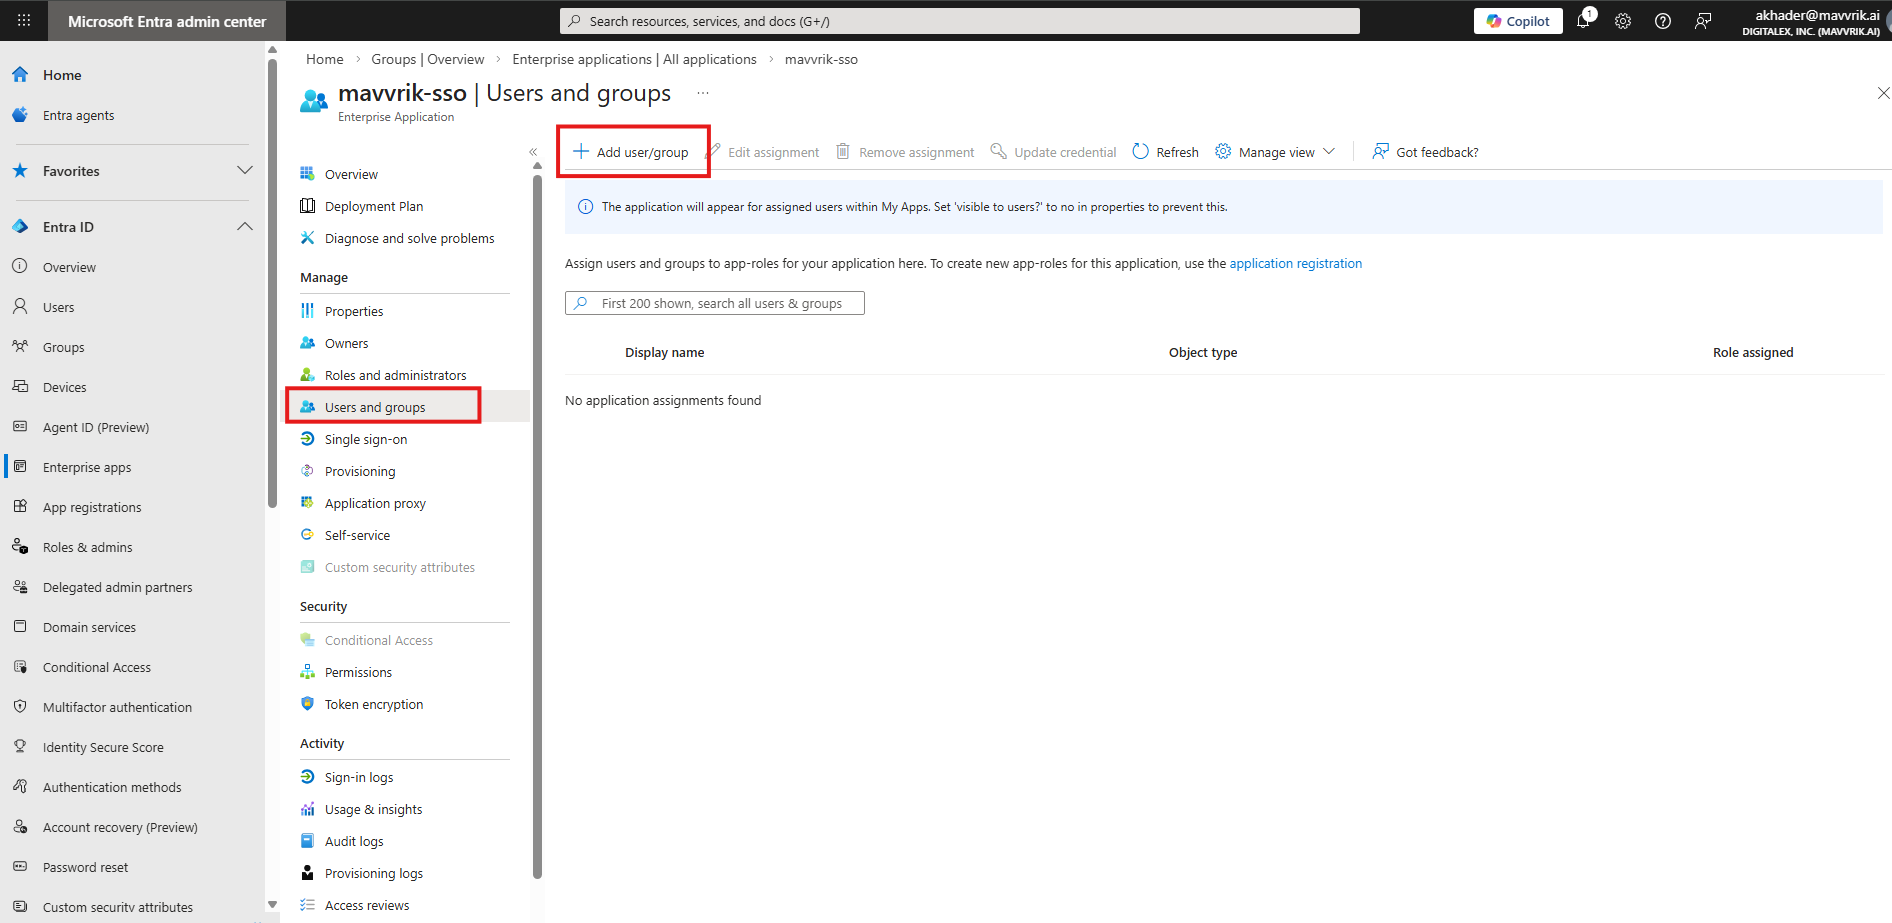
8. Add users or groups. We recommend adding a group to avoid assigning access to individual users when onboarding new employees.
-
After adding users, you can see them listed as shown below.

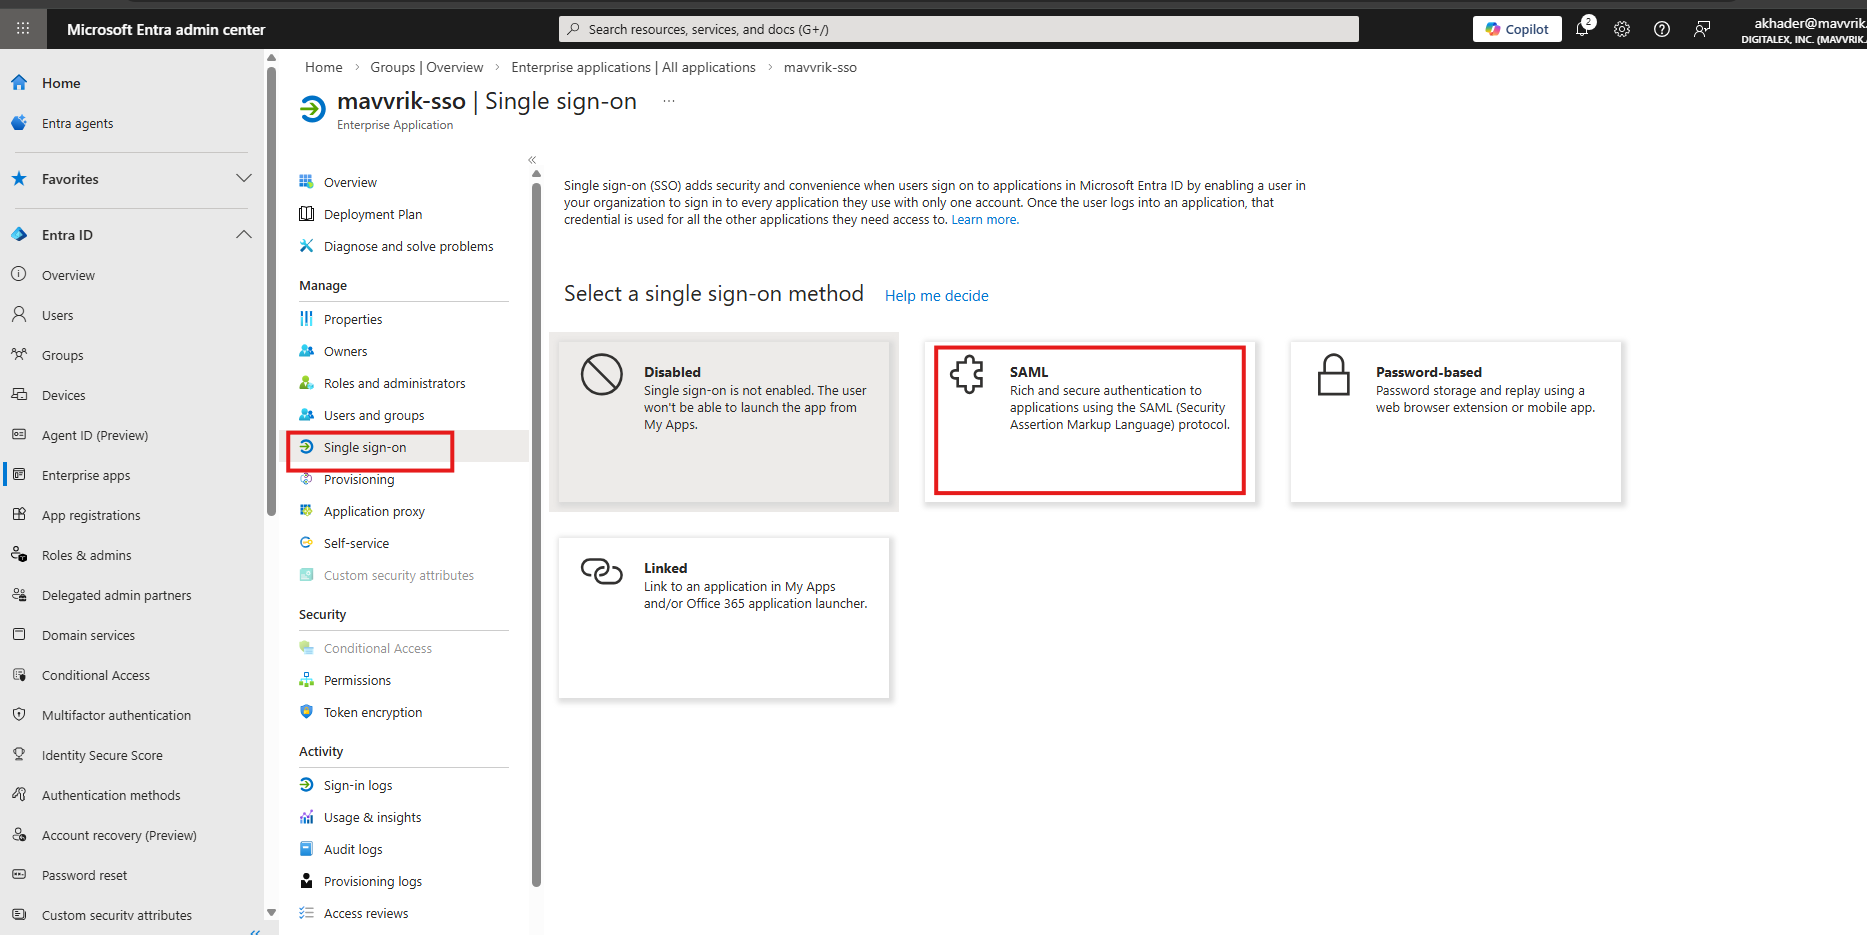
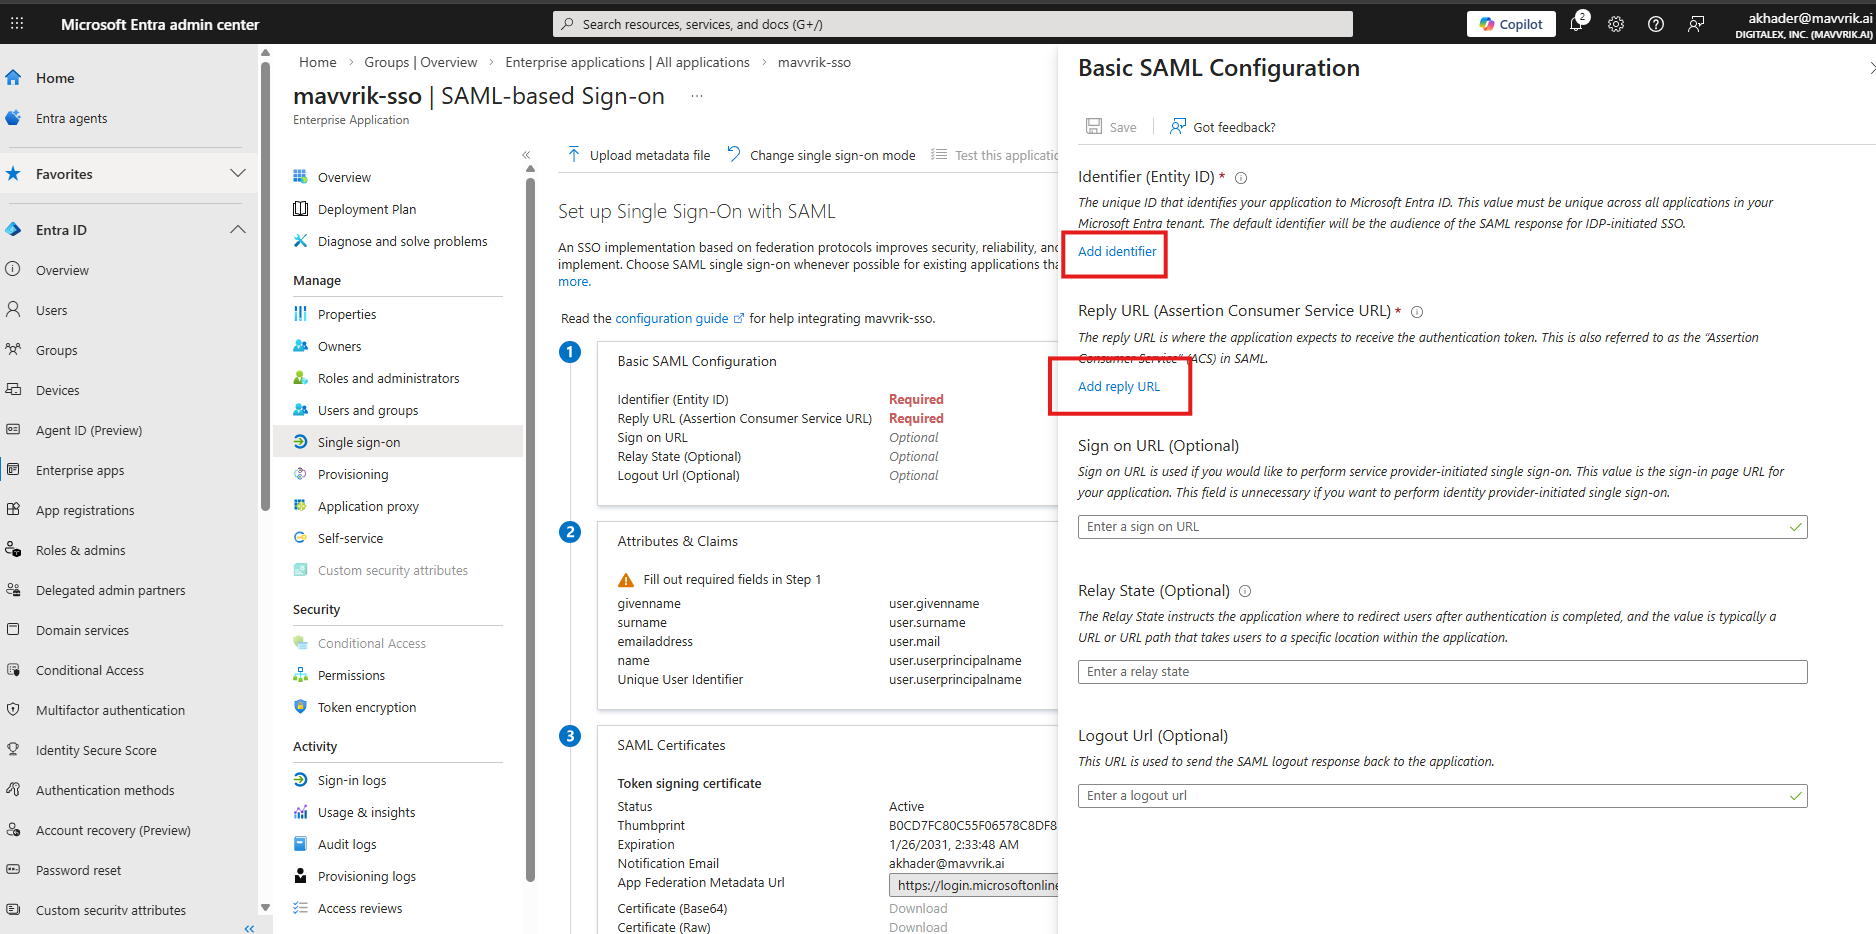
10. Go to Single Single-on and select SAML
-
Click on Edit button
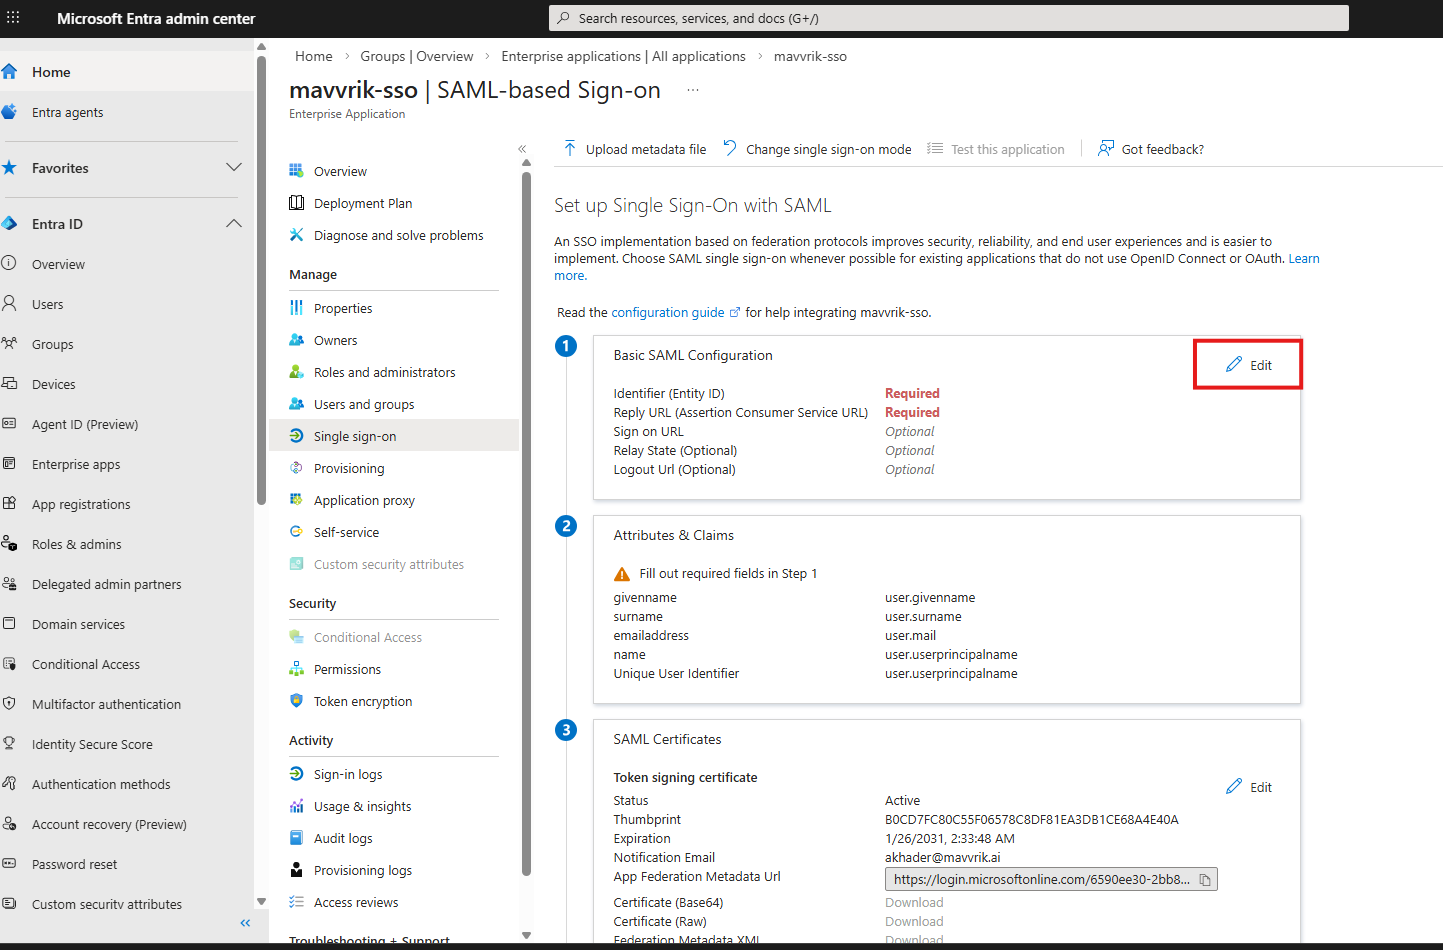
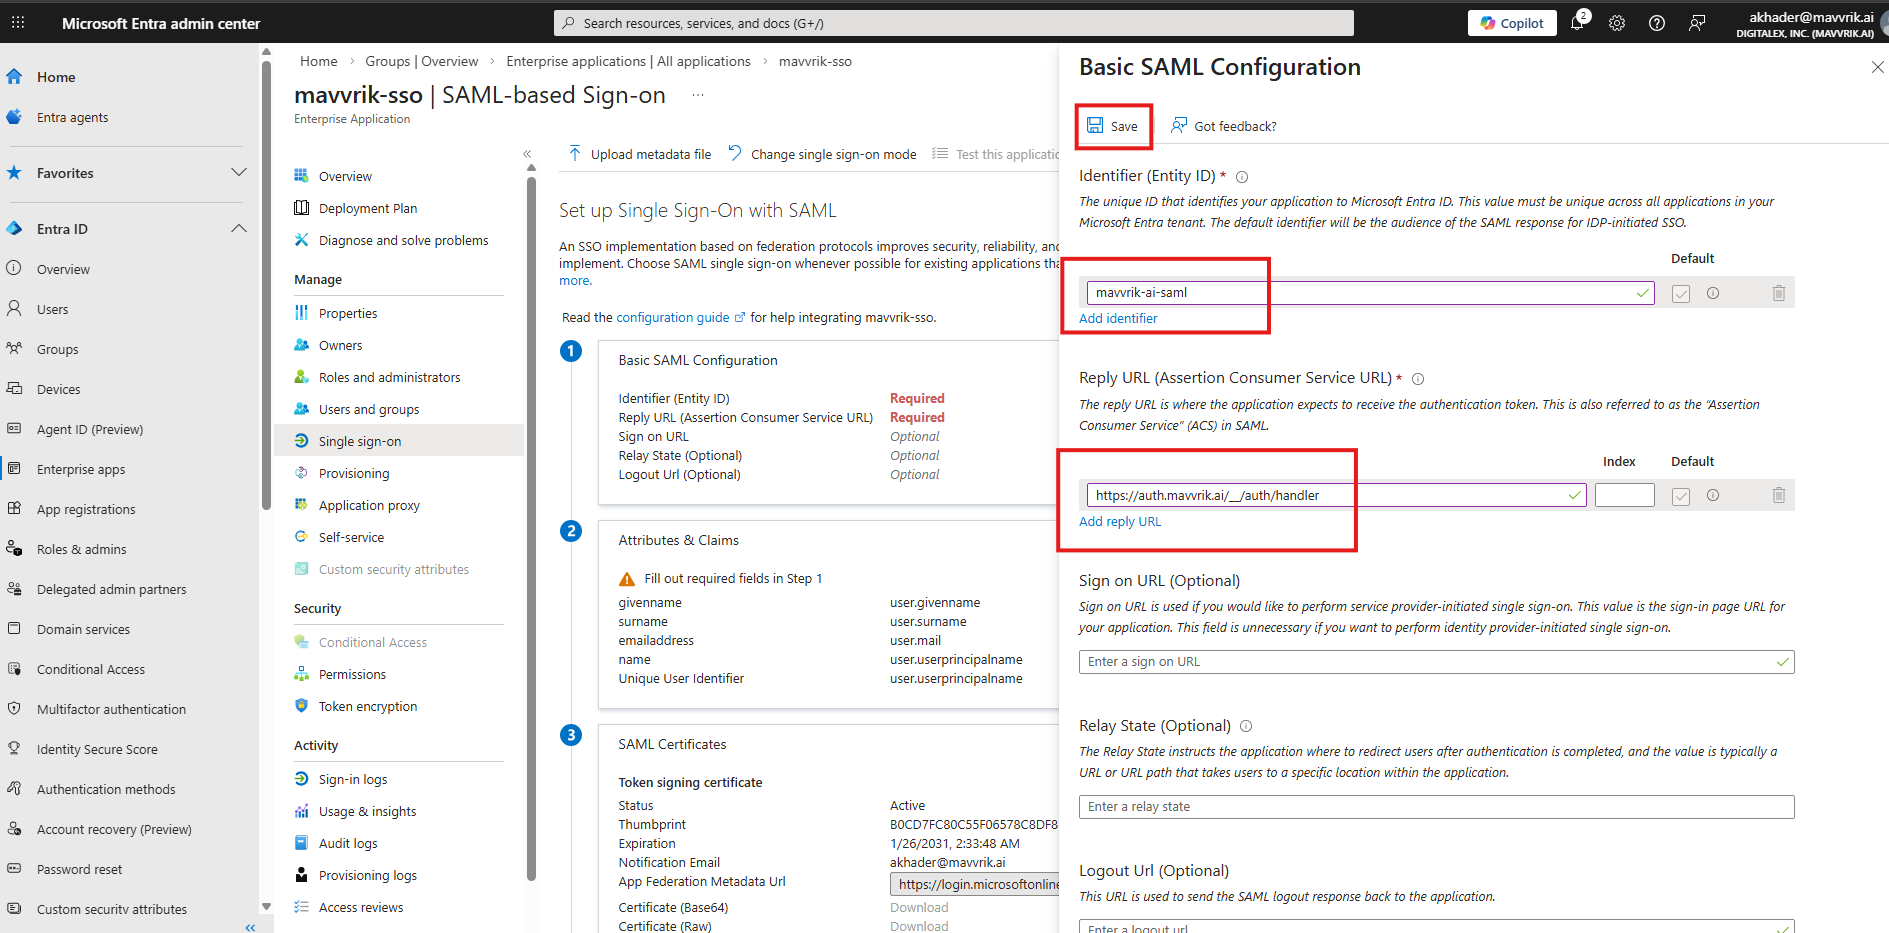
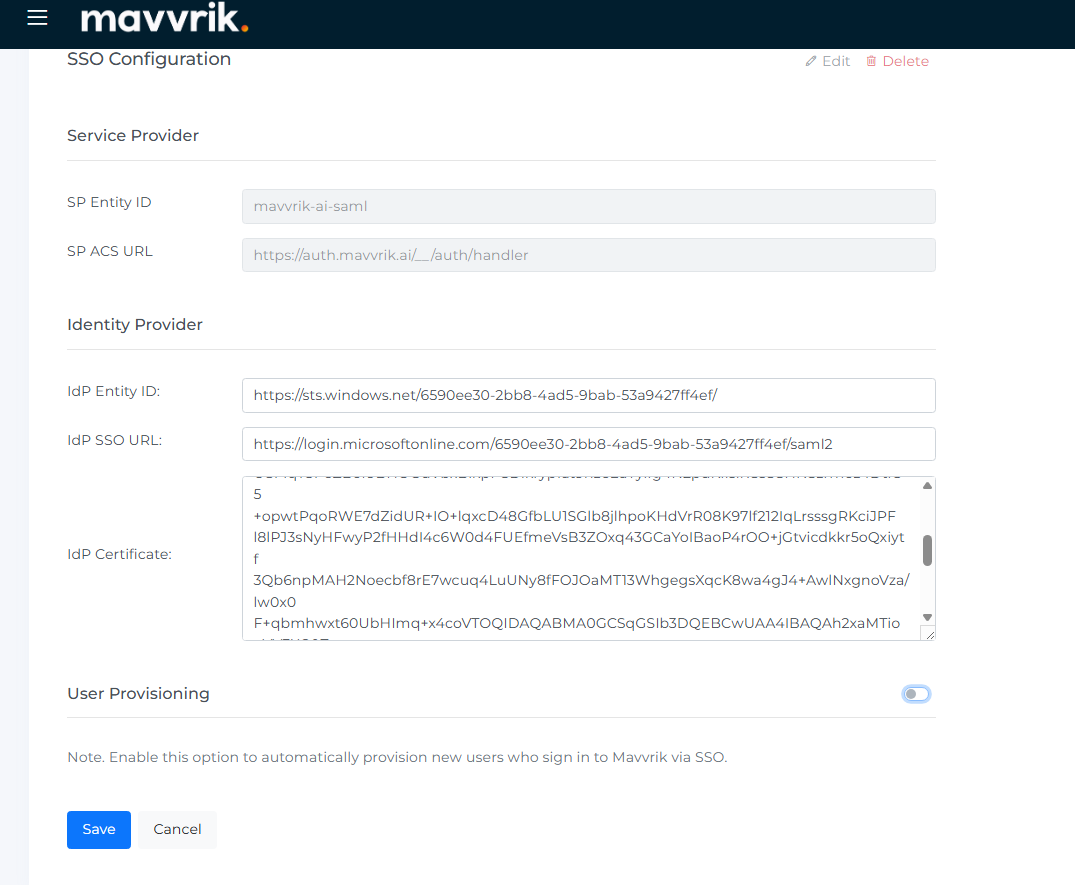
12. Enter the “SP Entity ID” copied from Step 1 and paste it into the Add Identifier field. Then copy the “SP ACS URL” from Step 1 and paste it into the Add Reply URL field, as shown below.
-
Click on Save
-
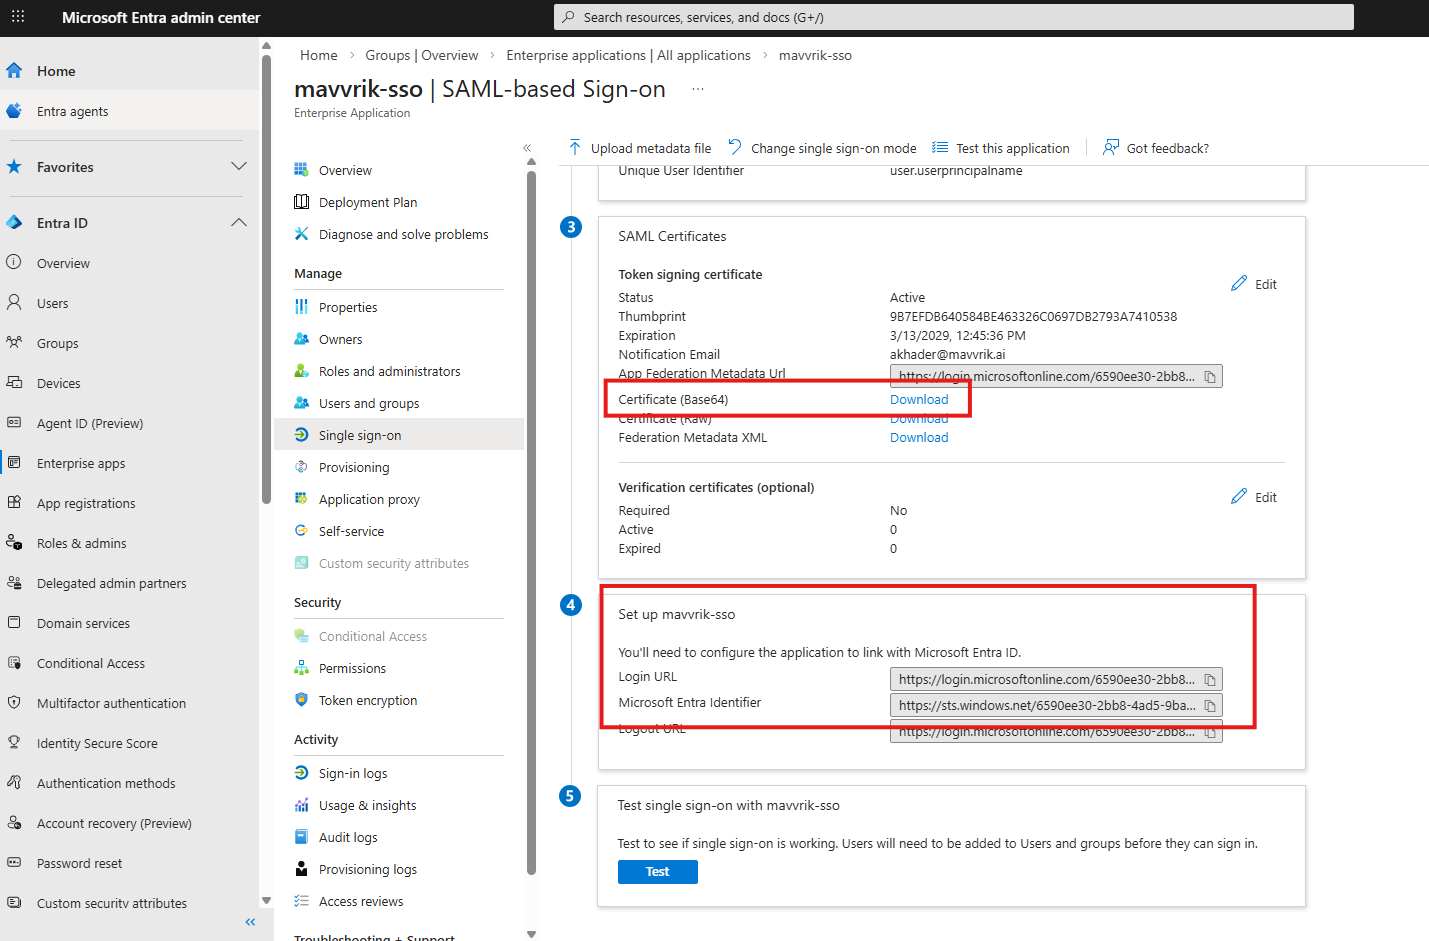
Download SAML Signing Certificate, Base64 version as shown below
-
Copy the Microsoft Entra Identifier from Step 4, as shown in the picture below, and paste it into the IdP Entity ID field on the Mavvrik SSO configuration page.
16. Copy the Login URL from Step 4, as shown in the picture below, and paste it into the IdP SSO URL field on the Mavvrik SSO Configuration page.
17. Copy the contents of the certificate you downloaded earlier and paste them into the IdP Certificate field on Mavvrik.
18. The Test Single Sign-on doesn’t work. However, you can use Login with SSO from the Mavvrik login page to test this integration.