.png)
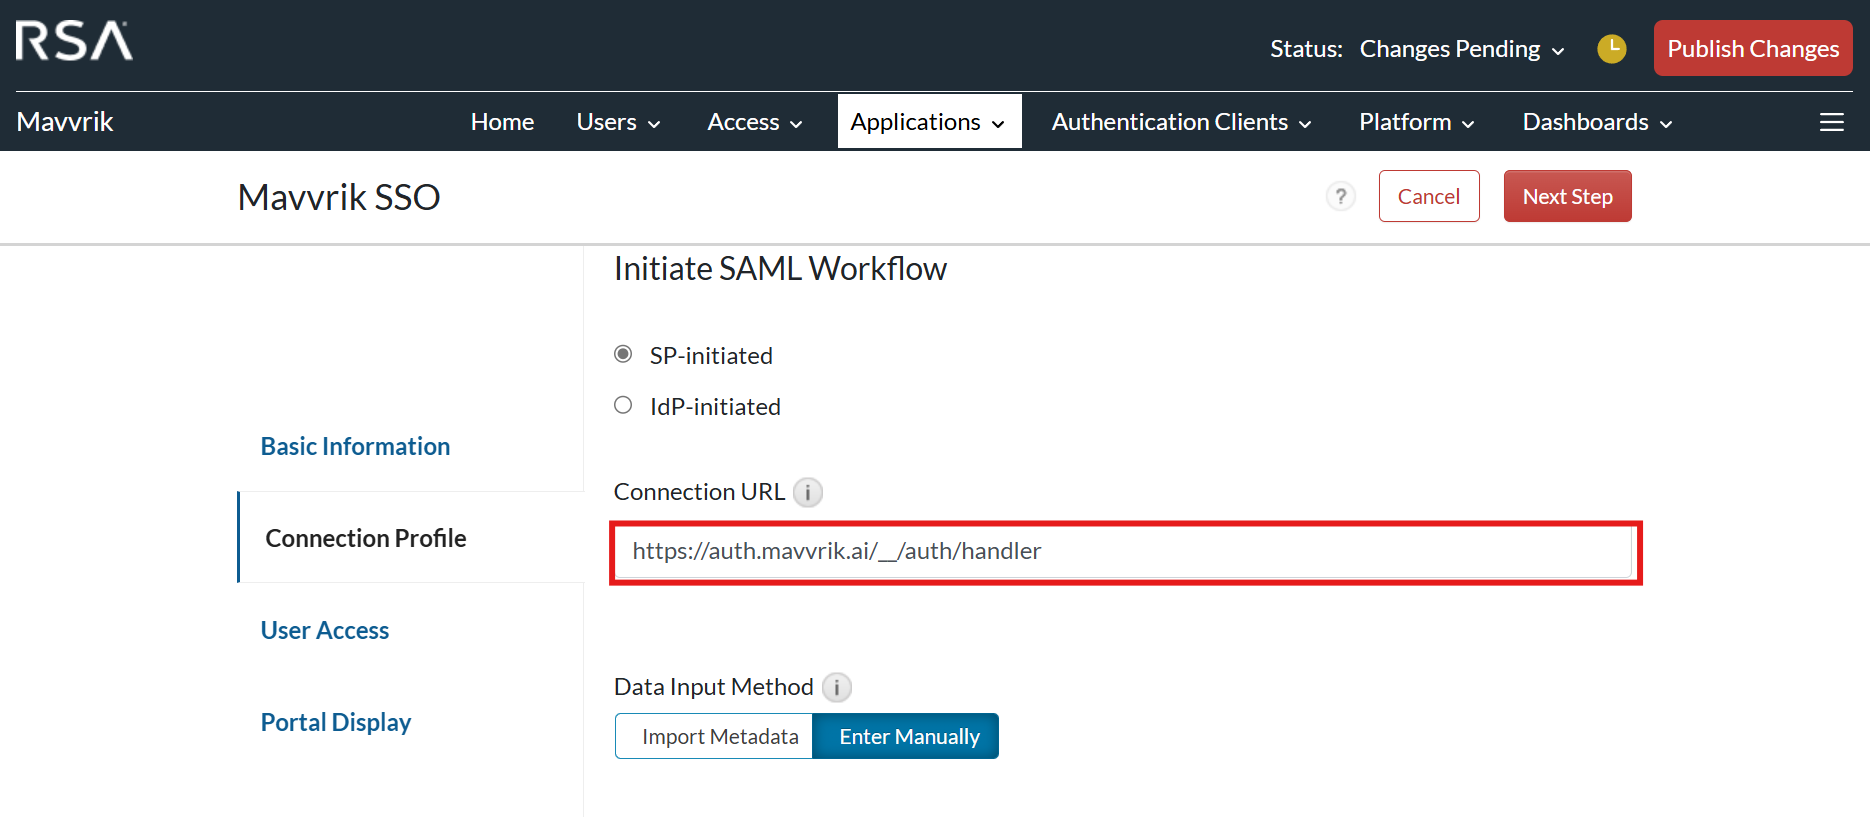
Note: Mavvrik does not support IDP-initiated flow for single sign-on (SSO). In order to use SSO with Mavvrik, you will need to initiate the SSO process from Mavvrik
Here are the steps to create a SAML app in RSA:
-
Log in to RSA Secure Id admin console
-
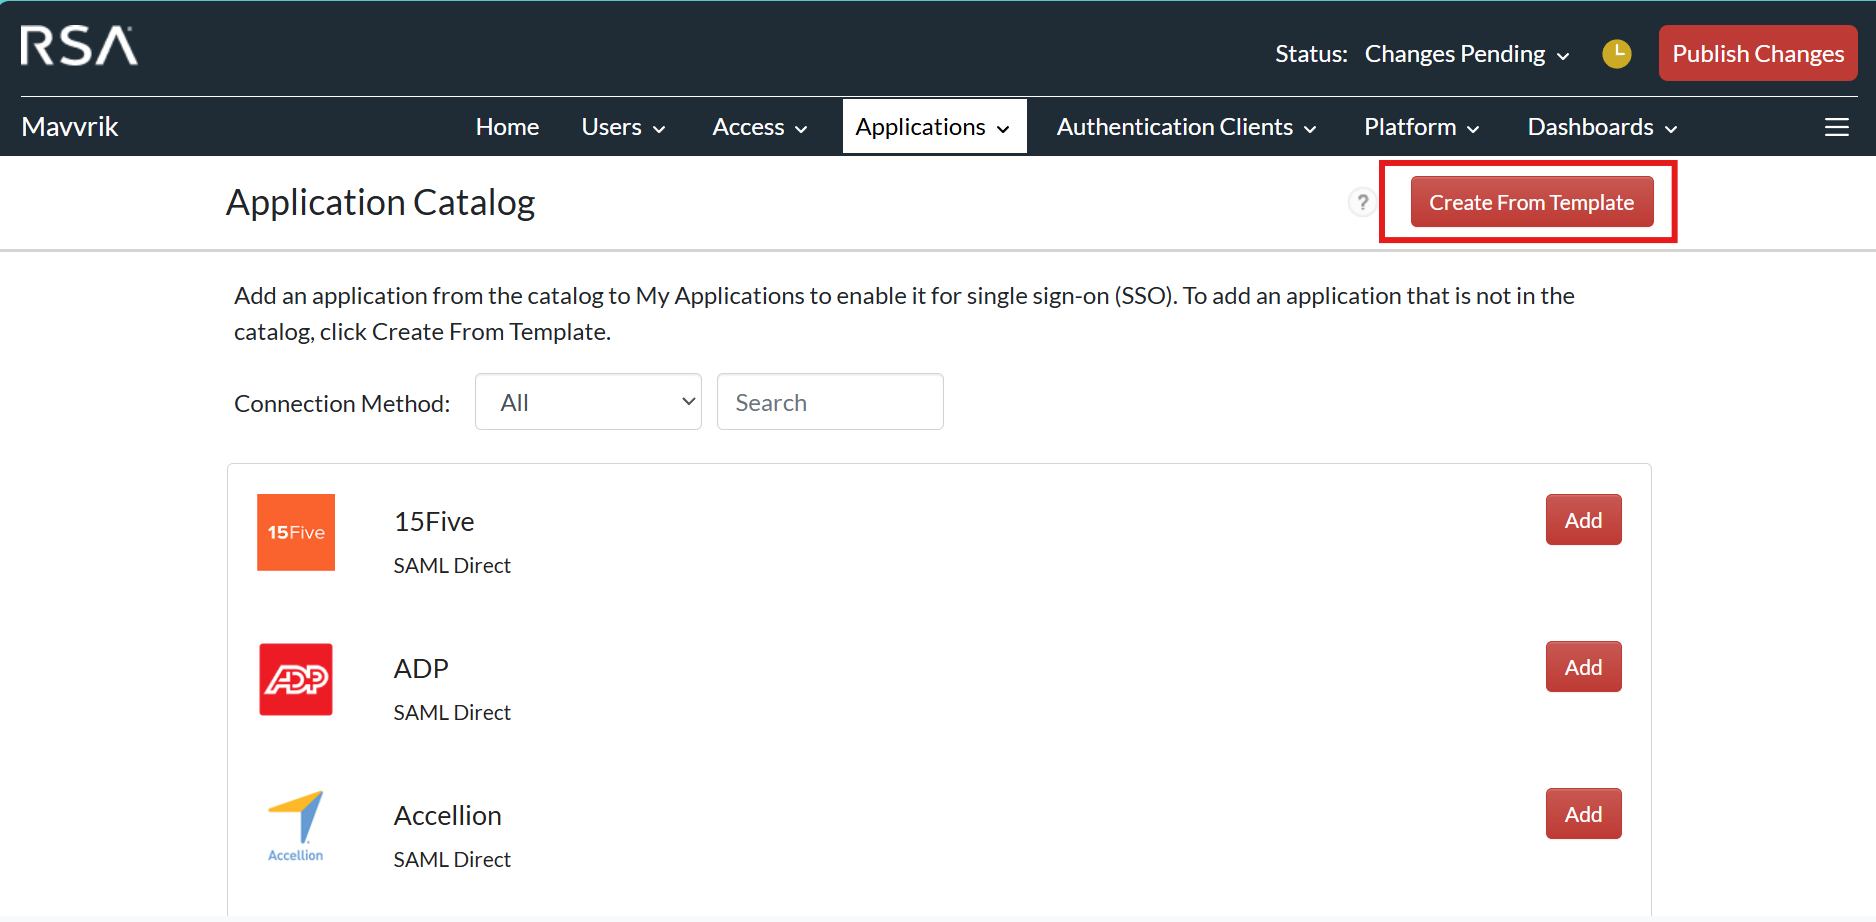
Click on Applications
-
Click on My Applications
-
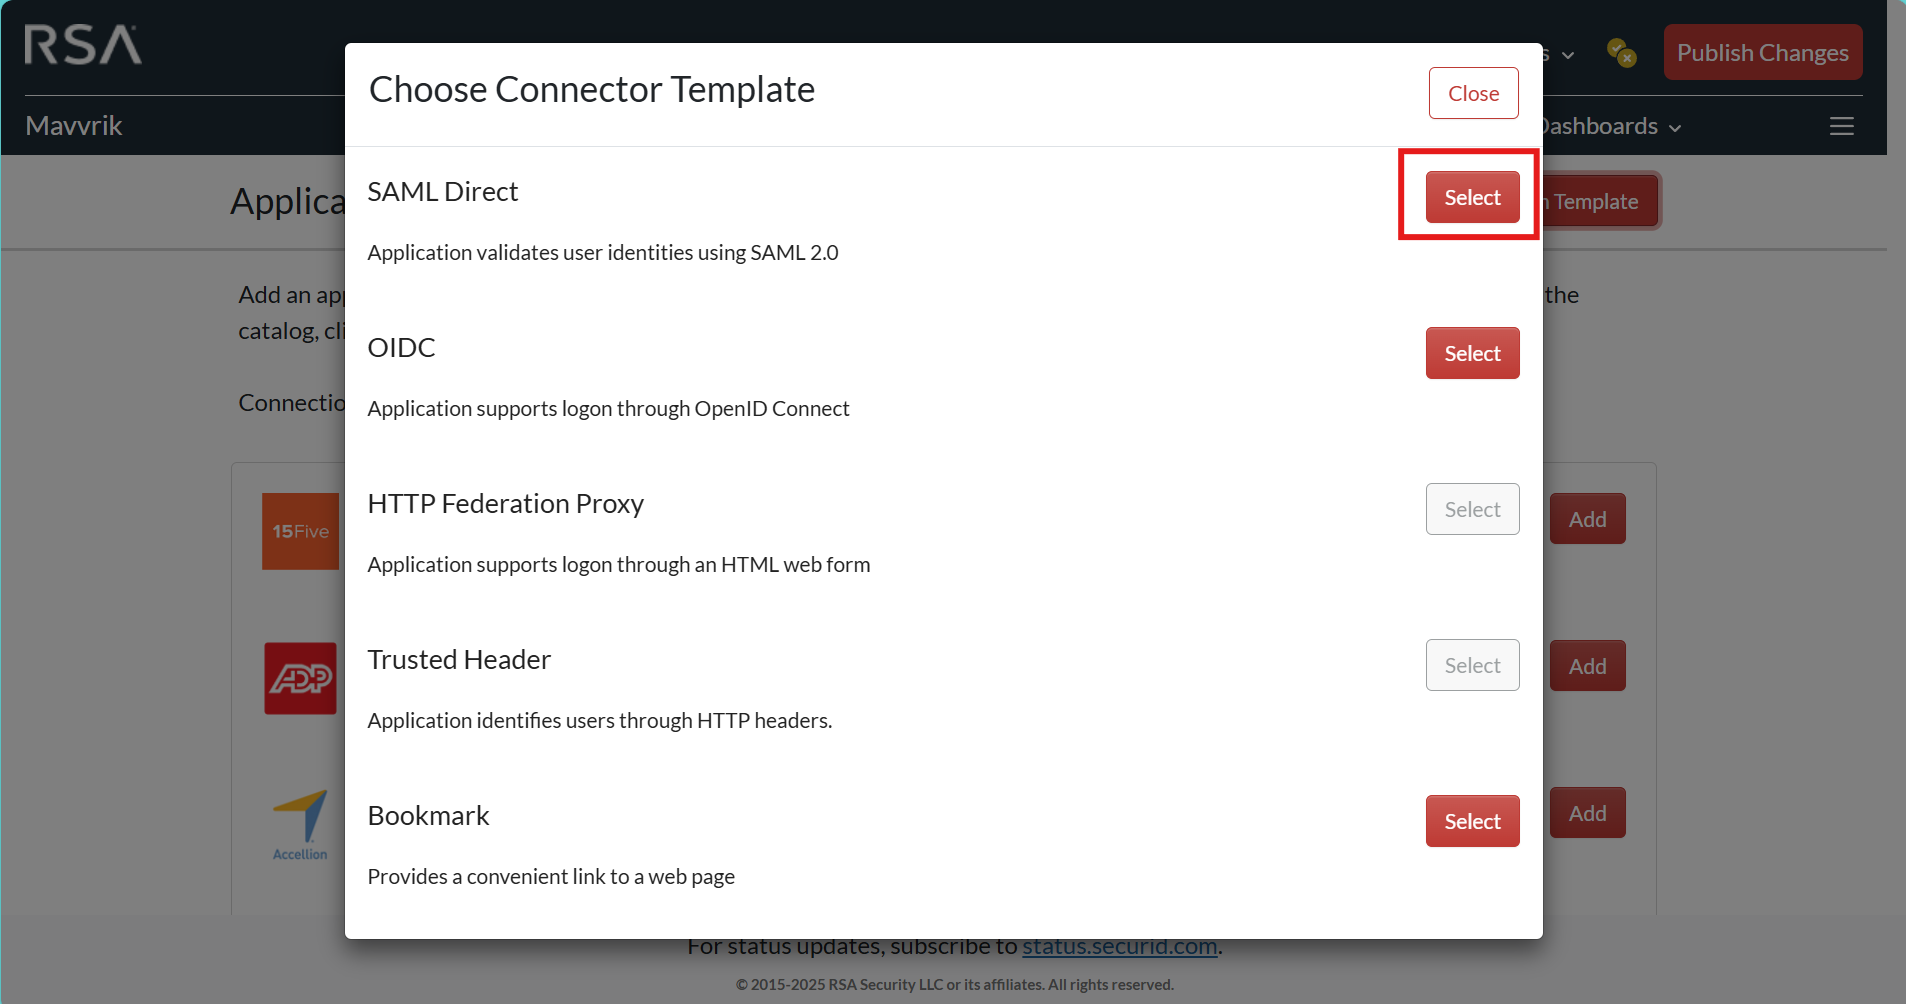
Click “Create from Template”
-
Click on Select
-
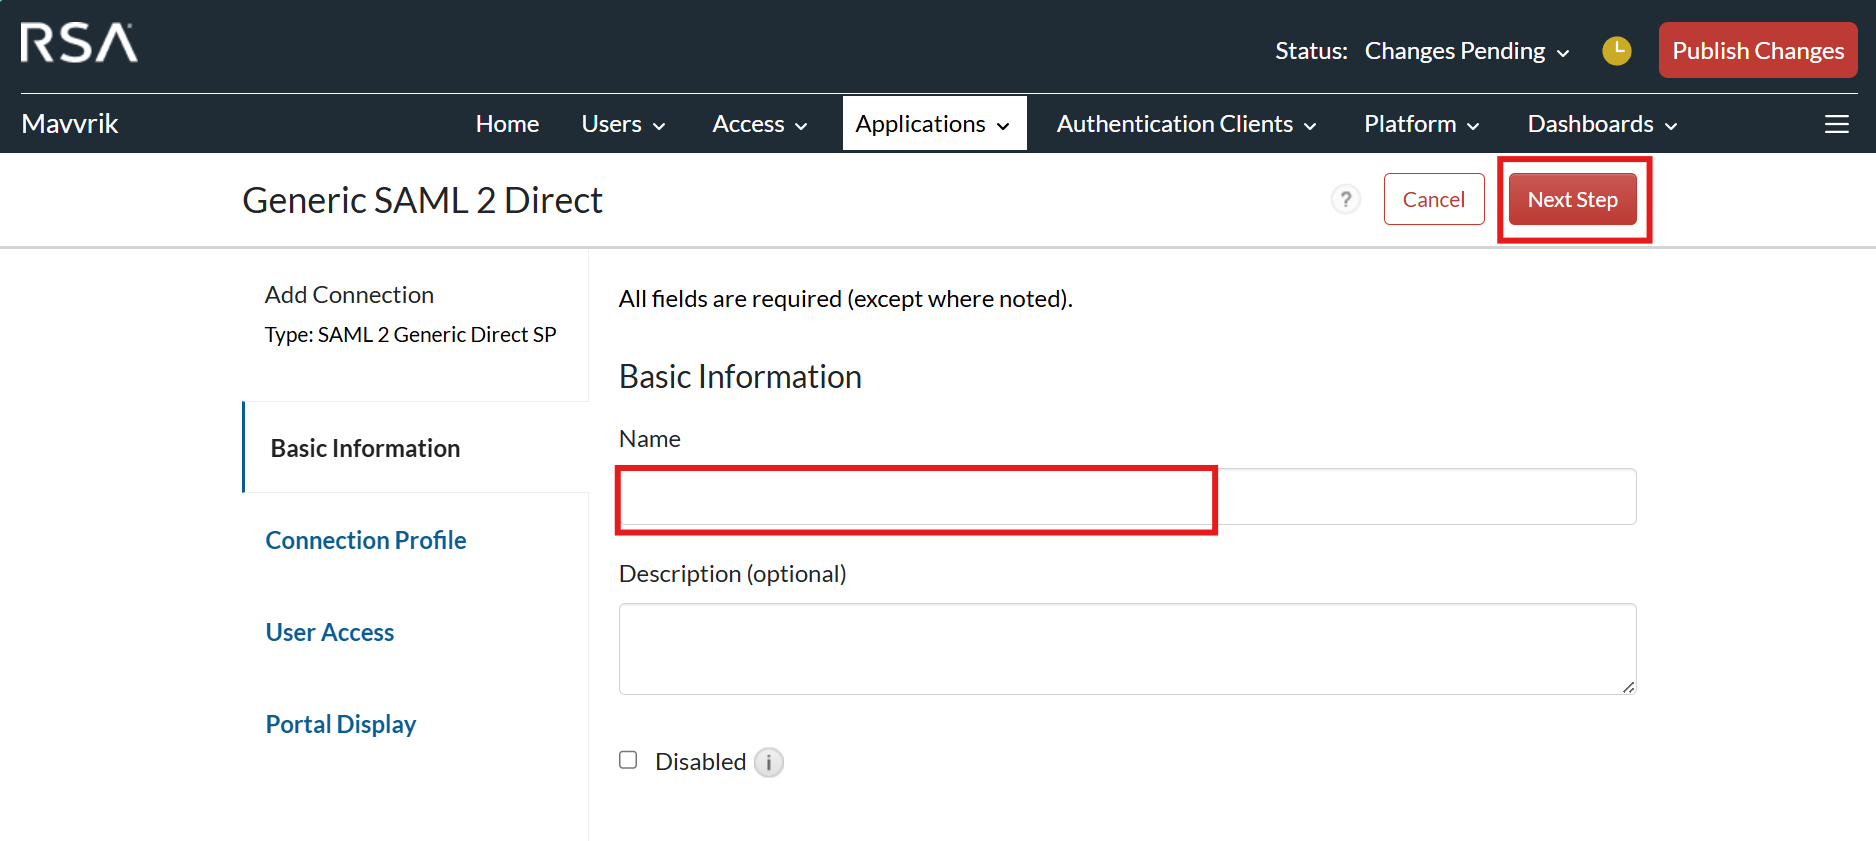
Enter Name
-
Click on Next Step
-
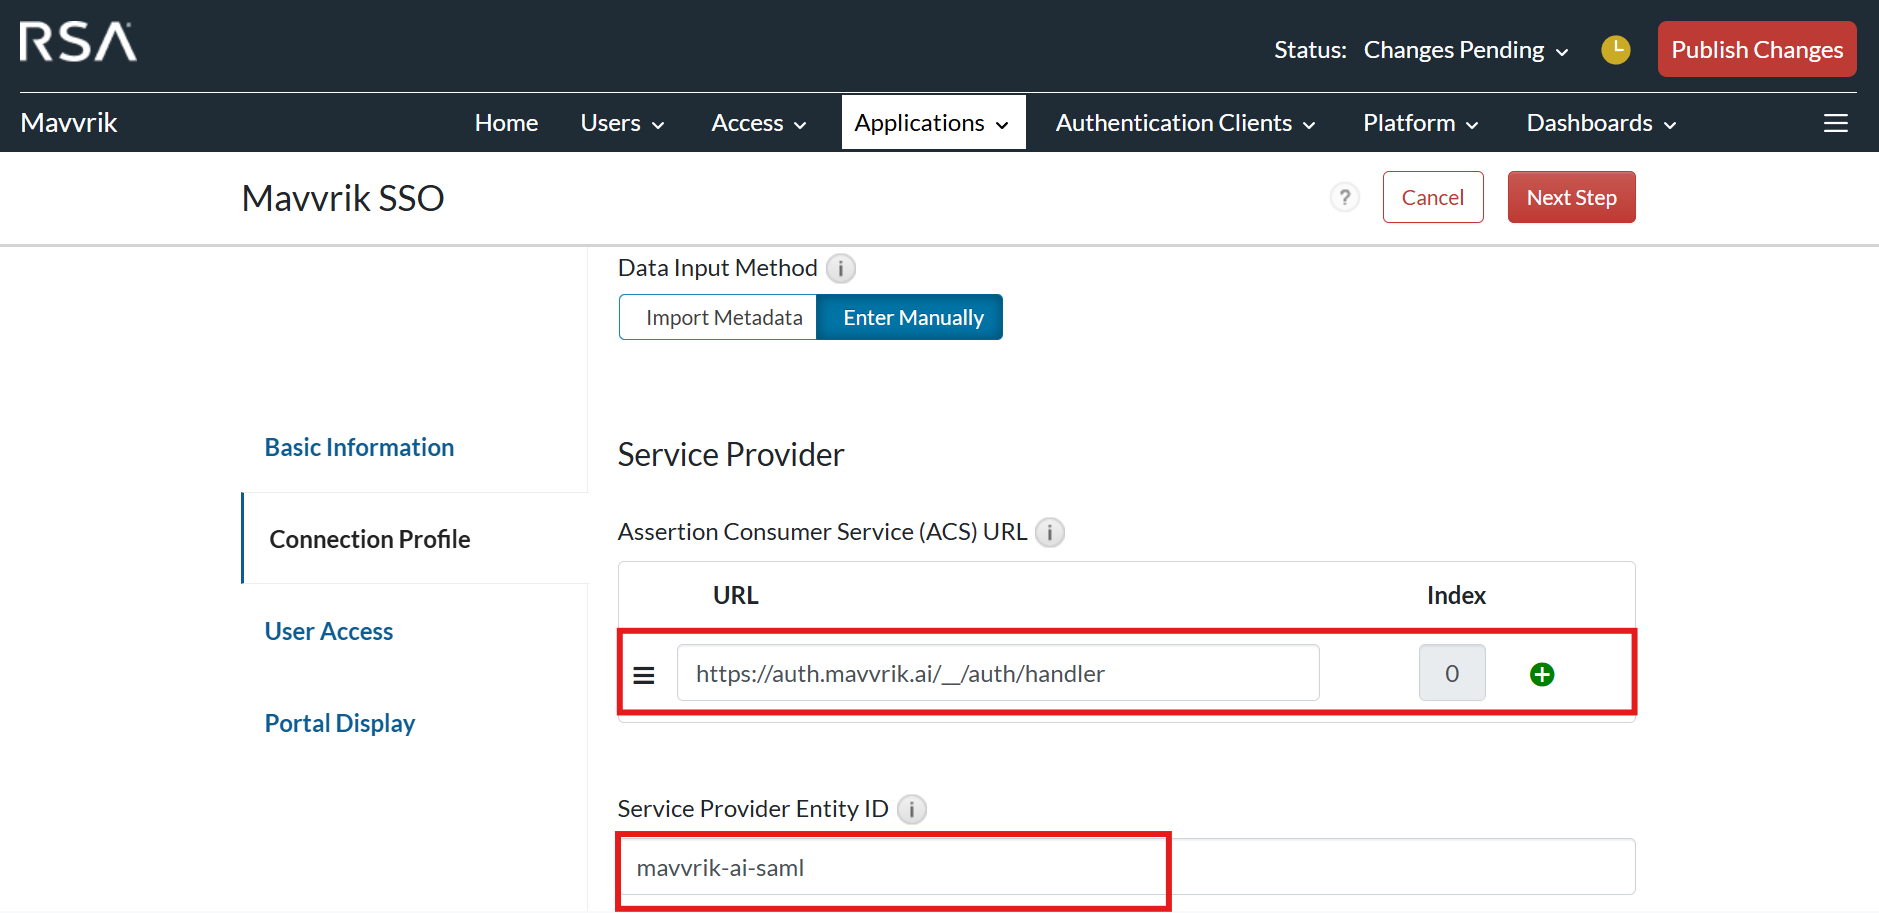
Enter Connection URL (Navigate to Mavvrik SSO page under Admin and copy the SP ACS URL)
-
Paste the same connection URL used in above step in Assertion Consumer Service (ACS)
-
Enter SP Entity ID (Navigate to Mavvrik SSO dashboard under Admin and copy the SP Entity ID)
-
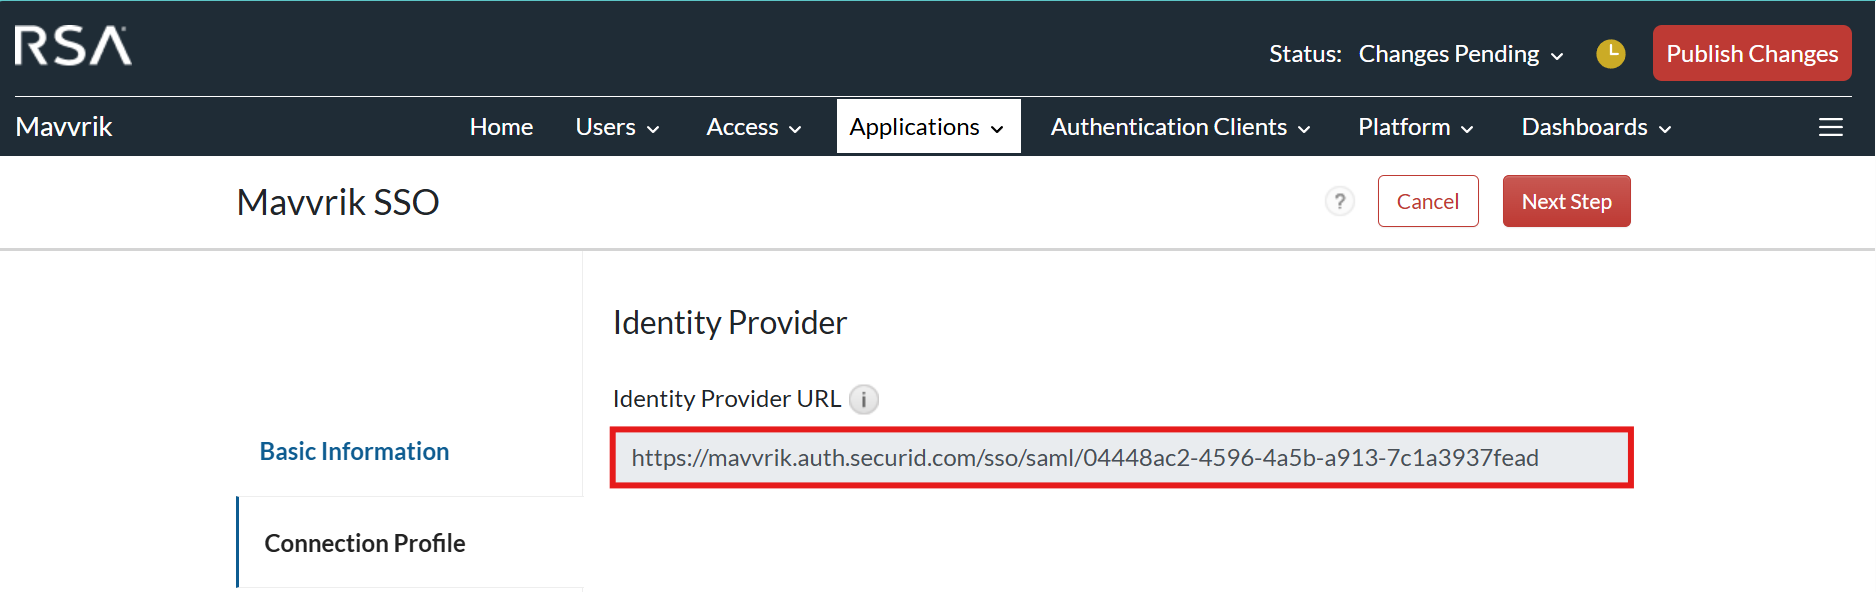
Copy this Identify Provider URL and paste it in IdP Entity ID and IdP SSO URL in mavvrik sso dashboard.
-
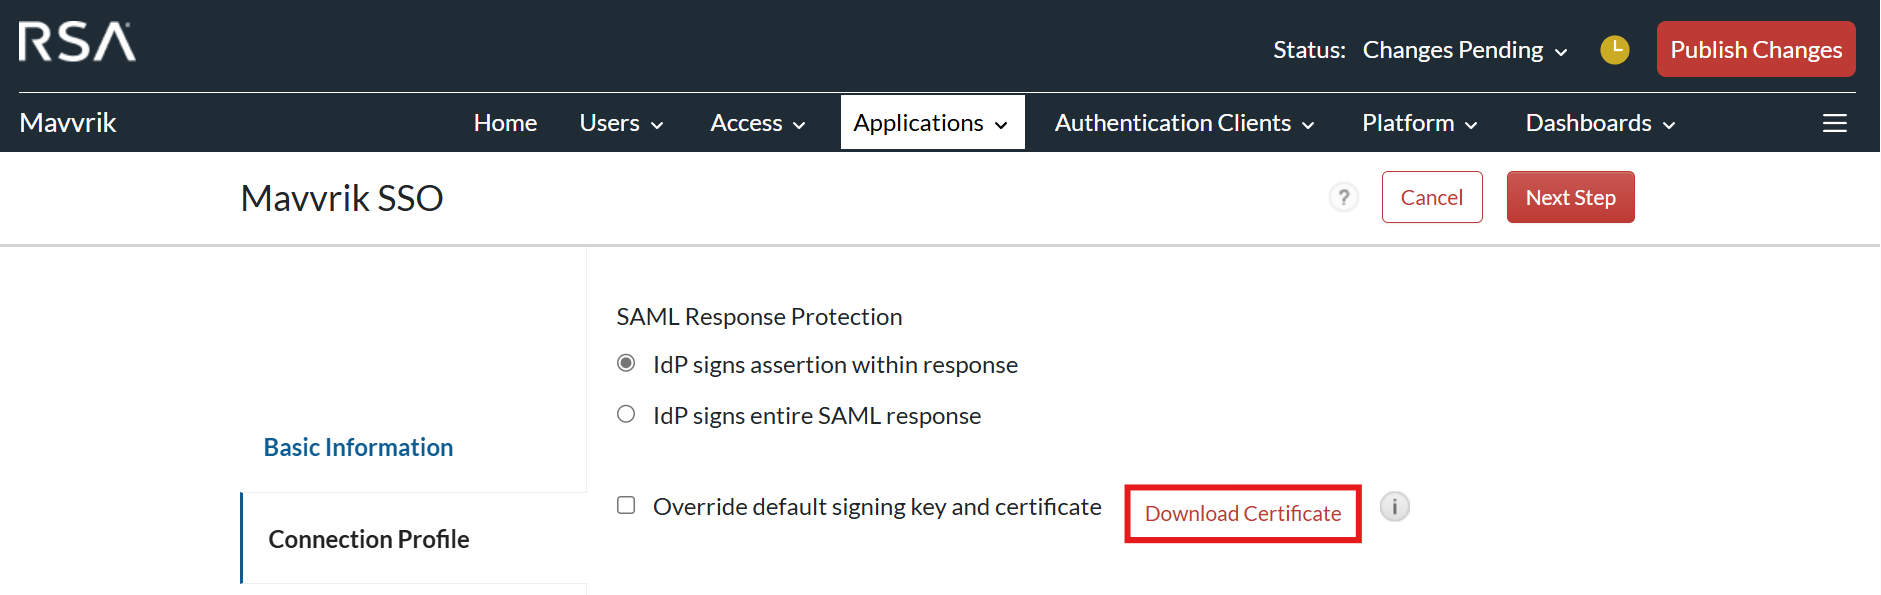
Click on Download certificate, open it and copy the certificate and paste it in IdP Certificate in mavvrik sso dashboard.
-
Click on Save in Mavvrik SSO
-
Go back to RSA secure id dashboard
-
Click on “Show Connection Profile Advanced Configuration”
-
Under User Identity select Identifier Type as “emailAddress”

-
Click on Next Step
-
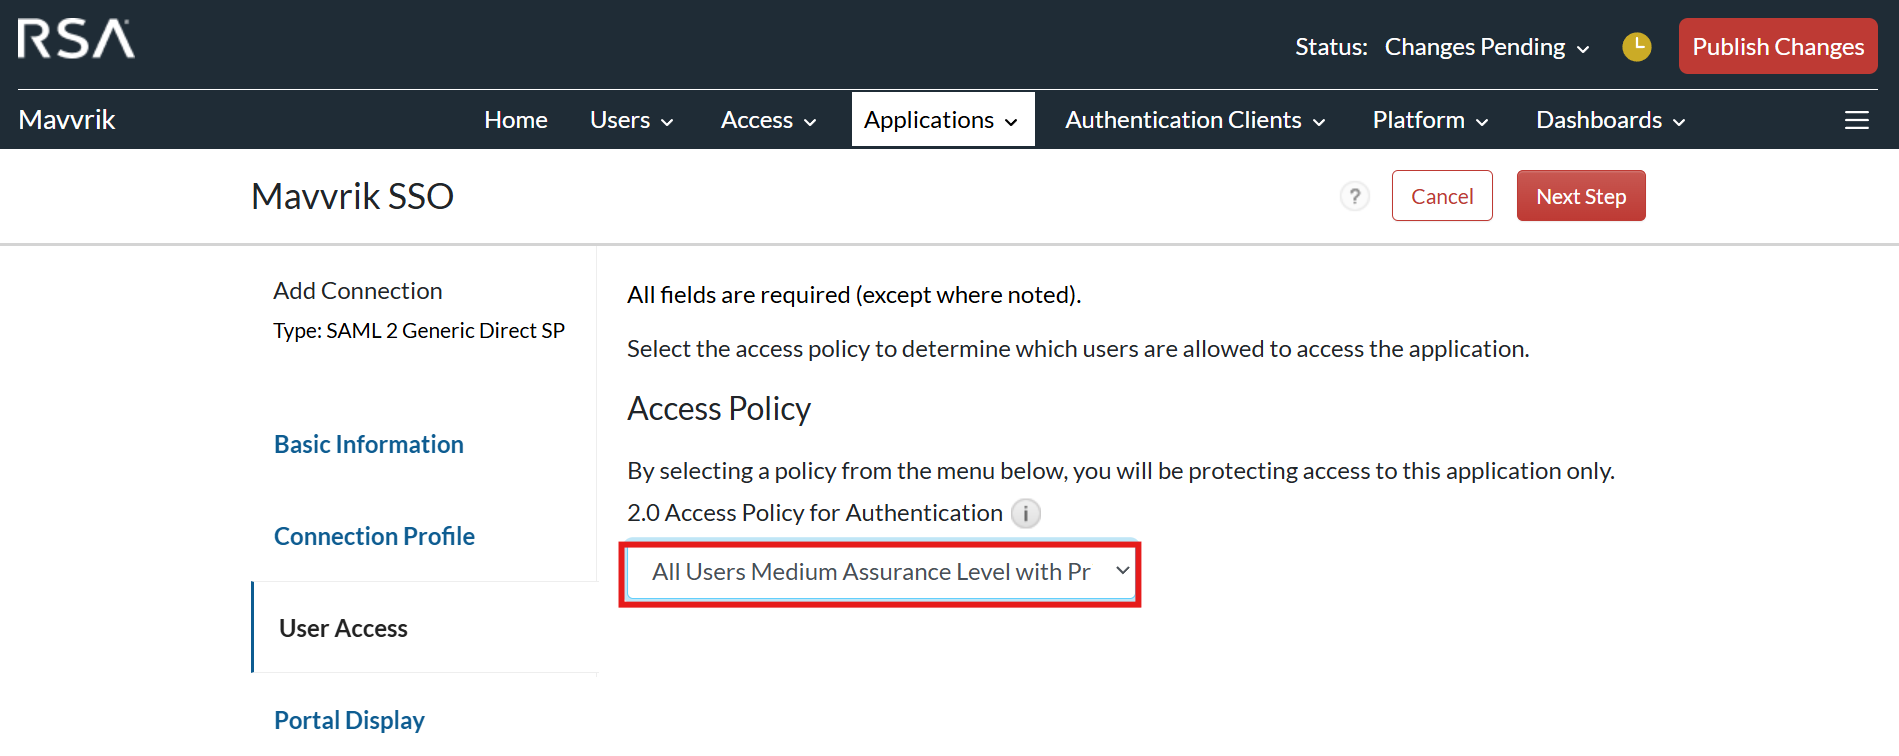
Based on subscription select “Access Policy”
-
Click on Next Step
-
Click on Save and Finish
-
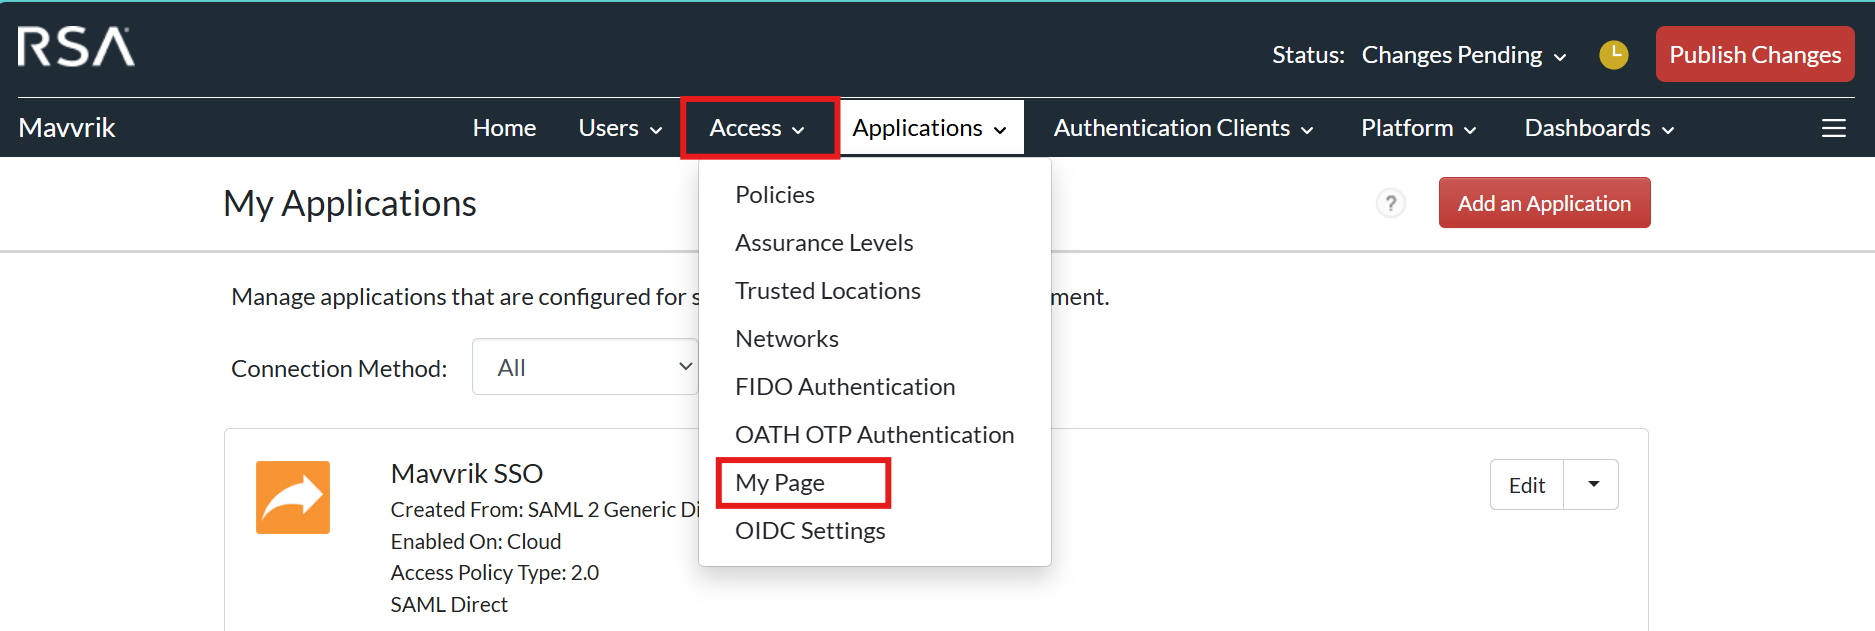
Click on Access
-
Click on My Page
-
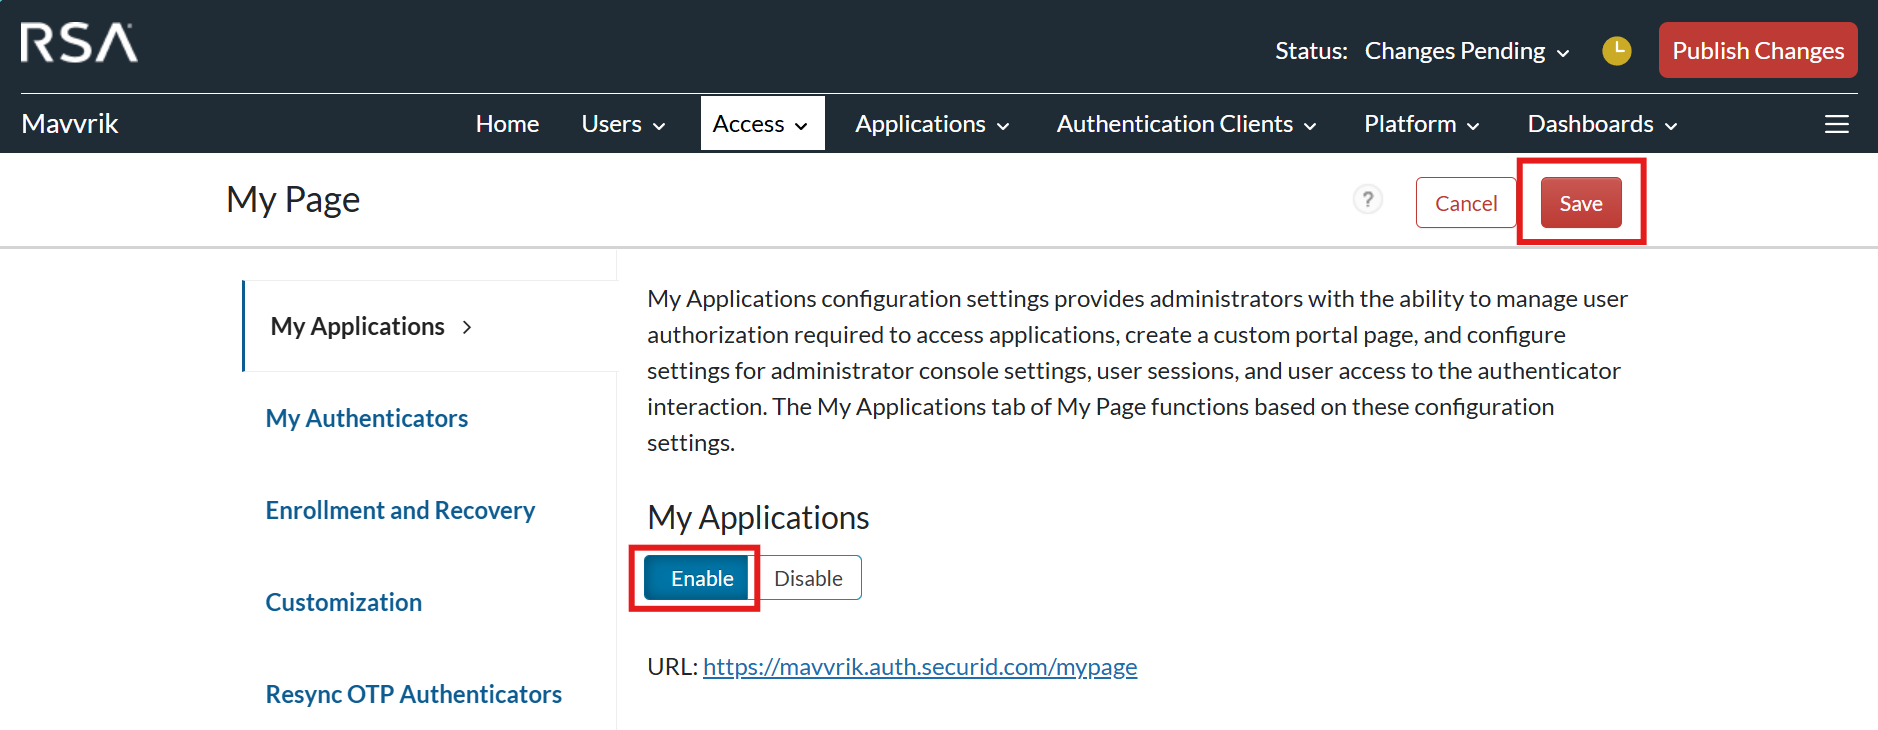
Click on My Applications Enable button
-
Click on Save
-
Click on Publish Changes at top right corner.
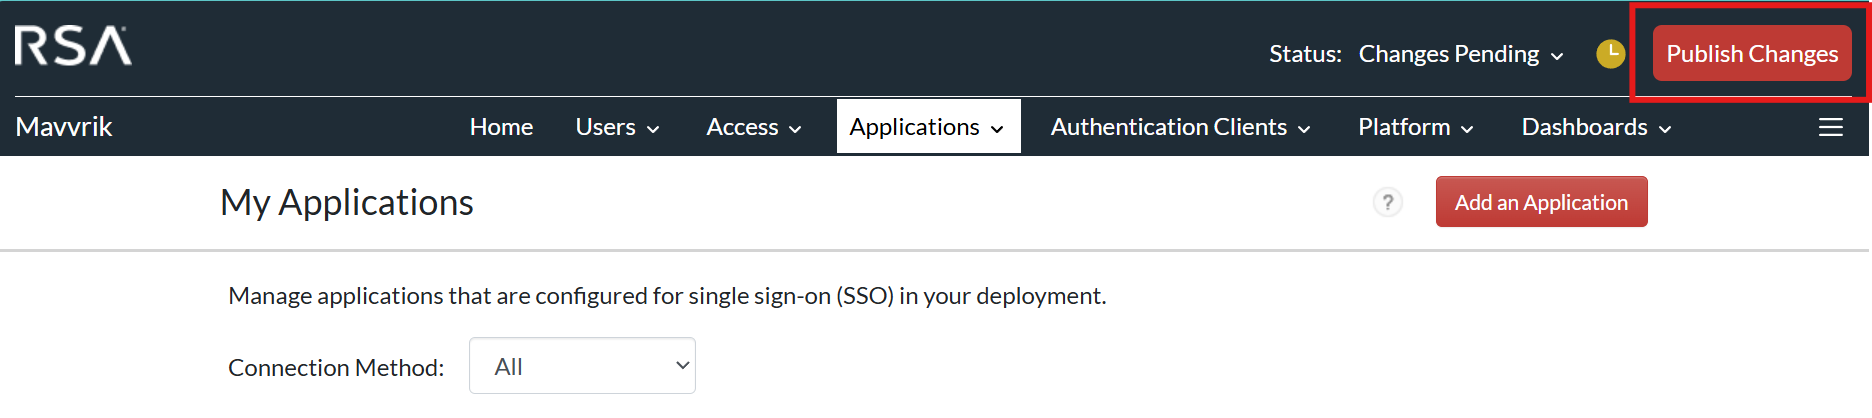
NOTE: After every change/edit application publish changes should be done to reflect the changes.