.png)
Root-level or business-level cost allocation involves distributing the total costs incurred by a company to its various departments, products, or services. This process ensures that each segment of the business accurately reflects its share of the overall expenses, leading to more precise financial analysis, budgeting, and pricing decisions
Steps to create cost allocation at the business/root level:
-
Login with user roles as Owner/Editor
-
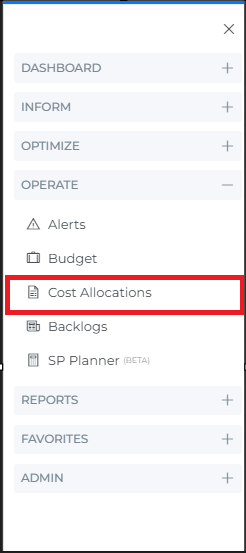
Click on menu
-
Click on Cost Allocations
-
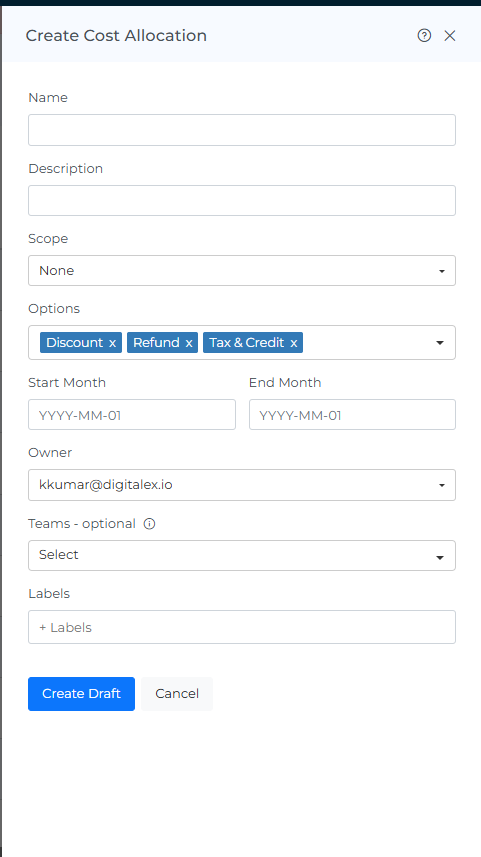
Click on +Cost Allocation
-
Enter name & description
-
Select scope like none/perspective/custom
-
None: If you select none you need to add cost allocations & shared cost manually
-
Perspective: If you select a perspective, you need to choose the data source option, and based on your selection, the perspective will be displayed automatically
-
Custom: If you select custom, then you can choose the filter of your choice
-
-
Select the cost options you want to apply i.e. Refund, Tax & credits, Discount, or Amortized
-
Enter the start date and end date i.e. from which month you want to start the cost allocation and until which month you want to see the allocation
-
Select the owner of the cost allocation
-
Select teams i.e., to which team you want to allocate the cost allocation note: teams are optional
-
If you wish to add any labels to allocation, you can add them in the labels column
-
Click on create draft
-
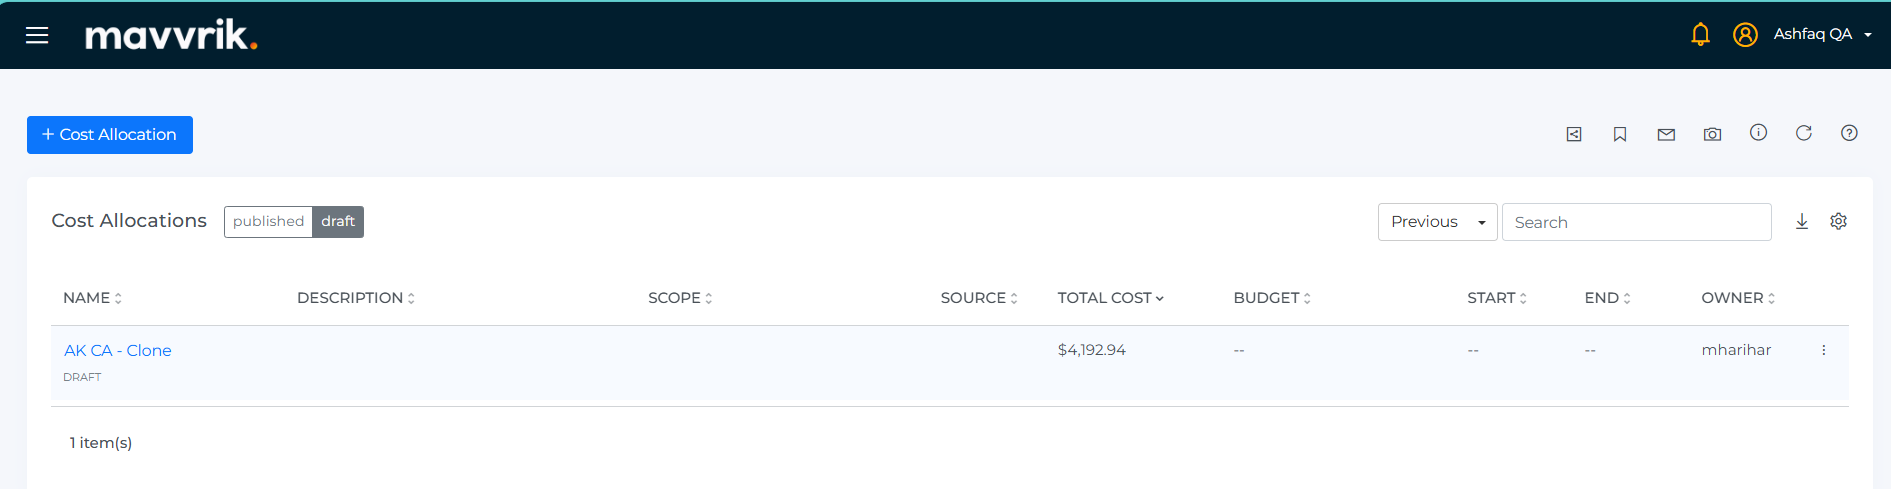
Cost Allocation is created and displayed under draft mode as shown below
Save as Draft
Cost Allocations feature in Mavvrik has “Save as Draft” capability—giving you full control over when and how your cost allocations are finalized.
1. Save as Draft
-
While creating cost allocation, you have the option to Save as Draft before publishing.
-
This lets you:
-
Work on your cost allocation gradually.
-
Save your progress without making it active.
-
Review your configuration before publishing it for reporting or budgeting use.
-
2. Draft Status Indicators
-
Draft cost allocations are clearly marked with a “Draft” label below their name in the dashboard grid.
-
A Draft icon also appears next to these cost allocations.
-
Clicking this icon allows you to publish the draft once you’re ready.
Editable Fields in Draft Mode (Advanced Rules)
When a Cost Allocation is saved as Draft, you can edit most fields—but some exceptions apply based on the type of segment or shared cost involved.
Use the table below to understand which fields can be edited in Draft mode:
|
Type |
Scope |
Source |
Filter |
|---|---|---|---|
|
Shared Cost |
Allowed (any-to-any) |
Allowed (any-to-any) |
Allowed (any-to-any) |
|
Inherited Shared Cost |
Not Allowed (always 'Inherit') |
Not Allowed (fixed) |
Not Allowed (fixed) |
|
Leaf Auto-Discovered Segment
|
Not Allowed (always 'Custom') |
Not Allowed |
Not Allowed |
|
Leaf Root/Segment
|
Allowed (any-to-any) |
Allowed (any-to-any) |
Allowed (any-to-any) |
|
Non-Leaf Root/Segment
|
Allowed |
Allowed |
Allowed |
Clone Cost Allocation
To help you save time and streamline your cost allocation setup, Mavvrik now allows you to clone an existing Cost Allocation. This feature enables you to duplicate the full structure—segments, shared costs, and settings—so you can easily create similar models without starting from scratch.
How It Works:
-
From the Cost Allocations page, locate the cost allocation you want to duplicate.
-
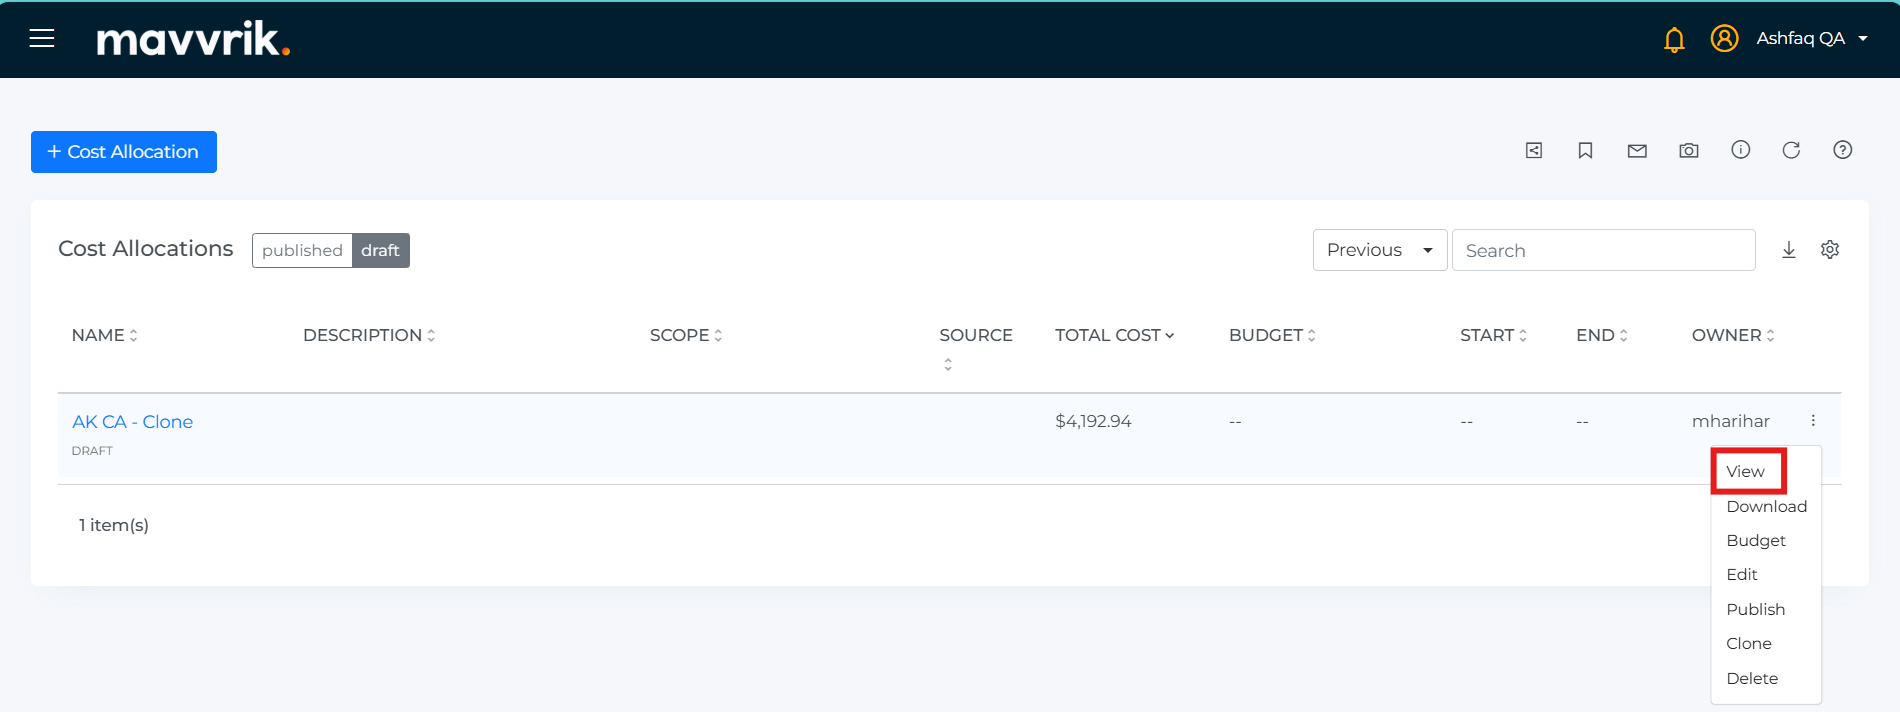
Click the Clone icon
-
A complete copy of the cost allocation will be created.
-
The cloned version will automatically be saved in Draft mode, allowing you to:
-
Adjust segments or shared costs.
-
Modify details before publishing.
-
Review settings before making the cost allocation active.
-
Key Behavior:
-
The cloned cost allocation includes all segments, shared costs, and configurations from the original.
-
You can rename the cloned cost allocation to avoid confusion.
-
All standard draft editing rules apply to the cloned version.
-
Once you’re ready, you can publish the cloned cost allocation like any other.
Expired Cost Allocation
Cost Allocations feature in Mavvrik has “Expired” capability—giving you full control to edit the expired cost allocations and reuse them if required by changing the allocation dates.
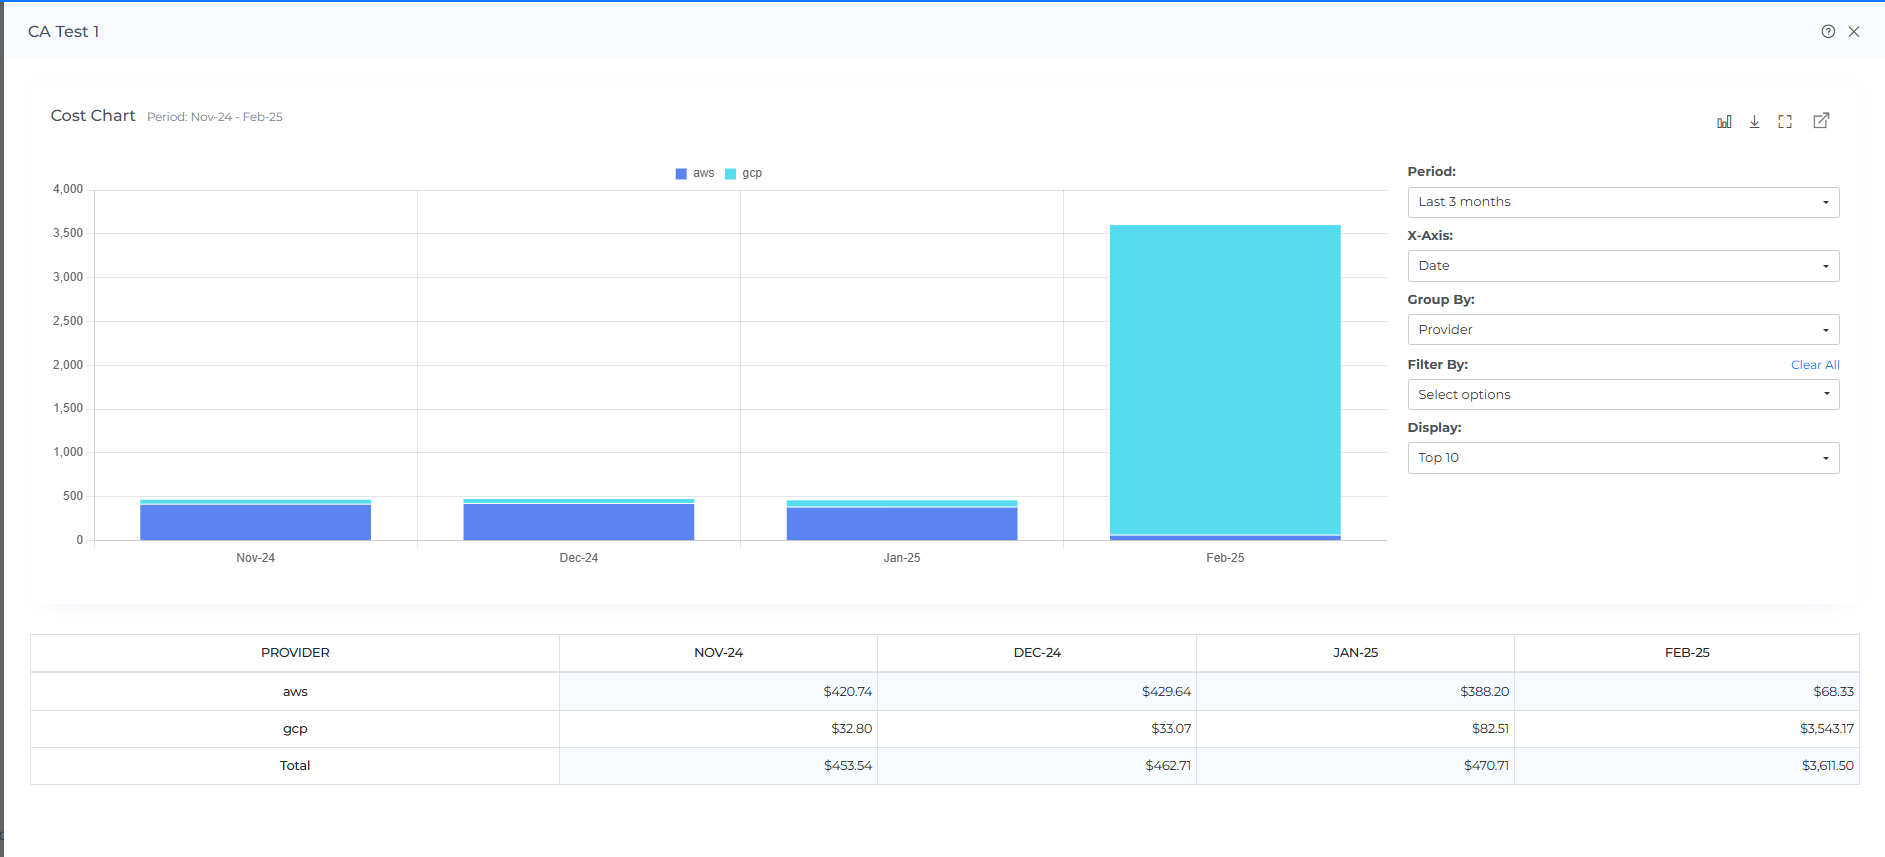
Steps to preview cost allocation business:
-
Click on view option
-
Preview will be displayed as shown below.
-
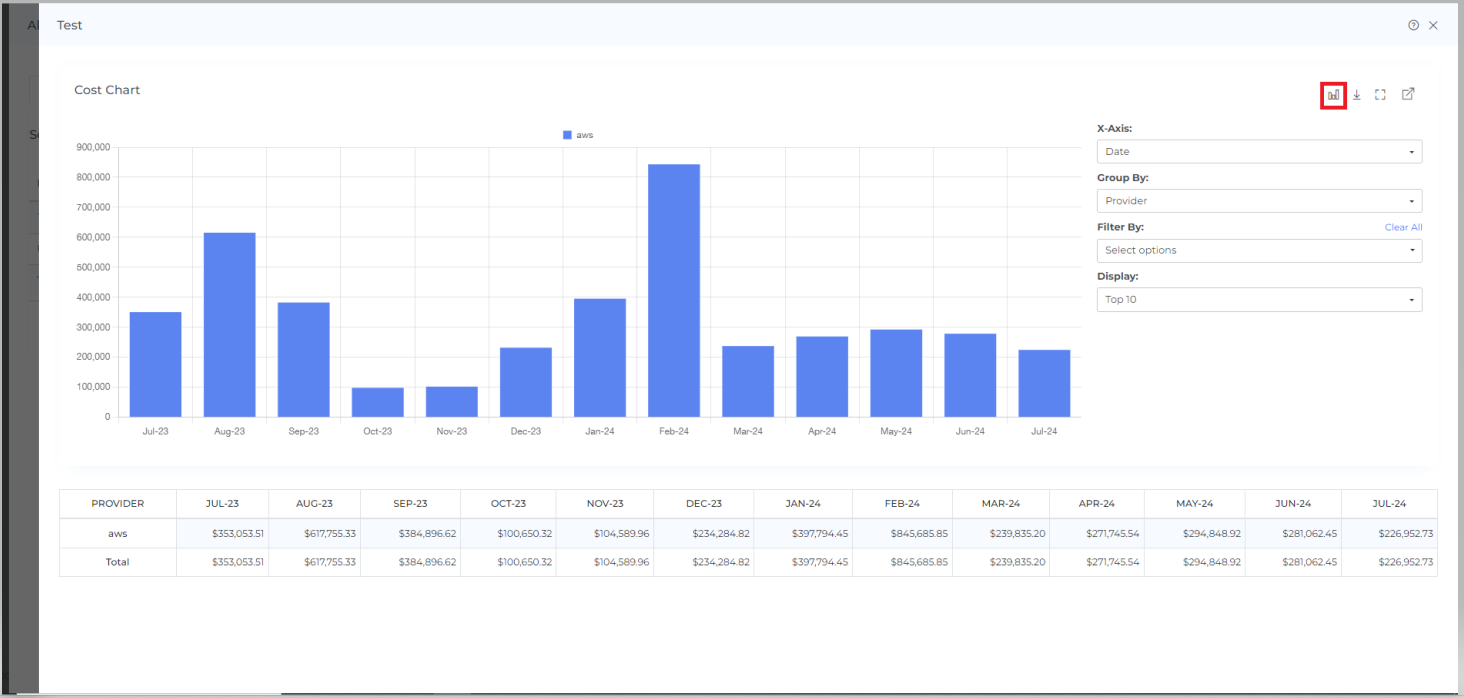
You can change the chart type by clicking on the chart type icon
-
You can download the chart data by clicking on the download icon

-
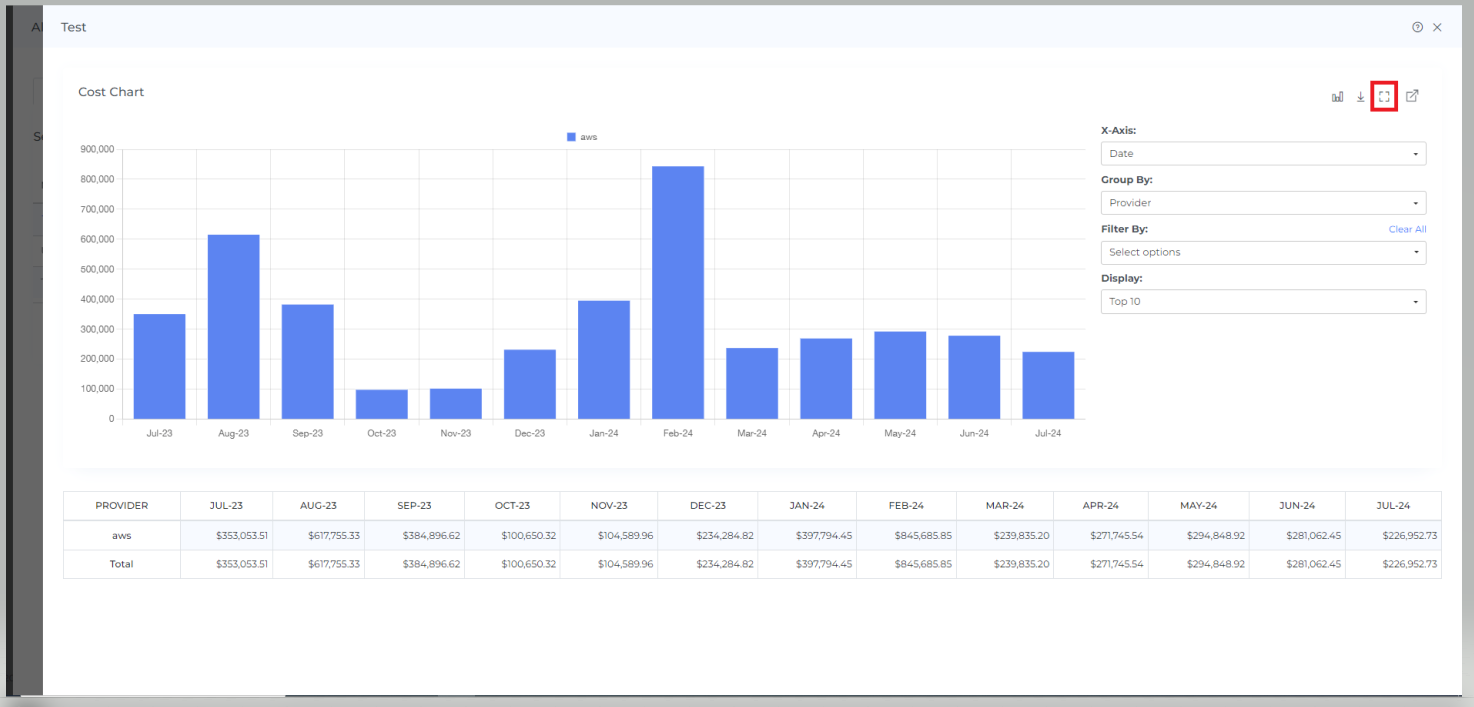
If you want to see the charts in full screen then you can do it by clicking on the full-chart view icon
-
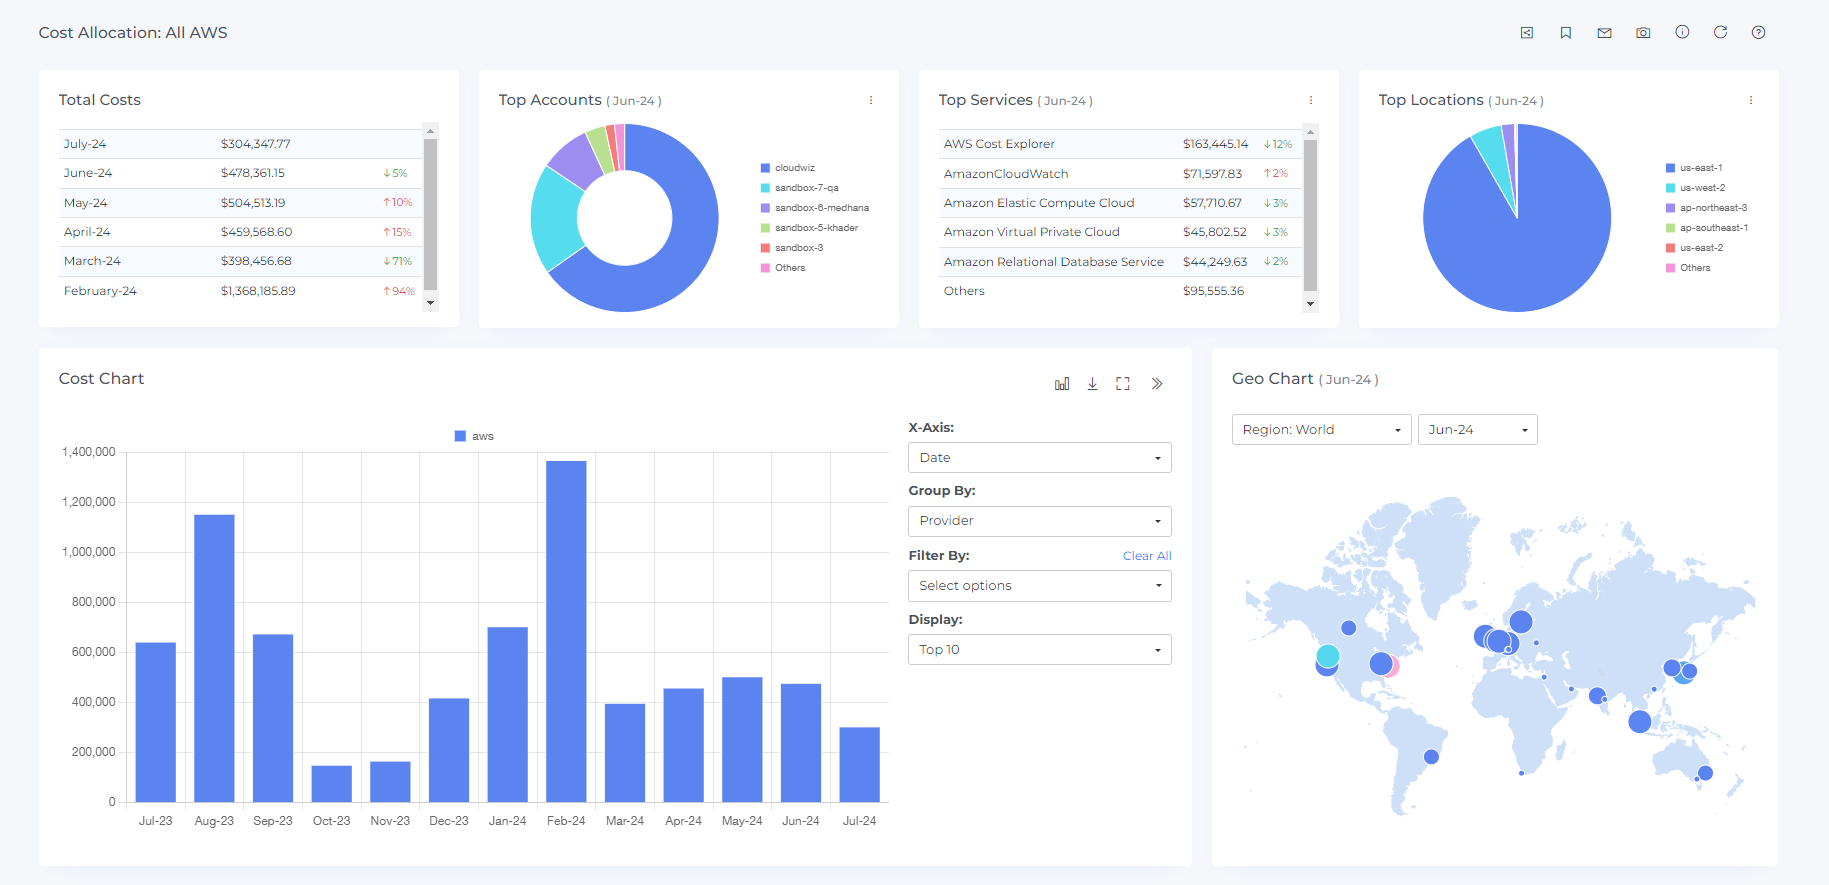
To view in a separate dashboard, click on the view icon at the last

-
After Clicking the view icon you will see the cost allocation dashboard as shown below
Steps to download segments:
-
Click on the download option

-
On clicking the Download icon the details of the segments will be downloaded in a CSV file
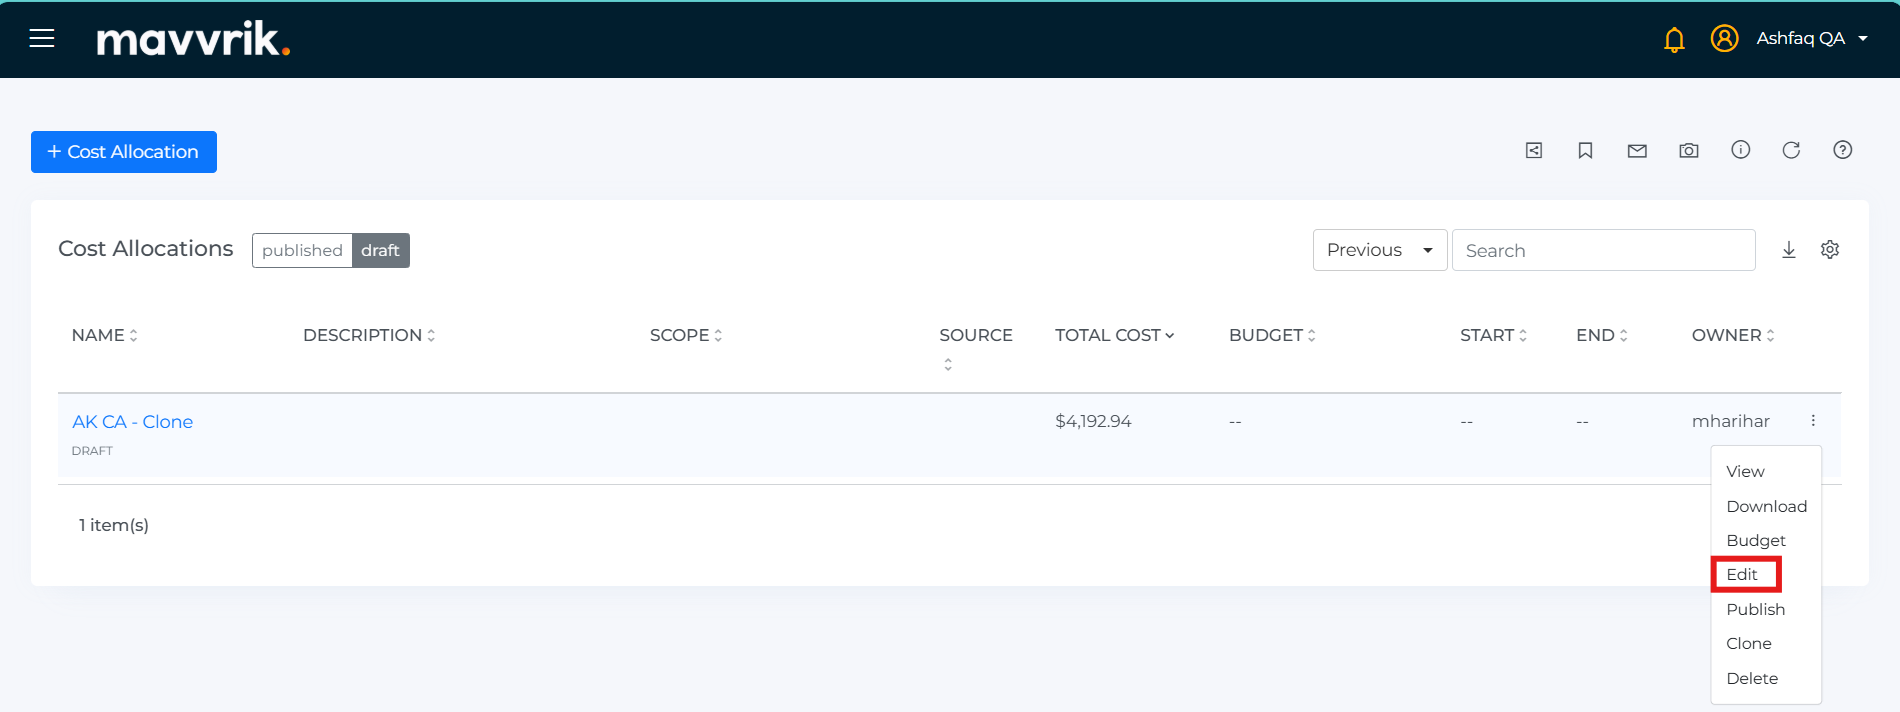
Steps to edit cost allocation:
You can only edit the name, description, owner and teams for the existing cost allocations which are published
-
Click on the edit option
-
On clicking the edit option, you will see the below view
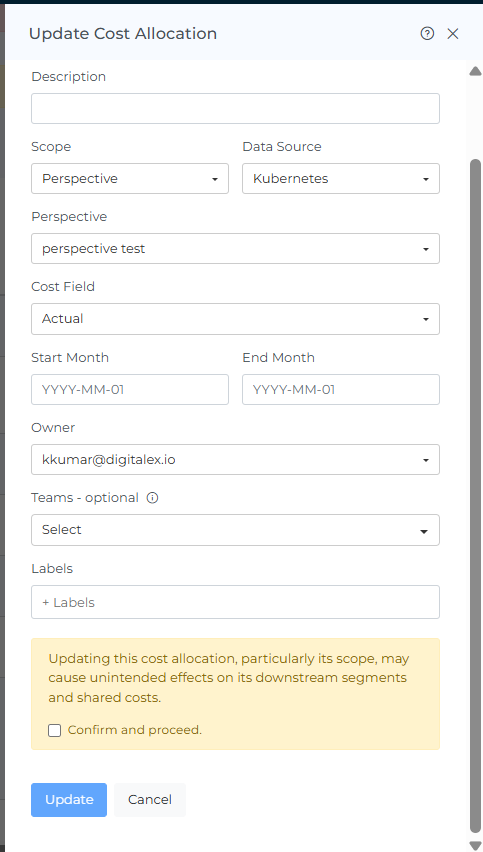
-
Edit the fields you wish and click on update
Updating the cost allocation, particularly its scope, may cause unintended effects on its downstream segments and shared costs.
Steps to delete cost allocation:
-
Click on the delete option
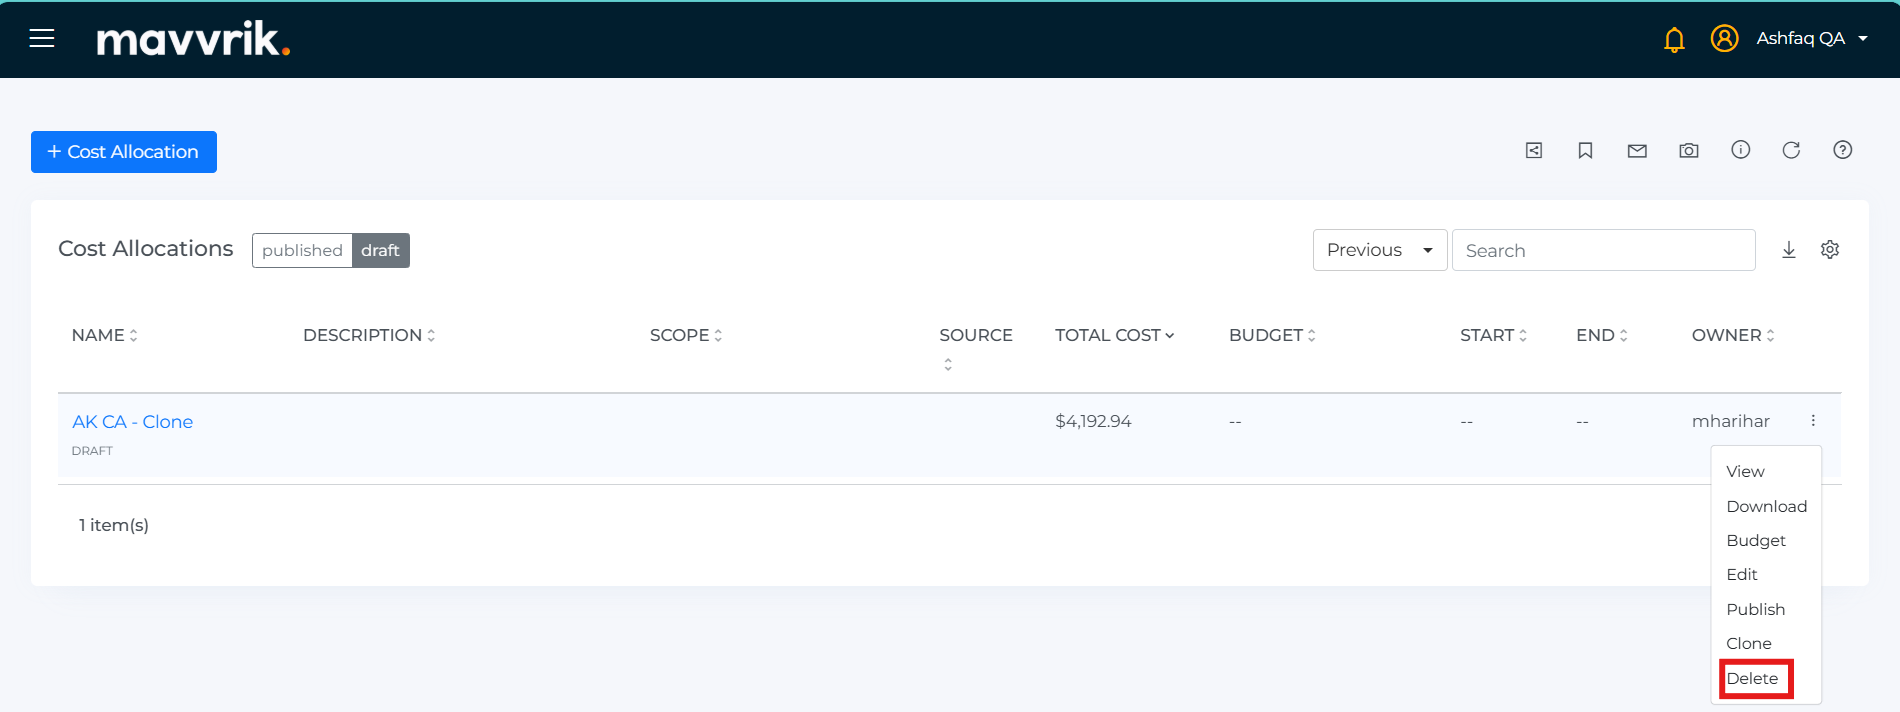
-
On clicking delete option, you will see the delete confirmation box
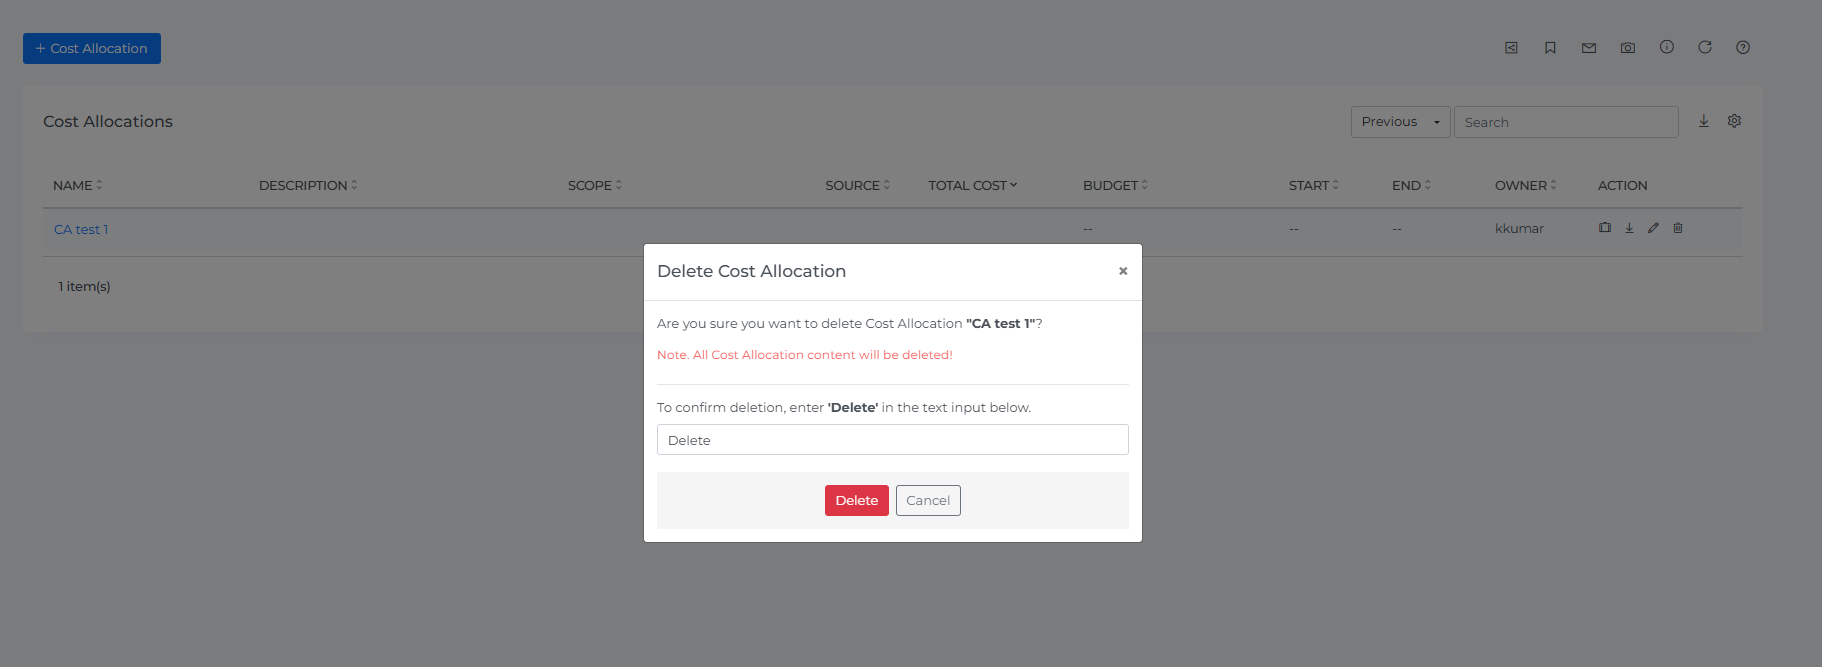
-
On the popup type delete
-
On Clicking the delete icon the cost allocation will be deleted
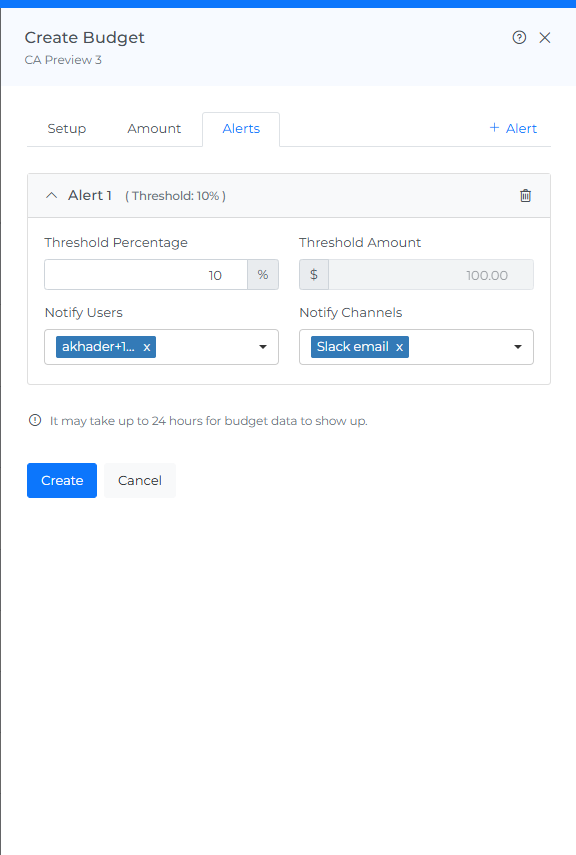
Steps to create budget for cost allocation:
-
Click on budget option
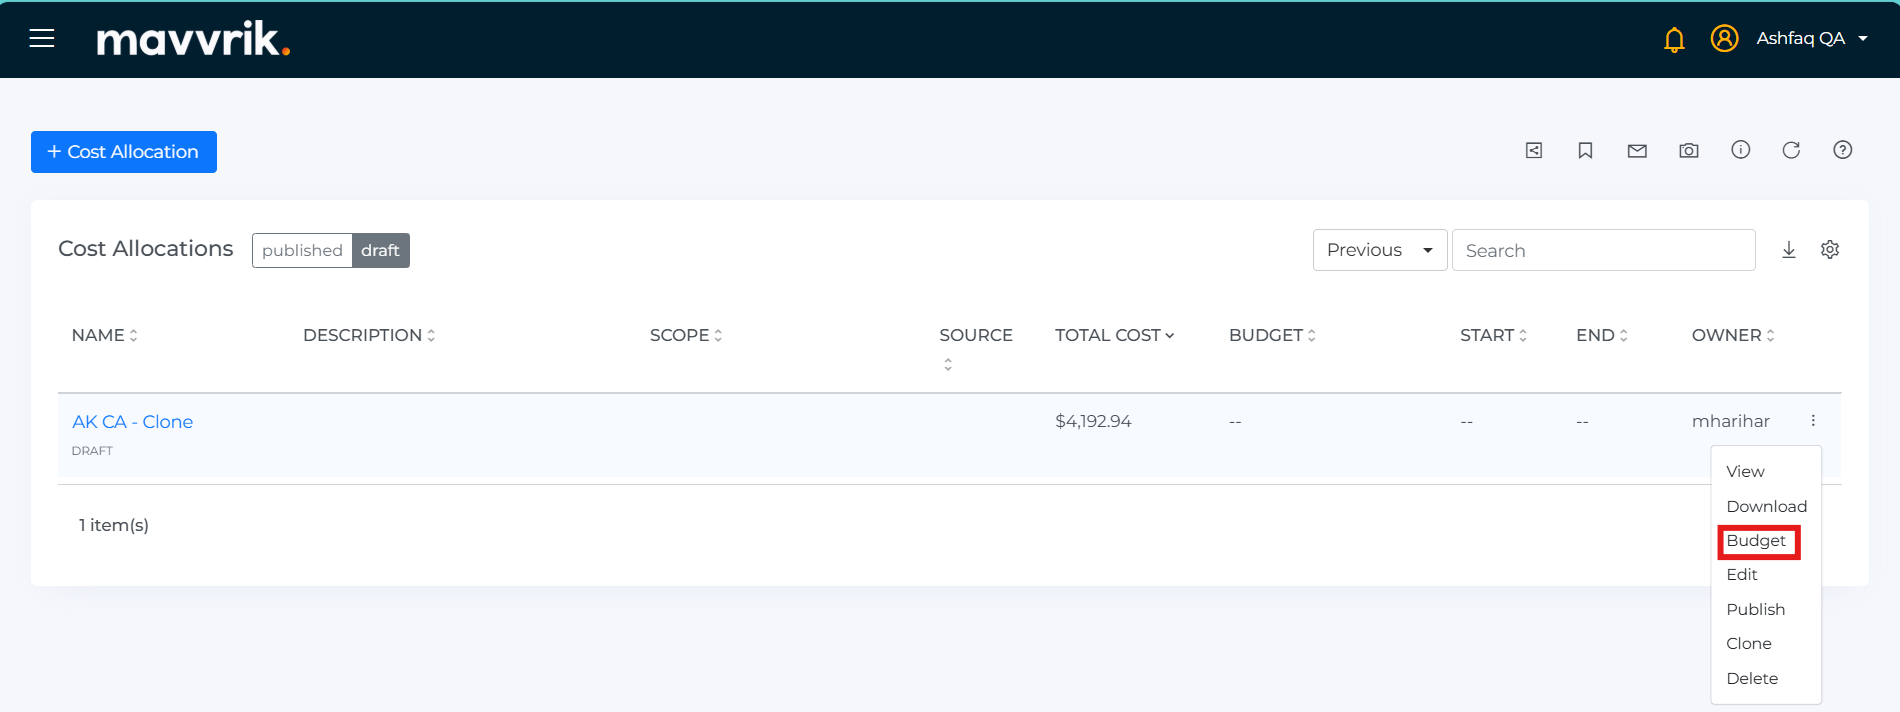
-
On clicking budget option, you will see the Create budget
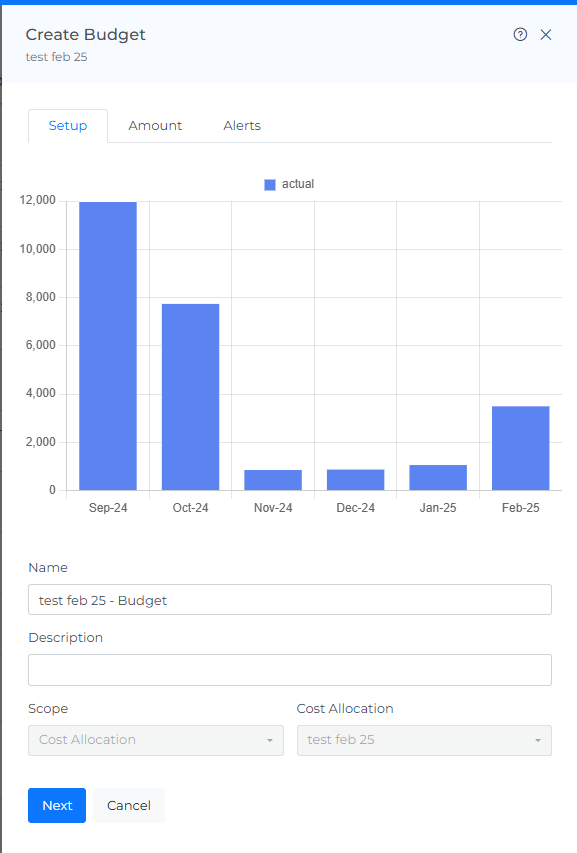
-
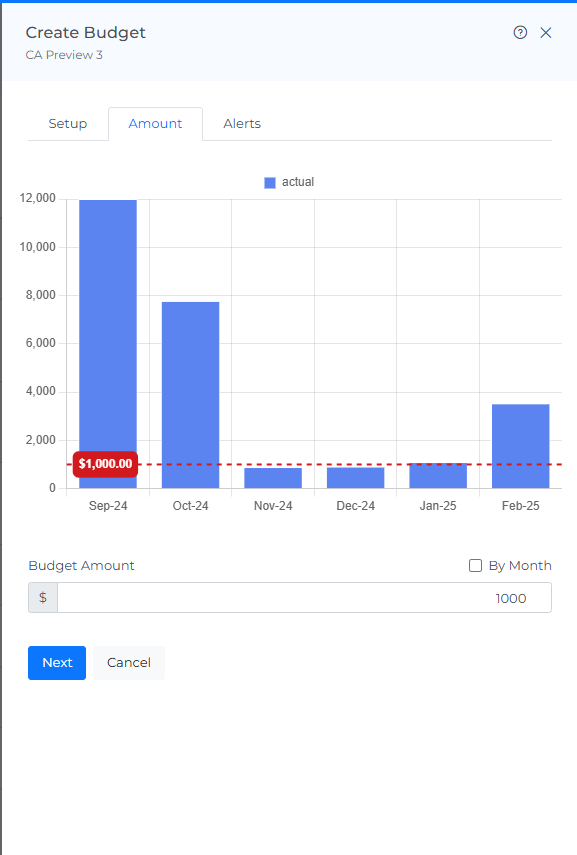
Enter the budget Amount
-
You can enter all months
-
You can enter by month also
-
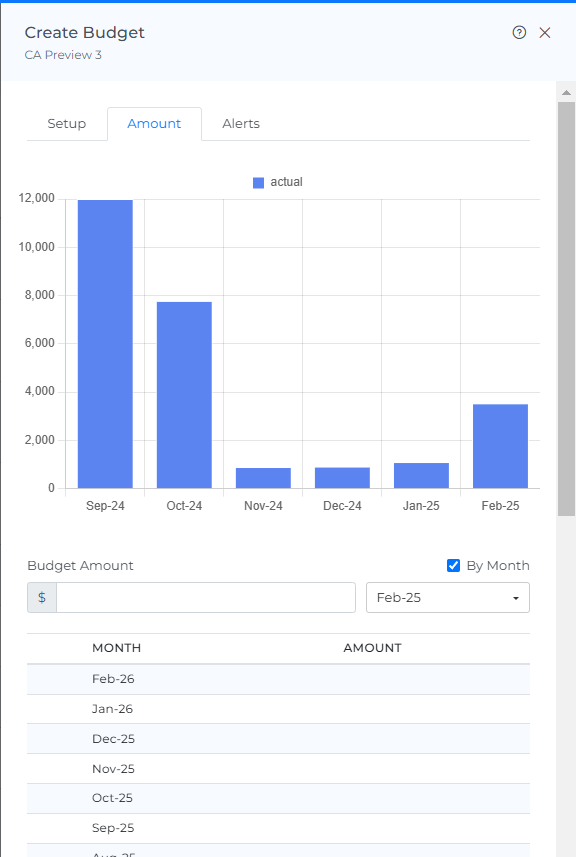
-
Select the user to get the default alert when a 100% budget threshold is reached.
-
Select the channels to receive a default alert when a 100% budget threshold is reached.
-
Click on Create
-
Your budget will be created and you will see it on budget page also
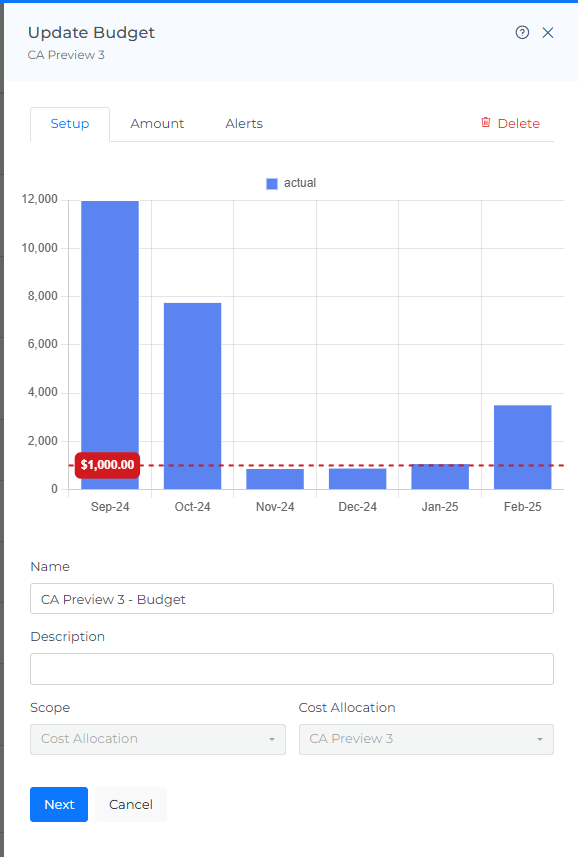
Steps to edit budget cost allocation:
-
Click on budget icon

-
On clicking budget icon you will see the update budget
-
Enter the budget Amount
-
You can enter all months
-
You can enter by month also
-


-
Select the user to get the default alert when a 100% budget threshold is reached.
-
Select the channels to receive a default alert when a 100% budget threshold is reached.

-
Click on Create
-
Your budget will be created and you can view or manage it on budget page too.